It allows to keep PV going, with more focus towards AI, but keeping be one of the few truly independent places.
-
-
Sorry to hear the bad news Shian.
Hope you can get over the loss quickly. I'm sure everybody here will understand if you need to take some time out.
Take care.
-
Go to your preferences - Make sure that multi-core rendering is on, check the "render multiple frames simultaneously" checkbox, try allocating more memory to AFX, and fewer to everything else, make sure nothing else is running. I always restart before a render to clear out the virtual memory. And the estimates aren't always correct, AFX estimates by how long it takes to render the first few frames. Film Grain and GHrain Killer will boost render times dramatically if not applied as set. (tweeking the settings, risks adding increased render times)
I only use GHrain Killer when absolutely necessary, reports from other users indicates that NeatVideo will sometimes double render times over GHrain Killer.
-
@stonebat - I'm having the same problem. I have a technical grade in Color Finesse, several (4 to 5) gears stacked with a film grain layer over it all. Some clips have Neat Video and some have text. Pushing 11 hours to render 2 or so minutes of 720p footage on a 2009 MacBook Pro with 4gb of RAM @shian - Is this normal or am I missing something?
-
@MarkV What order do you suggest ? I think the spectral enhancer moved up for some reason...
Is this right then...?
 Screen shot 2012-01-23 at 2.27.59 PM.png1440 x 900 - 685K
 -
@No_SuRReNDeR: I´m no pro here, but I think you should check your gears order, right @shian ? :-)
-
OK so here is how I have it now...youre right-well of course you are but.... workflow is much smoother now. (Think I need pull the grain kill down quite a bit... reduced in image 3)
 Screen shot 2012-01-23 at 1.52.45 PM.png1440 x 900 - 687K
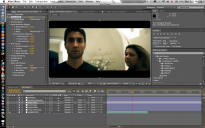 Screen shot 2012-01-23 at 1.53.50 PM.png1440 x 900 - 681K
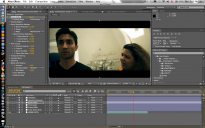 Screen shot 2012-01-23 at 2.00.57 PM.png1440 x 900 - 728K
 -
Sounds like he was a good man. Rest in peace.
-
Aw, man I'm totally bummed. My mentor, the man that recruited me to come to Hollywood, John Lowry has passed. I owe him so much. When I worked for his company, I learned nearly everything I know about cinematic image processing and grading. He was the sweetest man, the kindest employer, a true life coach - he wanted all his employees to go on to accomplish great things whether it was with the company, or on their own.
-
Rendering 75 seconds original MTS file with 4 stylish layers, a couple of technical layers, and text animations took 2 hours in my 2010 macbook pro with 8GB RAM. Yeap I turned off the displaying option.
If the source file is transcoded by 5DtoRGB, will it render faster?
-
@No_SuRReNDeR basically, watch the mixer tut, and working with Sequences, and there will be an addendum to working with sequences up soon to help those coming from FCP and are used to copy and paste attributes. (u don't in AFX) but there's a way to accomplish the same thing.
-
@sam_strickland Yeah, Stu is really good at confusing people, and making things too complicated. Like Stu, I too have worked in the VFX compositing world, the major difference is, when Stu finishes his work it all gets rendered out, and off-loaded to a LOG DPX sequence, and those drives get couriered to us, and we (or one of the other 3 majors) finish them off. We ALWAYS begin in LOG, and export our final DI in log - linear is an afterthought - we know that for video (tape, DVD, Bluray), it will have to be converted to linear, so of course we do send a version to QC with a linear conversion, but we never work in it. Linear conversion will bake in certain things we don't want in our workflow.
Linear is an INTERPRETATION of your image, but it is NOT your image. LOG is the only color space that can show you the maximum amount of data in your image short of bouncing around through all the LUTs. Linear will hide, mask, and distort your image. Work in linear at your peril.
Stu is trying to help, and I get what he is saying. What Stu is trying to save people from is that horrifying realization when you love your image on your computer screen and you burn it to DVD or BLURAY only to find it looks horrible on your TV. But I have found that exporting my way, and finishing in QT Pro does the same thing, without all the math, and headaches, and hassle.
I haven't covered, yet, how to calibrate your system and workflow yet in detail on the site, but I will. (Although a few pages back I did post it in brief.) But, like I've posted before, working with CGT in AFX the way I've designed it, I have never taken a drive of a project graded at home on my system to a post house for mastering and been ambushed by things looking differently on the high grade stuff. And I'm working on an iMac and a Panasonic Plasma TV....no DVS, or Dolby monitor here (not wasting $20,000 on that.... although they are VERY nice to work on, but not necessary.)
-
Andrew Kramer has a good set of basic After Effects training. Plus more keyboard shortcuts. Then ready for the training, I guess. @shian Yeap great idea to show us more AE tips. Thanks.
-
@shian Oh ...I see that explains allot. I need to watch all of the tutorials-I know- I just got excited and figured I could figure it out on my own. I wasn't using the adjust layers for anything other than the letterbox...I haven't used AE since film school and it was AE6.5 back then so yeah...I'm a bit behind with proper workflow.
So say I want to use the Ghear Tony Scott 3way ...I drop that one on its own adjustment layer, then I want use Ghrain killer I also do that on separate layer. Then I think its too greenish and I use the green killer....that too is on a separate layer correct?
-
@shian Do you have a tutorial up on why you prefer Log colour space? For years I've been reading the opposite. For example, this post from Stu Maschwitz on ProLost:
http://prolost.com/blog/2009/9/30/passing-the-linear-torch.html
-
I'll be creating a few new tutorials this week, mostly to address these issues. I sometimes forget some people aren't used to using AFX the way I do, so I will try to show you how to manage clips, etc, so that you can work in a way similar to NLE's like FCP in terms of copying and pasting attributes to similarly treated clips, showing you just what is going on in GH2 footage in terms of highlights and shadows so you can get better exposures, and also know just what can and can't be fixed in post.
-
Never mind. You are correct. They share the same layer source in the project panel though.
-
@stonebat that sounds really odd. AFX doesn't have an instance copy function. If you cut and paste layers it is a true copy. U do have to select them top to bottom in order for them to get copied in order, but unless you have some sort of collapse function selected there is no way to control layers in one composition by changing settings in another. And then it only occurs when those layers are nested in a pre-comp.
-
I have a completed composition with a stack of stylish adjustment layers. I copied and pasted those layers on a new composition... but those layers are pretty much same ones. When I made a change in one of the layers, it affected the other composition, too. Is there a way to create "true" copies? Thanks.
-
@No_SuRReNDeR dude, you need to use more than one adjustment layer, and mix. Stacking GHears in one layer is insane, I can see why that would take forever to adjust. It shouldn't take you longer than a few minutes to grade each shot, and once you get used to how the GHears work, it takes just a few seconds. drag. drop, mix, move on...
And unless there's an exposure mismatch, or a need to power window, leave the footage alone, and do all your grading in the adjustment layers. It's a different process than other systems. I've been doing this for 12 years, and have already made all the mistakes for you, and learned from them, learn from me, and save yourself a lot of time and trouble.
-
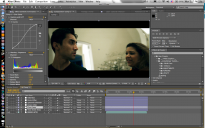
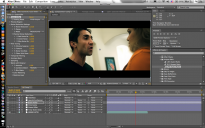
@shian I love this..... Here are some snap shots from AE of before and after grades........Im still working on these...think I need to get mores blue out the blacks in the gun shot.
I just need a workflow that doesnt take 10 hours per shot....
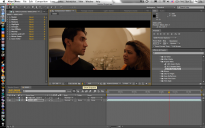 Screen shot 2012-01-22 at 2.12.58 PM.png1440 x 900 - 642K
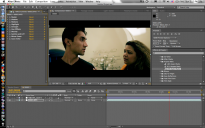 Screen shot 2012-01-22 at 2.12.52 PM.png1440 x 900 - 645K
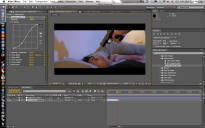 Screen shot 2012-01-22 at 1.14.02 PM.png1440 x 900 - 558K
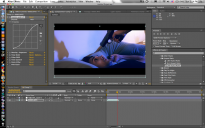 Screen shot 2012-01-22 at 1.14.34 PM.png1440 x 900 - 564K
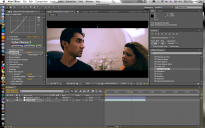 Screen shot 2012-01-19 at 10.04.15 AM.png1440 x 900 - 673K
 -
Ok, thanks! :)
-
In the rendering and output tutorial I cover this. As well as working in AFX, stay out of linear at all costs. Avoid it like the plague, Always work in log, stay in log, and render out in log. Don't color manage.
5Dto RGB doesn't have a pure log setting but the rec709 is your safest bet, maybe someday they'll have a log685 setting like the R3d convertor, but for now, use rec709, no gamma.
-
But when I choose to work with color managment and set the project to linear everything gets darker (unless I switch on the LUT, I think it is not called this rather "display..." something, in the viewer). So when I add the 5D dense it's really dark anyway. Crazy dark w/o LUT display turned on.
And the clip from 5DtoRGB is interpreted as REC.709. I can't change it to anything else. ;)
Am I missing something essential?
-
Sorry to be out of it for so long, I've been shooting a short in Laguna Beach all week, and my down time has been spent battling one of the worst colds I've ever had, I'm still getting over it.
I did an exposure and EV test last week, and I'll post it this week to show you how the GH2 handles shadows and highlights. But the simple explanation is that once you hit +3EV you hit 100 IRE and your highlights are completely blown out, and therefore unrecoverable.
@kanintesova the 5DtoRGB dense settings are targeted for a flat 1.0 gamma. I prefer a flat gamma in every case, it is your digital image at it's purest.
@kenoah @Elenion I plan to, but not sure how or if it will translate.


Howdy, Stranger!
It looks like you're new here. If you want to get involved, click one of these buttons!
Categories
- Topics List23,911
- Blog5,718
- General and News1,330
- Hacks and Patches1,148
- ↳ Top Settings33
- ↳ Beginners254
- ↳ Archives402
- ↳ Hacks News and Development56
- Cameras2,342
- ↳ Panasonic984
- ↳ Canon118
- ↳ Sony154
- ↳ Nikon95
- ↳ Pentax and Samsung70
- ↳ Olympus and Fujifilm98
- ↳ Compacts and Camcorders295
- ↳ Smartphones for video96
- ↳ Pro Video Cameras191
- ↳ BlackMagic and other raw cameras116
- Skill1,959
- ↳ Business and distribution66
- ↳ Preparation, scripts and legal38
- ↳ Art149
- ↳ Import, Convert, Exporting291
- ↳ Editors190
- ↳ Effects and stunts115
- ↳ Color grading197
- ↳ Sound and Music280
- ↳ Lighting96
- ↳ Software and storage tips266
- Gear5,407
- ↳ Filters, Adapters, Matte boxes344
- ↳ Lenses1,577
- ↳ Follow focus and gears93
- ↳ Sound496
- ↳ Lighting gear313
- ↳ Camera movement230
- ↳ Gimbals and copters302
- ↳ Rigs and related stuff271
- ↳ Power solutions83
- ↳ Monitors and viewfinders339
- ↳ Tripods and fluid heads139
- ↳ Storage286
- ↳ Computers and studio gear559
- ↳ VR and 3D248
- Showcase1,859
- Marketplace2,834
- Offtopic1,314
Tags in Topic
- gh2 1276
- gh1 196
- color 90
- grading 76
- effects 48
- after 47
- 5d 29
- correction 19
- 7d 13
- colorghear 11


