It allows to keep PV going, with more focus towards AI, but keeping be one of the few truly independent places.
-
Case anyone need it
CHANGE THE FRAMERATE OF RESOLVE'S TIMELINE AFTER CREATION
It happens... to the best and manliest of ranging dudes, and if one has been working on a long project could turn into a nasty PITA. BlackMagic's user vasikgreif found a cumbersome yet useful way of doing this:You need to go to your Resolve projects directory (here it's C:\Program Data\Blackmagic Design\Support\Resolve Disk Database\Resolve Projects\), and open the project directory.You'll see a bunch of folders and xml files. Now, you need to edit the XML files and search for some strings and replace these with some other values: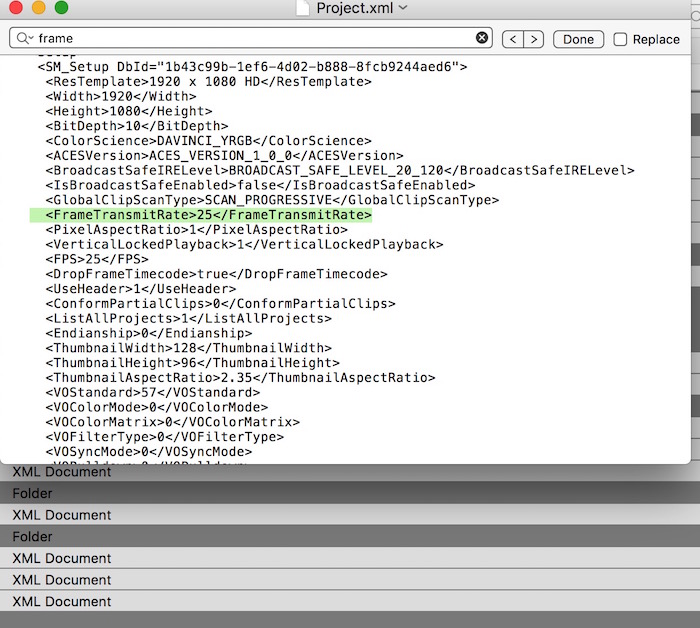
I found mine (OSX) under/Library/Application\ Support/Blackmagic\ Design/DaVinci\
Resolve/Resolve\ Disk\ Database/Resolve\ Projects/Users/panfilo/Projects/greitname
and there, were actually 3 xml files that needed tampering: the project one, the config one and the long alphanumerical one. It might be obvious but most text/code editors have a search & replace or find & replace funtionality which in a conjuncture such as this become handy.
Attaching a screengrab as I'm unable to parse some symbols through MD.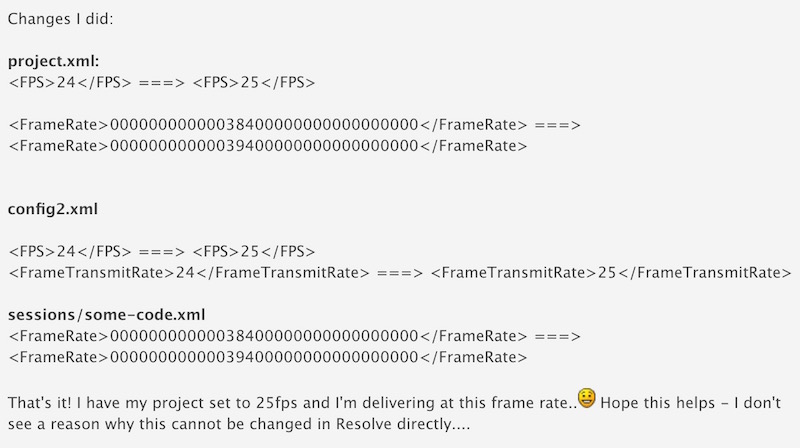
Then It's maybe a good idea not to extend the project's wraping and export the opium blast ASAP. Resolve needs to access (and modify) the xml files too, so it's possible that it can change its properties on its next launch... you can also leave the xmls open as long as you're still working in DR.
Finally before launching fireworks and kissing the turtle, double check that TL's framerate and project's framerate are same: e.g. {putting sesame st costume} WRONG

RIGHT!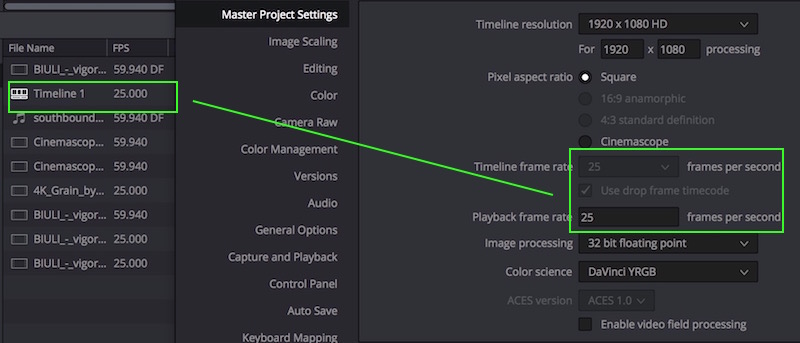
Source: https://forum.blackmagicdesign.com/viewtopic.php?f=3&t=145thanks to vasikgreif
-
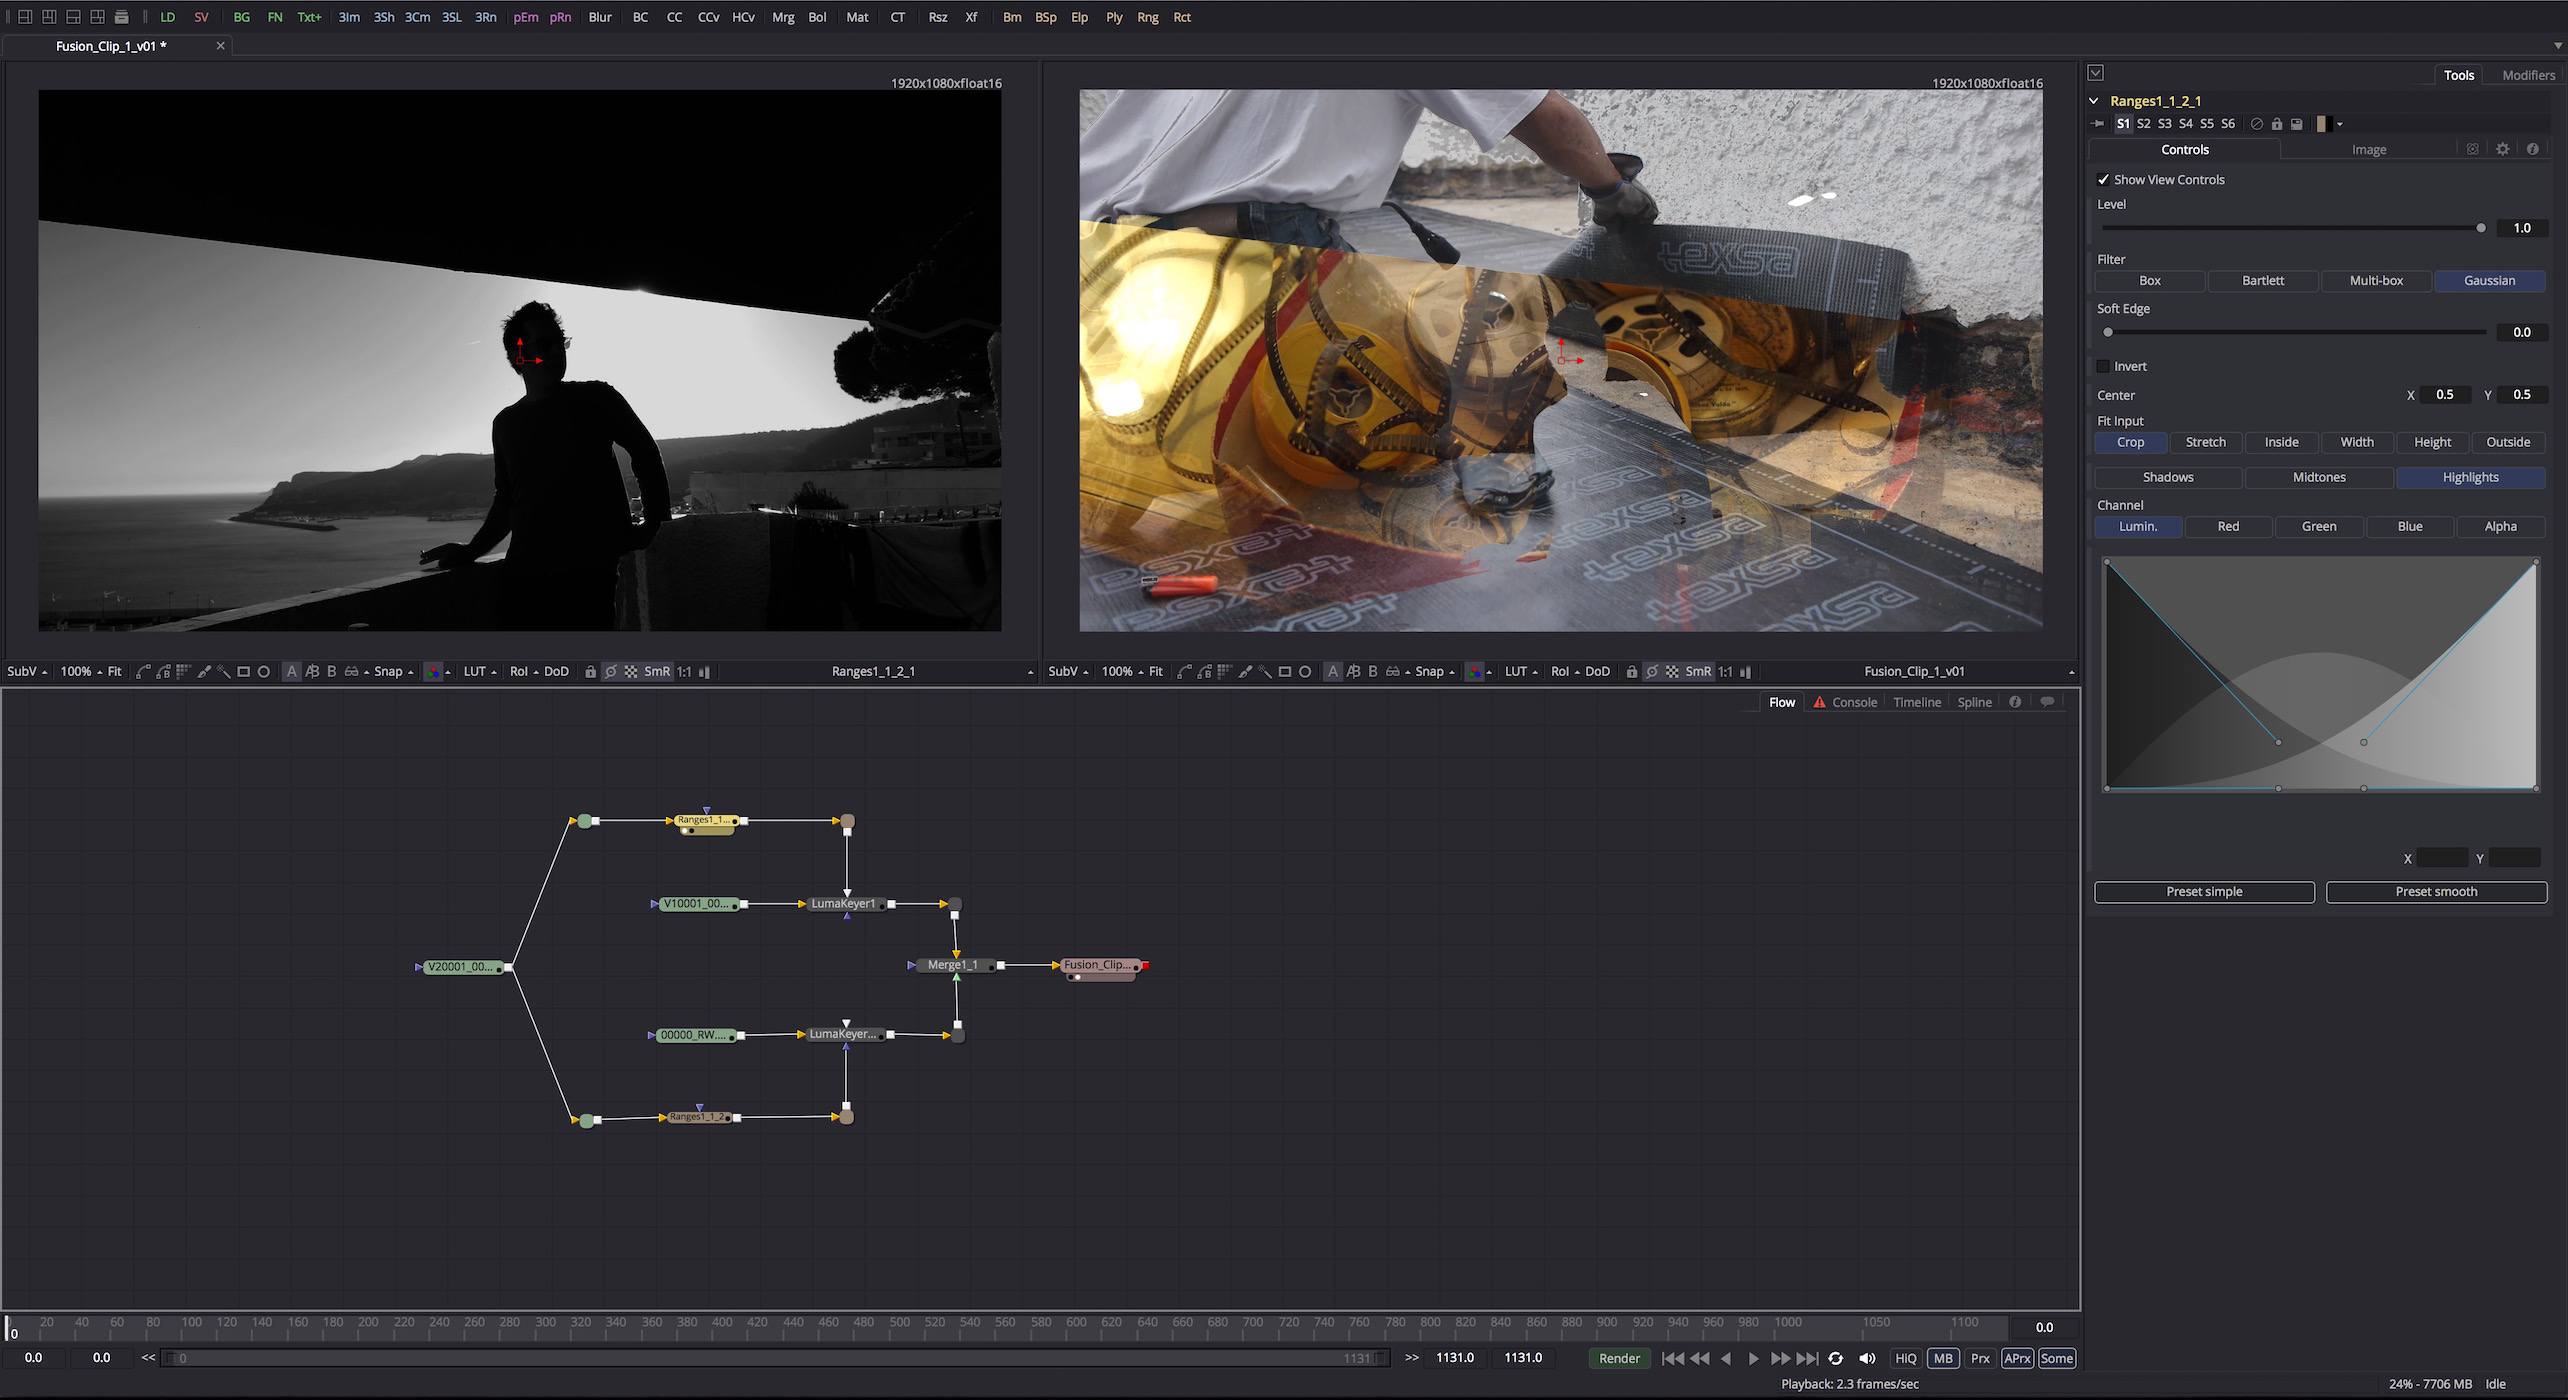
@caveport you're absolutelly right, the Luis XiV kind of absolute. I was a bit... reticent to go into yet another platform (never used fusion before) but to my surprise the roundtrip DR - fusion is pretty straight forward and flexible enough. Also the guts of fusion look very like natron, nuke and the sort; so no sweat there. Being fusion for free seals the deal. Big thank you matte =)
For those interested, here's how to you send (render) a composite to fusion
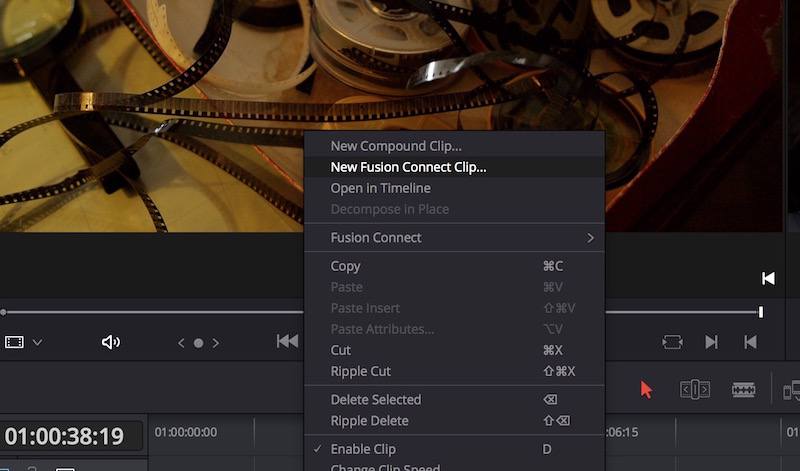
And how you update (after render) in resolve

The node shape of the process
-
Resolve is not designed as a compositing program. These kind of comps using alpha masks are possible but not flexible as you need to import dedicated masks, as the node trees are separate for each clip. Fusion is the best way if you don't want to use a compositing program like After Effects. I don't do any compositing in Resolve as it's not really suited to it... yet!
-
Hi there pips =)
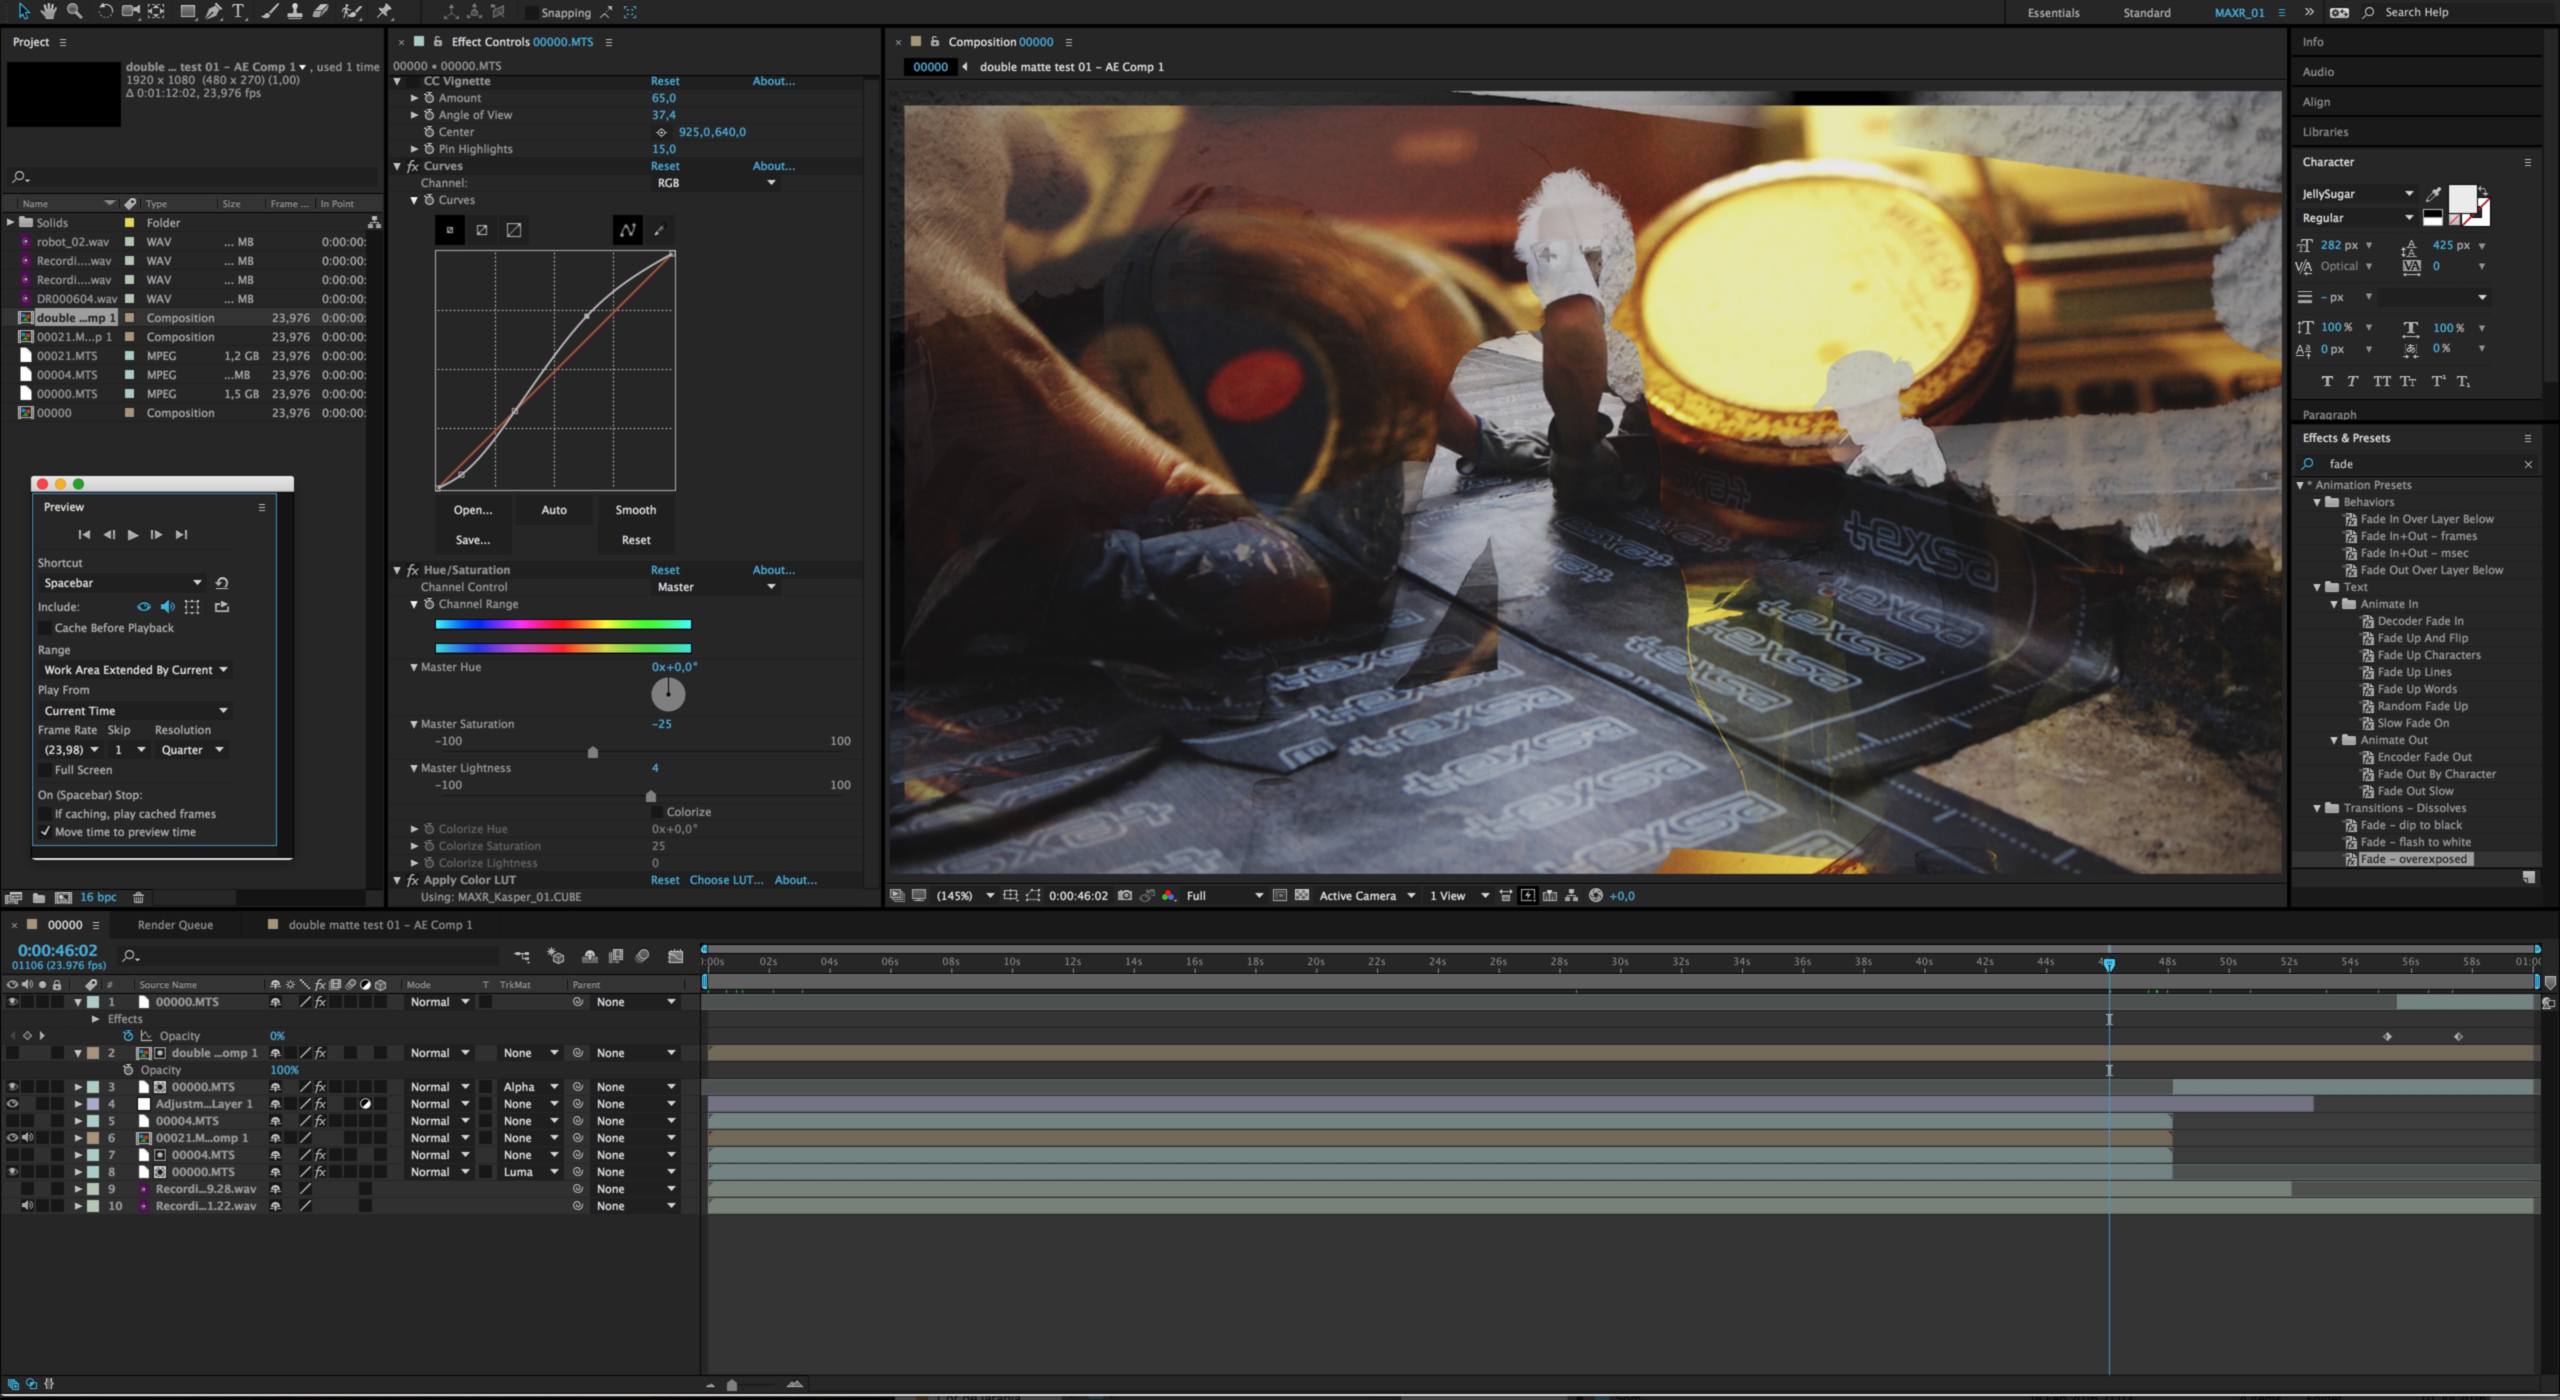
I've been trying to achieve somethin' within resolve with no good luck, maybe the cracks of the colour walls can help me out. I believe it would be easier if I explain how I already achieved this (more or less simple) effect in After Effects. So 4 layers, top to bottom layer 1 and 3 is the same and I'm using it as a matte for layer 2 and 4. Layer 1 is a luma matte, layer 3 a luma inverted. So to have and image which high lights are formed from one layer and its darks are formed from Trump followers, I mean from another layer. Result
In resolve I only managed to achieve this with one of the (compunded) layers and an alpha output

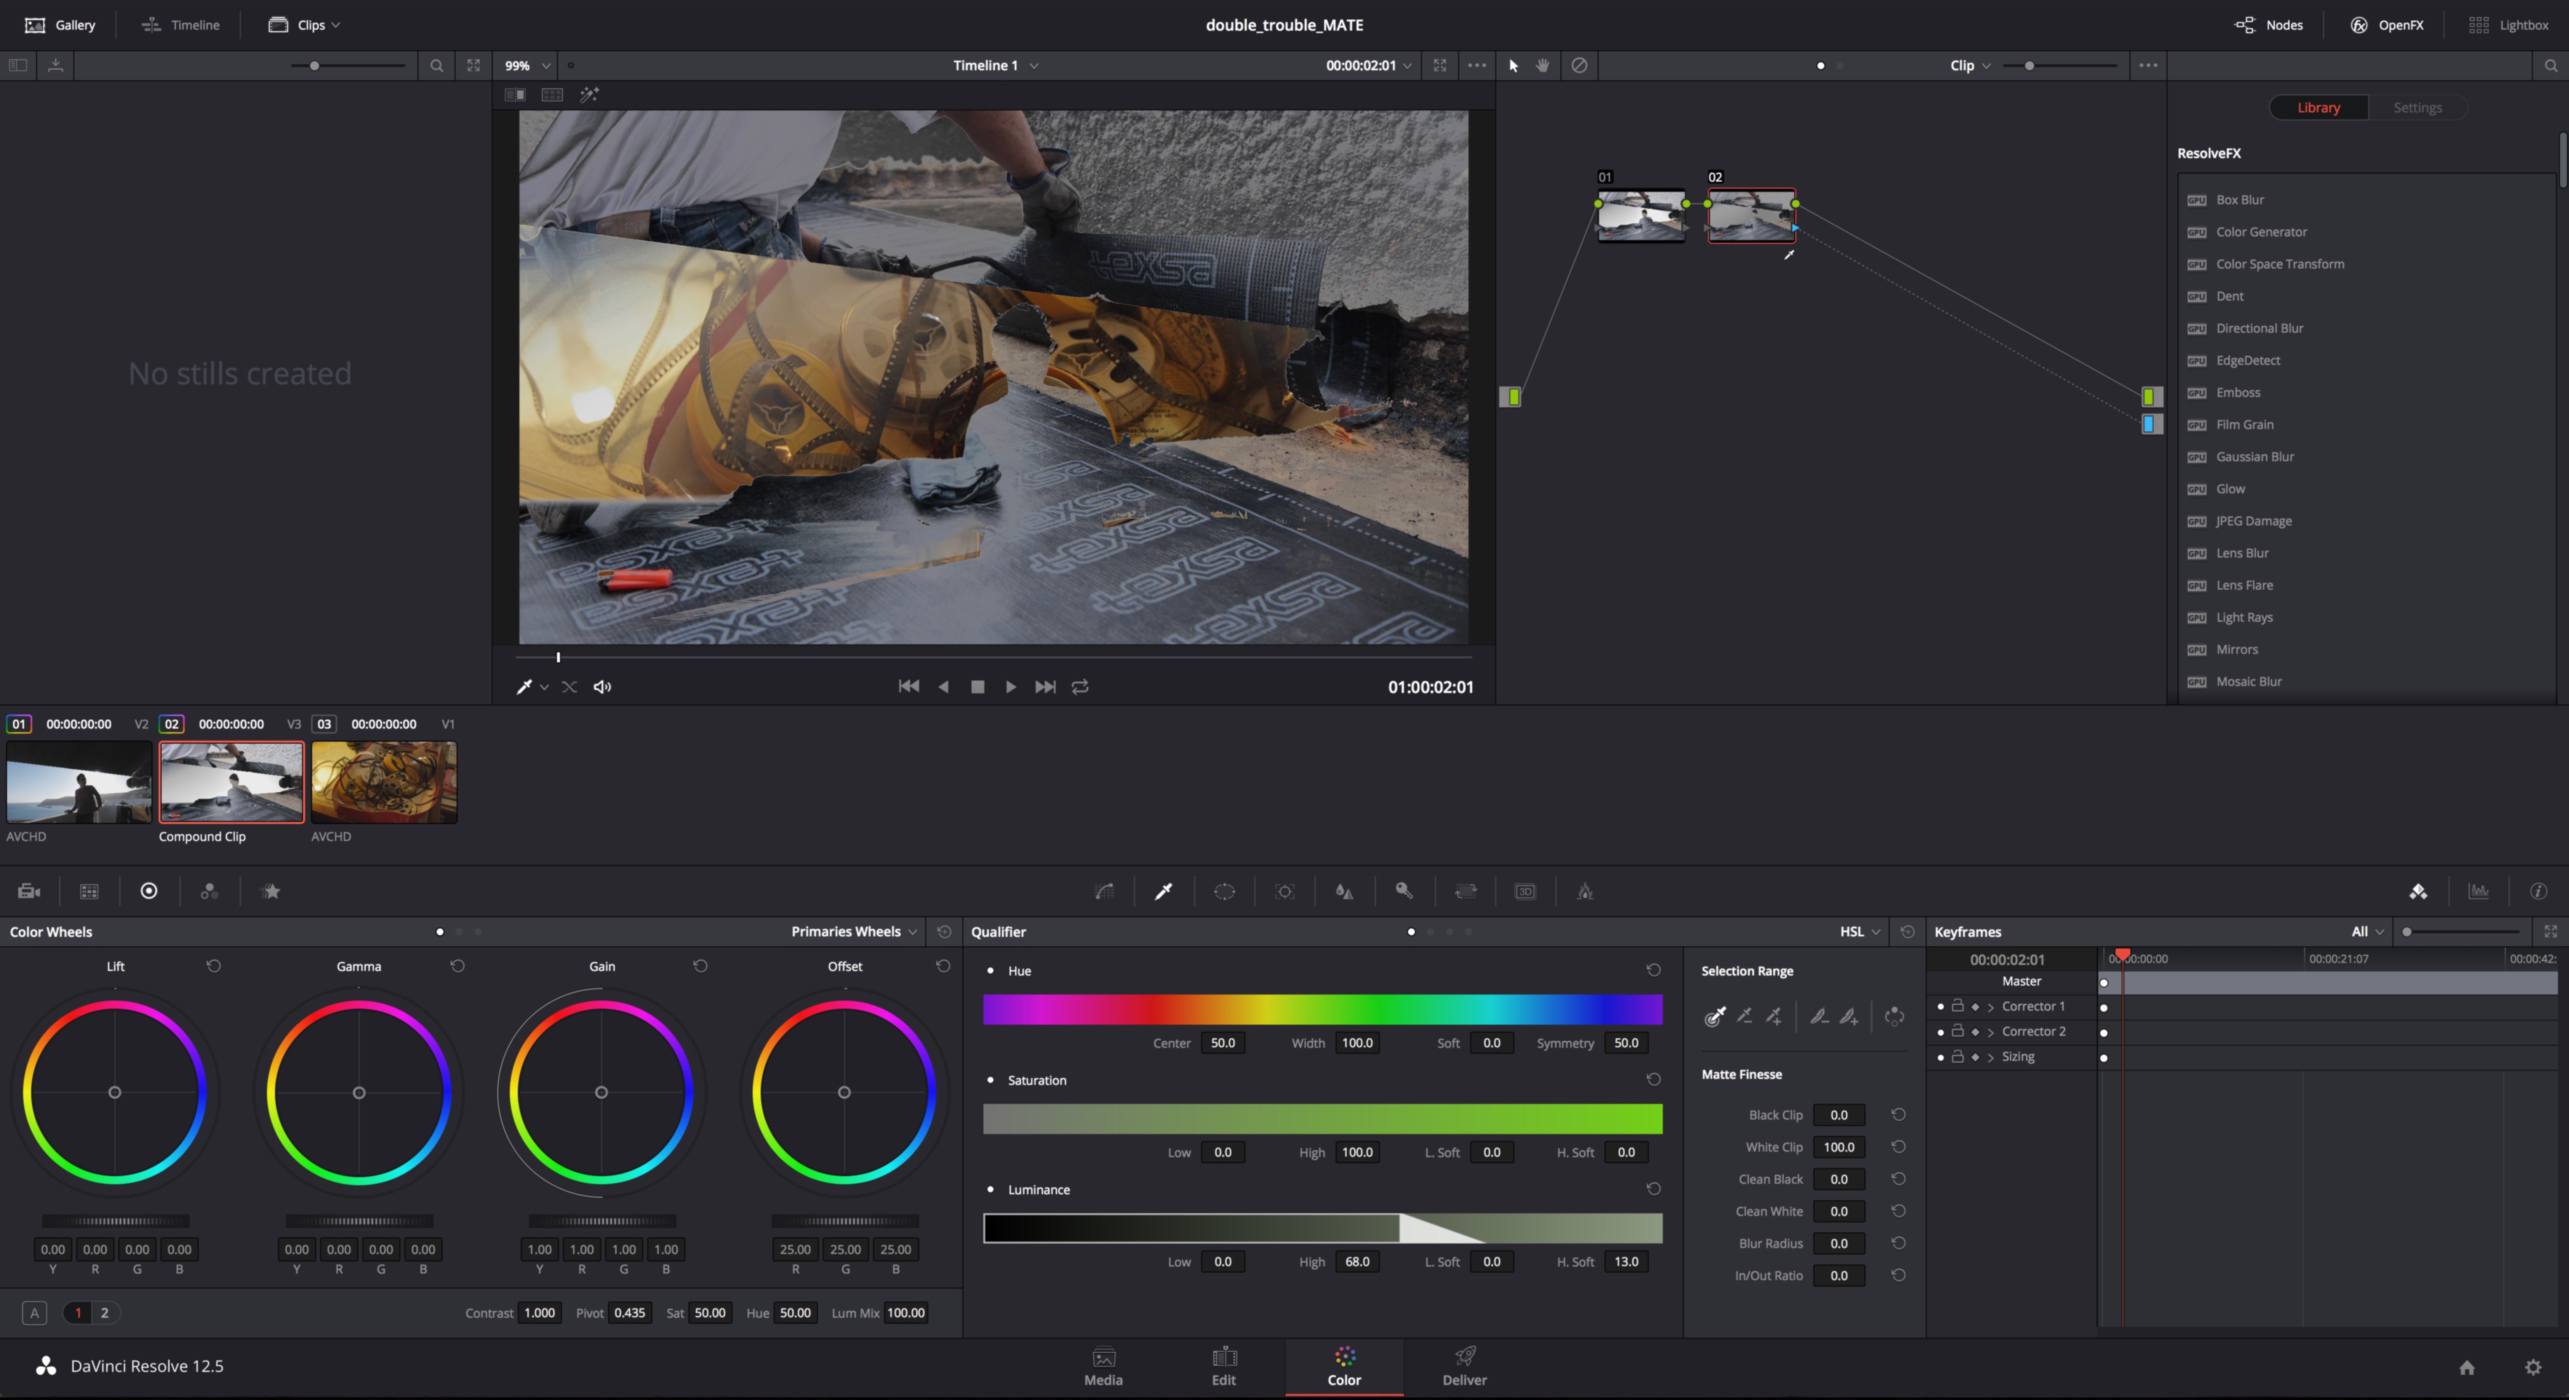
I'm aware I could export the matte from AE and then import and composite it inside DR with a matte node, but I would like to be able do the whole shibang and grade within same platform, you know lazyness is motor of long toe nails and most incredible achievements :PThanks in advance
-
New release of DaVinci Resolve 12.5.1. with lot's of changes:
https://www.blackmagicdesign.com/support/family/davinci-resolve-and-fusion
-
Why Adjust Colors Before The LUT?
-
Color Grading for a Dreamy Feeling!
Color Grading for a Scary Feeling!
-
Well, may be you downloaded full version?
-
Available for download
-
Wow! Really looks amazing! I wonder if other competitors will take note?
-
I have been playing around with new ResolveFX effects and I'm impressed. I can really use these. It seems that I don't necessarily need to open After Effects. I find at least these useful: Lens Blur, Lens Flare, Glow, Prism Blur, Scanlines, Mirrors, Film Grain, Dent. And the performance for most plugins is impressive when compared to same operation in AE.
-
Resolve 12.5 Basics
-
If they don't really use black magic, they need to make some money too ;-)
Currently there is no way to precisely monitor your grade without some I/O device from BM and a calibrated monitor.
-
(I believe PR doesn't even have curves for remapping)
It does, but it is very small :)
I haven't noticed in earlier versions of Resolve that when you select dual monitor workspace setup, now you can select which monitor is primary. That is a great thing IMO when you have calibrated second monitor and you of course want to playback fullscreen from Resolve on it without dedicated I/O hardware (like in Premiere).
But, when CMD+F it shows the full screen viewer to the other monitor, I mean the first one, ummm, the one that is system default first monitor. I haven't find a way to change this in settings. With all this 'power to the masses' attitude they could've finally make me not buy the Decklink.


Howdy, Stranger!
It looks like you're new here. If you want to get involved, click one of these buttons!
Categories
- Topics List23,911
- Blog5,718
- General and News1,330
- Hacks and Patches1,148
- ↳ Top Settings33
- ↳ Beginners254
- ↳ Archives402
- ↳ Hacks News and Development56
- Cameras2,342
- ↳ Panasonic984
- ↳ Canon118
- ↳ Sony154
- ↳ Nikon95
- ↳ Pentax and Samsung70
- ↳ Olympus and Fujifilm98
- ↳ Compacts and Camcorders295
- ↳ Smartphones for video96
- ↳ Pro Video Cameras191
- ↳ BlackMagic and other raw cameras116
- Skill1,959
- ↳ Business and distribution66
- ↳ Preparation, scripts and legal38
- ↳ Art149
- ↳ Import, Convert, Exporting291
- ↳ Editors190
- ↳ Effects and stunts115
- ↳ Color grading197
- ↳ Sound and Music280
- ↳ Lighting96
- ↳ Software and storage tips266
- Gear5,407
- ↳ Filters, Adapters, Matte boxes344
- ↳ Lenses1,577
- ↳ Follow focus and gears93
- ↳ Sound496
- ↳ Lighting gear313
- ↳ Camera movement230
- ↳ Gimbals and copters302
- ↳ Rigs and related stuff271
- ↳ Power solutions83
- ↳ Monitors and viewfinders339
- ↳ Tripods and fluid heads139
- ↳ Storage286
- ↳ Computers and studio gear559
- ↳ VR and 3D248
- Showcase1,859
- Marketplace2,834
- Offtopic1,314


