-
@kholi why not use .601 with 5DtoRGB?
-
Also, after I stopped using Full Range I saw Thomas post this:
This all looks good, but I'd use broadcast luminance range instead of full range. The GH2 doesn't write any data below 16/above 235, so you should be fine using broadcast range. Full range will compress the luma/chroma range too much (you can observe this with a waveform or a histogram).
So, that should tell you something. It's probably why I could never really get the Full Range image's blacks to a proper place without affecting the mids too much.
-
@mclarenf1 5DtoRGB definitely helps bring back detail from the shadows and the highlights, but I'm not sure whether this cannot also be done by adjusting levels in post, as @bug009 suggests. I haven't had time to try it myself, but I now suspect that it doesn't bring back any detail that couldn't be retrieved in Premiere, FCP, Magic Bullet, etc. @shian is right about it not affecting the actual dynamic range; I wasn't thinking clearly when I suggested that it did. Still, the full luminance range of 5DtoRGB better prepares footage for grading, in my opinion, by giving you the flattest image to work with.
-
On this topic, although I know I recommended full range first, I'm pretty positive that doing Full Range is actually not a good thing after all. I have yet to take my most recent tests to my colorist (from Modern, if that helps put his experience in perspective) but after investigating someone's suggestion, it seems counter-productive to use Full Range as a setting.
You can try this yourself, but what you want to do is this (recommended here a number of months back):
Set your camera's LCD and EVF up (or just one) to the lowest saturation, lowest contrast settings in the LCD calibration. Then set the LCD brightness to A*1 in the menu. What this does is show you a less contrasty image and less saturated image (duh) and the brightness about matches what's coming through the lens.
Incidentally, not only does it show you just how far the camera's REALLY reaching into the shadows and highlights, making exposure on the LCD by eye MUCH freakin' easier, it also shows you what you would get when converting via 5DtoRGB with Full Range. Short version: you can now see at least MOST of what the image would look like flattened out.
Now, in post, convert two of the exact same files with a decent contrast range in two different ways: 709 Full Range and 709 Broadcast Range, then match them whichever way you'd like. TO my eyes, the Broadcast range looks slightly better and when you go to add contrast back to the full range, it's almost like you can never really get the colors to separate properly. I mean, it's 4:2:0 regardless, but the Broadcast Range seems to play a lot better.
I'm going to the DI suite next week with new test footage for my $10K feature film, part of it's going to be testing this. I know I posted using full range and such before, but it may NOT be the way.
As far as lowering contrast goes, I think (think means I am NOT sure just yet, and not saying this is fact) you just need to do it before the lens or via the lens. As in Ultra Con filter, Low Contrast, and if you want to take the edge off of things a Tiffen black Diffusion.
I've since stumbled on an old junk lens that I had around, tested the above theory against my newer glass and the result was probably the most comfortable I've been with the image coming out of this camera without having to resort to using PL glass; namely Standard Speeds.
Let me know what you guys think.
-
@Sangye - take some properly exposed footage of something more colorful (full range of colors will be best). Transcode with 5DtoRGB in Broadcast and Full. Import into whatever you color correct with. In FCPx, I simply created three duplicate stacked clips (Full atop Broadcast) along the timeline so I could A/B them at 400%. Take the first stack and correct the Broadcast footage so it looks as close to Full as you can. Then on the second stack, do the opposite. Then, if you want, on the third, find a middle ground and grade them both there. (It took me about 15 minutes using the scopes and rudimentary color tools in FCPx.) Compare and you will have your own answer.
-
@Sangye Great test thanks for uploading... Huge diffrence Full range digs in the black Wow!!!
-
@Sangye no it doesn't. All it does is compress the highlights, and lift the shadows. It does absolutely nothing to the dynamic range.
The only real advantage is that there is less chroma smearing when doing heavy grading on the full range conversions.
http://www.personal-view.com/talks/discussion/comment/55869#Comment_55869
-
Tested it some more on other footage from earlier projects. The difference that 5DtoRGB makes is big. I don't know of any easy way to calculate it, but I'm guessing it adds something like 2-3 stops of dynamic range, mostly in shadows.
To make the most of 5DtoRGB, make SURE that you set luminance range to Full Range. I'm also using ProRes 422 HQ, and the ITU-R BT.601 decode matrix.
-
Here're the results of my GH2 test of 5DtoRGB, as compared to direct .mts import into Premiere CS6. Needless to say, there's significant benefit to using 5DtoRGB, and it isn't merely a gamma shift issue. Interestingly, 5DtoRGB with luminance range set to Broadcast produces an image virtually identical to the image resulting from a direct .mts import, whereas with luminance range set to Full, it's leaps and bounds better.
Edit - just some additional info, this was shot at f/1.4 on a Voigtlander 25mm f/0.95, ISO 320; Smooth -2, -2, -2, -2. 5DtoRGB [Full Range] appears to do great things for dynamic range.
-
[EDIT] Apple specifies... 1920x1080 ProRes at 147Mbps, 1920x1080 ProRes HQ at 220Mbps & 1920x1080 ProRes 4444 at 330Mbps: http://documentation.apple.com/en/finalcutpro/professionalformatsandworkflows/index.html#chapter=10%26section=4%26tasks=true
So with Mysteron (& other high Mbps hacks) I should switch to ProRes 422 HQ or ProRes 4444, right? [END EDIT]
2 quick questions regarding high Mbps (GOP1) GH2 hack & 5DtoRGB:
Q1. what decoding matrix should we use in 5DtoRGB for GH2 (in particular with Mysteron)?
@EOSHD suggests "ITU-R BT.601" for GH2, FS100 or NEX: http://www.eoshd.com/content/8076/how-mac-osx-still-screws-your-gh2-fs100-nex-footage-a-must-read
Q2. if ProRes 4:2:2 has a lower mbps than the Mysteron hack I am using on my GH2 (as @stonebat suggests) should I be using another target format?
cheers, cmel
-
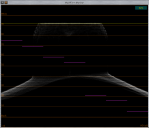
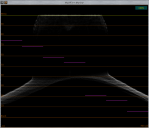
Is there actually a proven benefit of encoding through 5dtorgb as all it seems to do is pull up the blacks and pull down the highlights, thus potentially actually reducing the dynamic range. These screen grabs are from final cut 7 waveform. In fact it takes longer to encode and FCP wants to render the timeline earlier when grading the 5dtorgb footage (prores LT)?
 5dtorgb.png634 x 544 - 55K
 log and transfer.png632 x 543 - 56K
 -
I have a feeling that all the various conversion methods do is mess up the original footage. It’s up to us to prefer one method of “messing up” to another. It’s akin to the solid state vs. tube arguments in the realm of audio amplification: both types of amplifiers distort the audio signal; some people prefer one type of distortion to the other.
-
I've never tried 601, but I might just to see what happens, but my settings are already on record... I'm more concerned with what's going on in the film modes at this point because I think I've seen enough to know that there's not enough of a difference to make 5DtoRGB a MUST, but it is preferential to mts and fcp conversion at least IMO.
-
@shian “good thing I always use 5DtoRGB”
Well, where does he get this from?
Just make sure you use BT.601 as the decoding matrixand
which only does 15-235 broadcast safe 709 unlike a computer display which is 0-255 601This is true neither for BT.709 nor for BT.601.
Both BT.709 (http://www.itu.int/dms_pubrec/itu-r/rec/bt/R-REC-BT.709-5-200204-I!!PDF-E.pdf) and BT.601 (http://www.itu.int/dms_pubrec/itu-r/rec/bt/R-REC-BT.601-7-201103-I!!PDF-E.pdf) define a valid 8-bit video signal as ranging from 1 to 254 (levels 0 and 255 being reserved for timing/synchronization). Nominal blacks are at 16 and peak whites are at 235 (240 for each color-difference signal); occasional crossover down to 1 and over to 254 is allowed for transients for both standards.
For a 10-bit video signal, valid levels are 4 through 1019 (bits 0–3 and 1020–1023 being reserved for timing/synch reference), and nominal peaking is confined to the range of 64 through 940 for luma (64 through 960 for chroma).
A computer display may very well be able to handle a 0–255 signal (although most actually use 6-bit LCD panels), but that in and of itself has little to do with the BT.601 recommendations, or the difference between BT.709 and BT.601 in this regard (which doesn’t exist).
Next, how does his
Overall the dynamic range of the camera is reduced 1-2 stops by OSXfollow from this?
I edit my GH2 and FS100 stuff natively in Adobe Premiere Pro CS5.5 or the new CS6, or preview AVCHD MTS files in VLC Player.To me this looks like a non sequitur. Perhaps the headline should be “How Adobe Premiere Pro CS5.5 or the new CS6, or VLC Player still screws your GH2/FS100/NEX footage”?
-
well, good thing I always use 5DtoRGB
http://www.eoshd.com/content/8076/how-osx-lion-still-screws-your-gh2-fs100-nex-footage-a-must-read
-
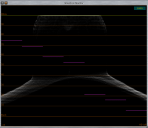
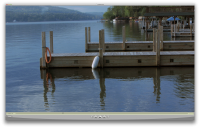
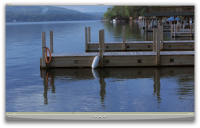
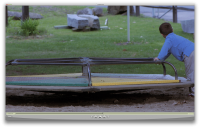
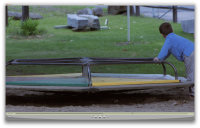
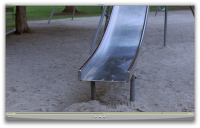
Ok, so here is another aspect of GH2 wonderland that is going to drive me deep into the testing cave again. Here is some footage shot with the Mysteron Burst Hack. [K] white balance and then graded in FCPX. One brought in with 5DtoRGB and one brought into Pro Res in FCPX. I think there MAY be something to it. Not sure. It seems to separate the color channels by quite a distance on the Waveform monitor. Whereas the normal way keeps the black RGB close together, the 5DtoRGB separates them more. Not sure if there is benefit. I'll let you be the judge of the screen grabs. I think there may be more in the shadows and to me, the colors seems more separate from each other. For instance, the water looks very blue while the wood looks warm. In the normal way it blends colors together more. Where I really see a difference is in the trees far away in the dock shot. And the shadows of the hemlock tree in the sprinkler shot. What do you think? The first of each shot is the standard way. The second shot of each take is the 5DtoRGB. I hope this helps someone. Cheers.
 Screen Shot 2012-05-14 at 8.28.26 PM.png2034 x 1301 - 3M
 Screen Shot 2012-05-14 at 8.28.36 PM.png2034 x 1301 - 3M
 Screen Shot 2012-05-14 at 8.28.42 PM.png2034 x 1301 - 3M
 Screen Shot 2012-05-14 at 8.29.11 PM.png2034 x 1301 - 3M
 Screen Shot 2012-05-14 at 8.29.17 PM.png2034 x 1301 - 3M
 Screen Shot 2012-05-14 at 8.29.30 PM.png2034 x 1301 - 3M
 Screen Shot 2012-05-14 at 8.38.56 PM.png2034 x 1301 - 4M
 Screen Shot 2012-05-14 at 8.39.21 PM.png2034 x 1301 - 4M
 -
@crunchy Ah - yes, I was wondering if that might be the case. I was hoping it would allow me to work on mts files (as.avi) in Speedgrade, but on the other hand I might give it a try just out of curiosity.
Would be useful for those times when you want to tackle just part of a 4gb file...
-
"crunchy That's really interesting. So would this above pair of applications (plus avisynth) allow me to convert mts in realtime to use in an application that only accepts .avi files? Or do I completely not undestand what avisynth can do?"
More or less it works like you said. Instead of avs script you get a directory with avi, wav and some other files. However, don't expect that you'll be able to edit in real-time such avi file.
-
@duartix "Thanks @crunchy, but it won't work. Registering AVFS as a formatter for PFM fails in my W7 64bit box. If I find the time, I'll try to emulate @Mr_Moore 's & @arvidtp 's filters in AE."
I have W7 64bit. Try to install them as adiminstrator. It's strange that it works for me and not for you.
-
@bug009 what is the perfect luminance setting which helps grading the video better without artifact,.... full or broadcast,.. what are the gamma setting i can choose if i need a video which is so similar to mts luma range after conversion??????????
-
i use prores 422 hq 23.976 itu bt.709 luminance range broadcast for sedna aq1 most details shots,...... should i change any of this to keep the details up,...???? what about luminance, chroma mode and post processing options????
Howdy, Stranger!
It looks like you're new here. If you want to get involved, click one of these buttons!
Categories
- Topics List23,990
- Blog5,725
- General and News1,353
- Hacks and Patches1,153
- ↳ Top Settings33
- ↳ Beginners256
- ↳ Archives402
- ↳ Hacks News and Development56
- Cameras2,367
- ↳ Panasonic995
- ↳ Canon118
- ↳ Sony156
- ↳ Nikon96
- ↳ Pentax and Samsung70
- ↳ Olympus and Fujifilm101
- ↳ Compacts and Camcorders300
- ↳ Smartphones for video97
- ↳ Pro Video Cameras191
- ↳ BlackMagic and other raw cameras116
- Skill1,960
- ↳ Business and distribution66
- ↳ Preparation, scripts and legal38
- ↳ Art149
- ↳ Import, Convert, Exporting291
- ↳ Editors191
- ↳ Effects and stunts115
- ↳ Color grading197
- ↳ Sound and Music280
- ↳ Lighting96
- ↳ Software and storage tips266
- Gear5,420
- ↳ Filters, Adapters, Matte boxes344
- ↳ Lenses1,582
- ↳ Follow focus and gears93
- ↳ Sound499
- ↳ Lighting gear314
- ↳ Camera movement230
- ↳ Gimbals and copters302
- ↳ Rigs and related stuff273
- ↳ Power solutions83
- ↳ Monitors and viewfinders340
- ↳ Tripods and fluid heads139
- ↳ Storage286
- ↳ Computers and studio gear560
- ↳ VR and 3D248
- Showcase1,859
- Marketplace2,834
- Offtopic1,319


