-
Logarist is a color correction system for video editors. Logarist enables the same types of corrections that you can achieve using raw images in Adobe Lightroom, but without the need to shoot in raw, and right inside your video editing application. Logarist uses look-up tables (LUTs) to transform your camera's video into a color space optimized for exposure compensation, white balance correction, and contrast adjustment, and then renders it for display on a standard computer or HDTV monitor. Logarist makes basic color correction easy and accurate, and enables advanced corrections that are difficult or impossible in standard camera color spaces. Logarist is free, and you can download it from http://www.logarist.com/ .
Watch the Logarist introduction and demo/tutorial video on YouTube:
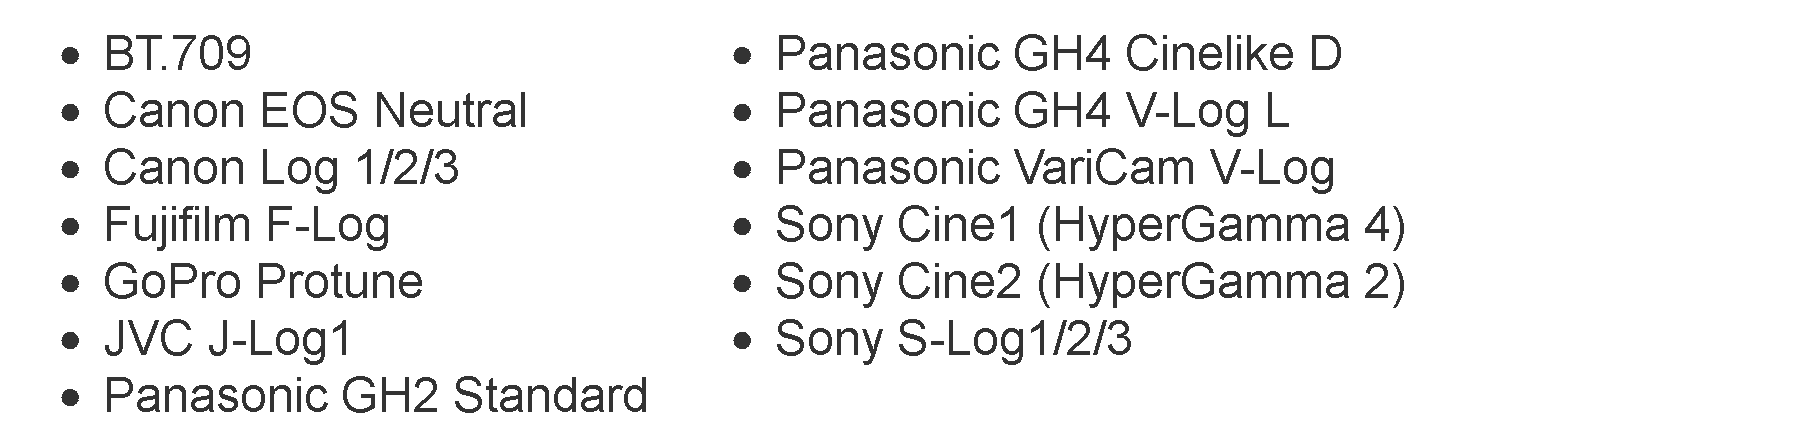
Logarist supports these camera color spaces:
-
Hi balazer,
Obviously a lot of work went into this. Can you explain why you did it? What does it give you that current tools do not?
-
Hi, @Ralph_B.
It's a way to get better looking images with less effort. Existing color spaces are optimized for delivery or capture, not for color correction. You can do color correction in those spaces, but it's more work than it should be and it's difficult to get a perfect result. Exposure compensation, for example, would require a very precisely shaped curve. White balance correction would require separate adjustments to shadows, midtones, and highlights. Some people are used to working that way, but I always found those methods troublesome, so I made something better.
If you're the kind of shooter who always manages to get perfect images straight out of the camera, you won't benefit from this. But for the styles of shooting that I do in the field, often in sunlight and varying lighting conditions, almost everything I shoot benefits from some color tweaks.
-
Thank you, looks interesting. Your video is awesome, so clear. That's how it's done.
-
The major bullet points here are exactly what Balazar points out: global adjustment of exposure compensation, white balance, and contrast. As with JPEG versus RAW still photography, these properties are burned into H.264 video recordings, regardless of whether you shoot in log or Rec 709 profiles. Normally when grading H.264 footage, you're working in a Rec 709 color space, either natively or converted from a log profile into Rec 709 by a calibrated 3D LUT. In that situation, you must work with the exposure, white balance, and gamma profile that were selected at the time the footage was shot.
Converting H.264 footage into a standardized log color space (in this case a version of ProPhoto RGB), allows exposure, white balance, and gamma curve to be adjusted in post-production, similar to how Adobe Lightroom uses ACR to manipulate these properties in RAW photographs. The color science behind this is well-defined and valid to the level of color fidelity recorded in the original footage.
Regardless of the working color space, what's open to personal opinion is how to best manipulate the footage with post-production tools. As with most photograhic software, Adobe Lightroom treats exposure, white balance, and gamma globally across the histogram range, and provides its own custom controls for separately adjusting highlight, midrange, and shadow properties. For example, the effects of Adobe's "contrast" control vary depending on which process version you select in ACR. It's a subjective interpretation rather than a calibrated adjustment.
With video color grading tools, it's more common to provide separate sets of calibrated adjustment controls for highlight, midrange, and shadow regions, as well as a master set of controls for the entire histogram range. This partially compensates for the absence of a global white balance adjustment, which cannot properly be performed in Rec 709 color space. Balazar's log color space conversion fills in that gap, allowing you to alter exposure, white balance, and contrast within the host application.
What's notably missing is support for Adobe Premiere Pro and After Effects, which I'd imagine is not an oversight, but due to more substantial issues?
-
@ balazer: Thank you for this valuable tools set, instruction video, 3D LUTs and informative website!
After setting my camera settings to the recommended settings from your website, I graded a clip with and without your LUTs and it definitely looks better and was quicker and easier to get a look I was happy with. What I like best about it is, that extreme settings are simply extreme and not as damaging as they would be if I was applying them without your LUTs.
This is what I have been looking for my A7RII footage along with the Still color setting instead of Pro - the colors are nicer as well.
If you have a Sony A7x, A6xxx, it's worth trying the camera settings listed on the website as well as the 3D LUTs when color correcting.
Any advice one whether there is an advantage to using Cine1 to Cine2 for the gamma?
-
If only I knew how to use resolve.
Bravo, thanks for making this, I've always wondered no one made a lightroom style plugin for NLEs that actually gave good results.
Coming from more of a photo background, CC and grading has always been painful for me in video.
Love that you made this!
-
I tried it out in Final Cut Pro X and it works out great. Really quick and easy to make adjustments to the image. @balazer Thank you for all of your work and providing this to us for free... Very much appreciated...
-
Thanks, @majoraxis. Yes, when you shoot with less than perfect settings in the camera, it won't be as damaging as it would be without Logarist. That's a good way to put it. Logarist doesn't give you unlimited latitude for mistakes, however. You'll still get the best results when the settings in the camera are right. The way I operate is to try to get the exposure and white balance fairly close in the camera. It doesn't have to be perfect. That frees me up to worry about camera motion, framing, and motion. Then I use Logarist to get the colors the last bit of the way to where I want them.
You can get the same results with Sony Cine1 or Cine2. The only real difference is how things will show in the histogram and with zebras while you're shooting.
@Azo, I'm glad to hear it. Which camera did you use?
-
@balazer I used some old footage from the GH4 and D750. On the GH4 I used the Cine D footage and the on D750 I used some footage that I shot with Neutral profile. Per your instructions it was really easy to get a to good starting point along with balancing out the image, super quick actually... :-) On a side note I sold the GH4 and am replacing it with the Fuji XT-2 so I am interested to see how that works out with your luts and grading in general.
-
Hi balazer, any chance for a version which works with adobe premiere pro cc? Works wonderful in FCP Pro x with JVC J-Log. Much headroom, smooth highlights. Thank you for your work..
-
@uliman, thanks for the feedback on J-Log1. Premiere Pro is something I may find a way to support in the future. Currently it doesn't have the color tools necessary for working in this type of log space.
-
Amazing, truly amazing work @balazer! I must have eaten s much work and time to develop it. Pity that I can't use it with Magix ProX7
-
Thanks, @tetakpatak. Can Magix Video Pro X7 load LUTs? How about the current version? That's one pre-requisite. But there's more too it than just that because it also needs to have the right kinds of color tools for dealing with a log space, namely, global offset, individual R, G, and B channel offsets with fine granularity, and contrast as a straight-line slope with the right pivot. I wish I could just publish a set of LUTs or a plugin that would work everywhere, but each video app has its own quirks for how it reads LUTs and how it reads video files and maps levels, and different built-in color tools. And so I had to compensate for all of that and make different LUTs for each app.
-
@balazer Sounds like more like a job for After Effects than Premiere Pro. AE can load .cube LUT's into 32-bit linear ProPhoto color space, and the Color Finesse plugin bundled with AE provides those kind of color tools.
-
I tried Color Finesse. It didn't have the tools I need.
-
Any chance you will support the Panasonic G85
-
@Scot, on your G85 try shooting in Cinelike D and using the GH4 Cinelike D Logarist transform. Follow the instructions for the GH4. With any luck the G85's Cinelike D matches the GH4's.
-
BMD Fusion looks like good candidate
-
@balazer I have had luck doing that with your previous LUTS using a G7. That being said I saw a video that showed GH4 and G7 CineD looking different so wondered how it might be affecting my output. Of course maybe G85 is closer to GH4 would be interesting to see a comparison of these alternate models and output in the CineD profile.
-
Very nice work. Thanks for supporting Sony cams. I said goodbye to Panasonic a year ago and now I can use your luts again. I liked the CineD to log workflow for the GH4 I had. This is more advanced.
-
@balazer. this looks awesome! any chance we could adjust white balance using Kelvin color temp? Like a custom node or something which takes into account the color temp as shot (could be supplied manually) which then calculates RGB offsets automatically for the target color temperature. I don't know, I'm just making shit up :) Lightroom has a slider for this.
-
Why not to do all this inside plugin including LUTS and adjustments?
As far as I understand you focus on basic adjustments.
-
@radikalfilm I would say that is outside of what this lut does being a lut and not a plugin. That being said inside Resolve they recently added the ability to adjust color by temp adjustment.
-
Thanks, @RKM. What camera do you use now? It'd be nice to see some samples posted as people start working with this.
@radikalfilm, in my experience RGB sliders are the best way to do white balance adjustment - better than color wheels or a Kelvin slider. I wish all the apps would use RGB sliders. With three sliders you have three axes on which to make the adjustment: the red-cyan axis, the green-magenta axis, and the blue-yellow axis. You only need two of those, but having all three makes it easier. If you are used to Kelvin sliders, treat the blue channel like Kelvin and the green slider like tint.
Vitaliy, I don't want to reinvent the wheel when we already have good-enough plugins for loading LUTs. It's not easy to make a plugin that performs well. It needs to be multithreaded or use GPU acceleration. And I'm not focused purely on basic adjustments. There's a lot of advanced correction that you can do in the log space with video apps' native tools, like masked corrections or graduated filters. I want people to be able to make all those types of adjustments in the log space, which means keeping the application of the LUTs separate from the color correction filters.
-
I tried Color Finesse. It didn't have the tools I need.
I'm curious which necessary tools After Effects and/or Color Finesse lack? It sounds like Logarist uses calibrated LUT's to convert camera-specific footage into an idealized log color space. From there you should be able to alter color temperature via direct manipulation of individual RGB components. AE's Color Management dialog implies that it can be configured to operate in linear 1.0 gamma, which should theoretically preserve logarithmic exposure levels. I wouldn't be surprised, however, if it turned out there were some hidden exceptions in Adobe's color science.


Howdy, Stranger!
It looks like you're new here. If you want to get involved, click one of these buttons!
Categories
- Topics List23,993
- Blog5,725
- General and News1,354
- Hacks and Patches1,153
- ↳ Top Settings33
- ↳ Beginners256
- ↳ Archives402
- ↳ Hacks News and Development56
- Cameras2,368
- ↳ Panasonic995
- ↳ Canon118
- ↳ Sony156
- ↳ Nikon96
- ↳ Pentax and Samsung70
- ↳ Olympus and Fujifilm102
- ↳ Compacts and Camcorders300
- ↳ Smartphones for video97
- ↳ Pro Video Cameras191
- ↳ BlackMagic and other raw cameras116
- Skill1,960
- ↳ Business and distribution66
- ↳ Preparation, scripts and legal38
- ↳ Art149
- ↳ Import, Convert, Exporting291
- ↳ Editors191
- ↳ Effects and stunts115
- ↳ Color grading197
- ↳ Sound and Music280
- ↳ Lighting96
- ↳ Software and storage tips266
- Gear5,420
- ↳ Filters, Adapters, Matte boxes344
- ↳ Lenses1,582
- ↳ Follow focus and gears93
- ↳ Sound499
- ↳ Lighting gear314
- ↳ Camera movement230
- ↳ Gimbals and copters302
- ↳ Rigs and related stuff273
- ↳ Power solutions83
- ↳ Monitors and viewfinders340
- ↳ Tripods and fluid heads139
- ↳ Storage286
- ↳ Computers and studio gear560
- ↳ VR and 3D248
- Showcase1,859
- Marketplace2,834
- Offtopic1,320
Tags in Topic
- logarist 1


