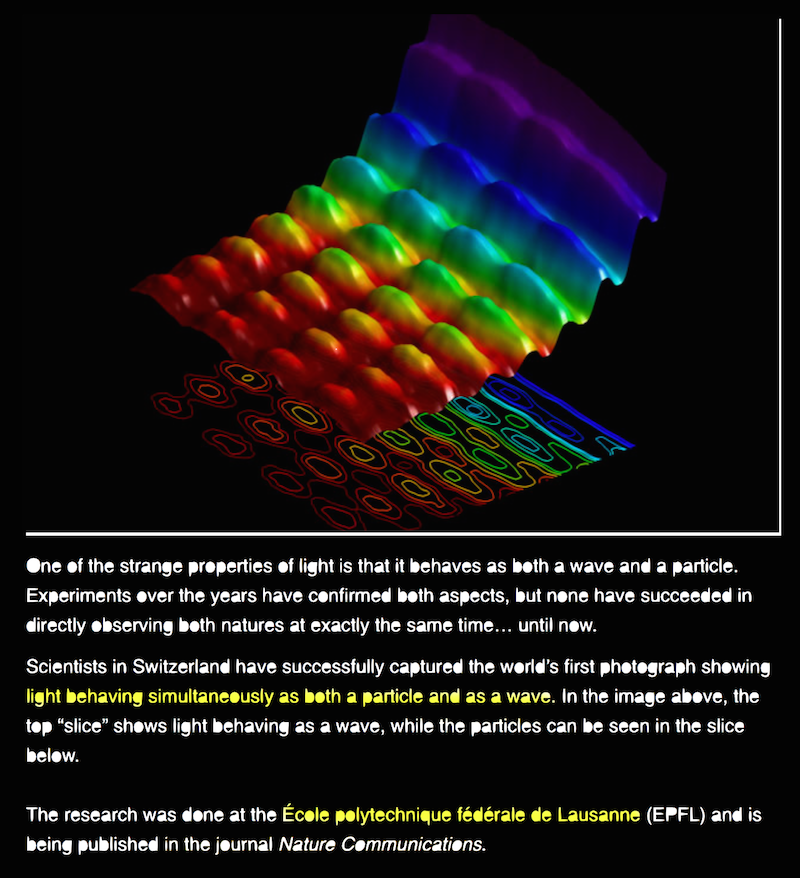
-
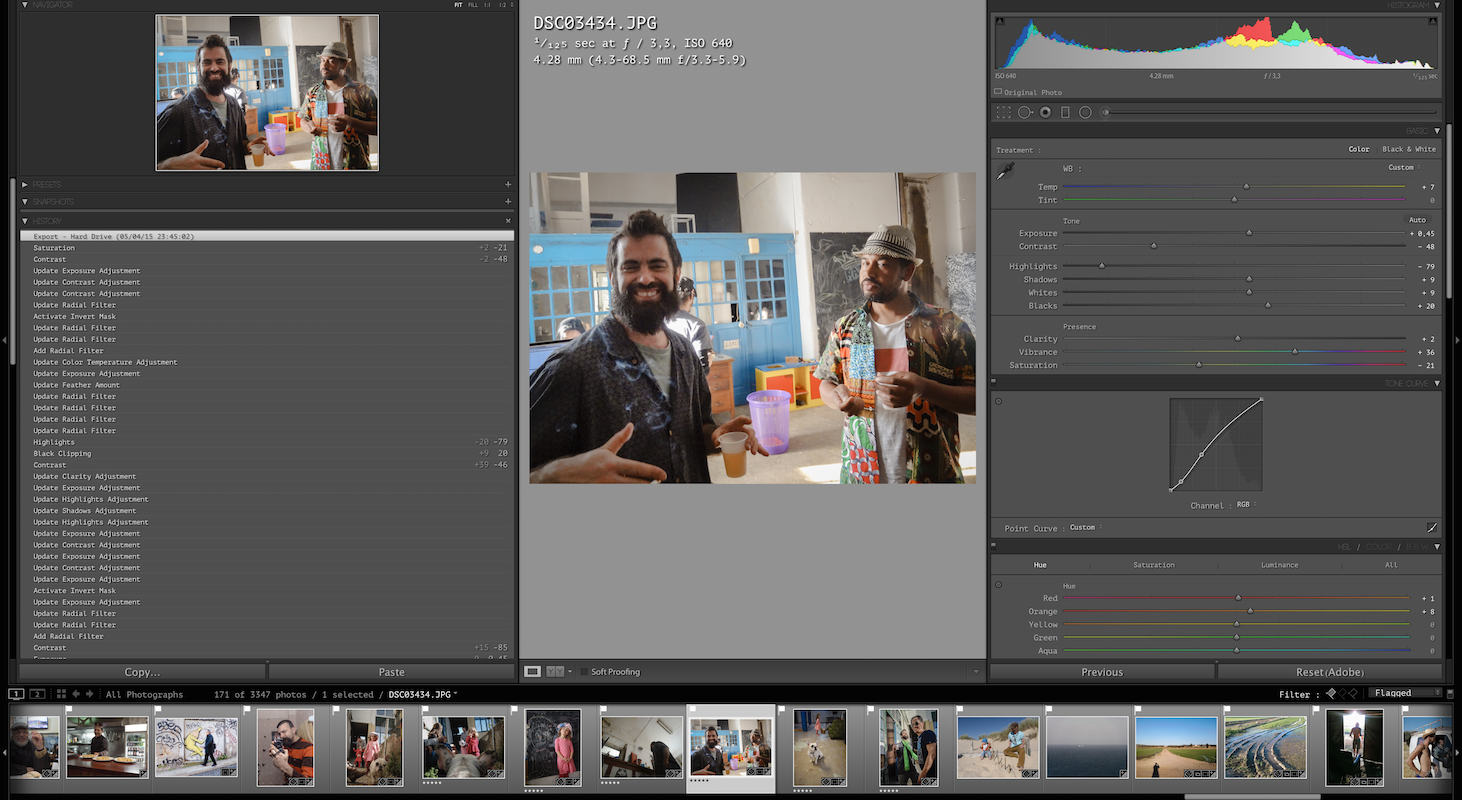
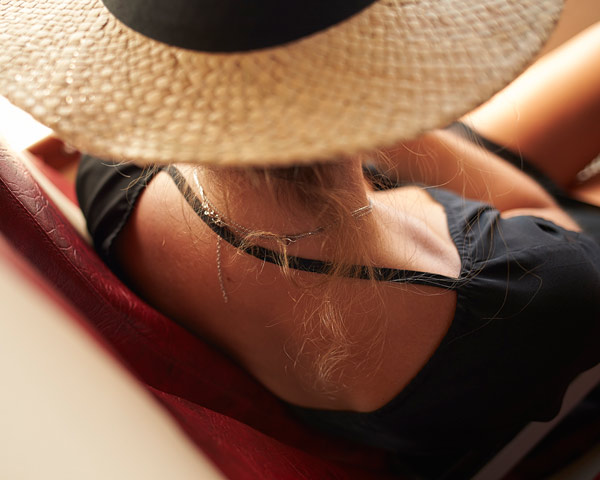
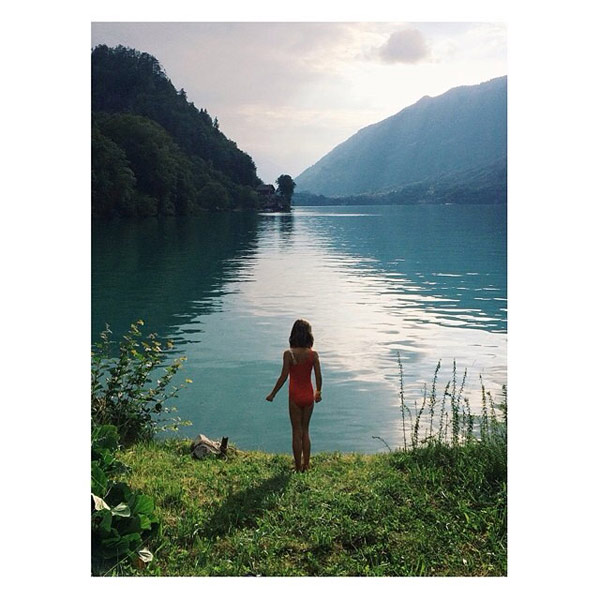
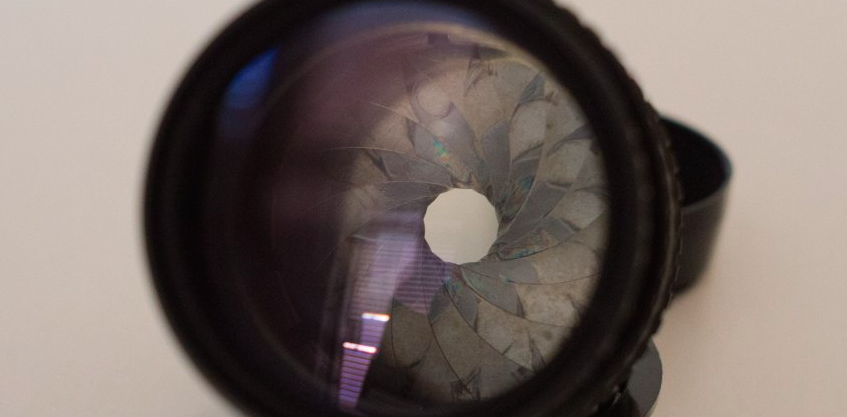
Hi guys! GH's can take stills too and damn good ones. Let's share workflows, compare apps and results! I personally, organize a 40.000 photos catalog with lightroom. Lr is very versatile but there are times when even it's myriad tricks don't get there. Capture one is giving me pretty nice results (best color engine out there) which doesn't come as a surprise once I got best results with 4/3's ORFs; is also unbeatable at sharpness. Other times I go with raw developer; I like it's simple interface and that I can get closer to "traditional" analogic photography (i.e. DR) look/feel. WHAT ARE YOU USING?
gashô
capture one (linear mode), left • lightroom, center • raw developer, right
-
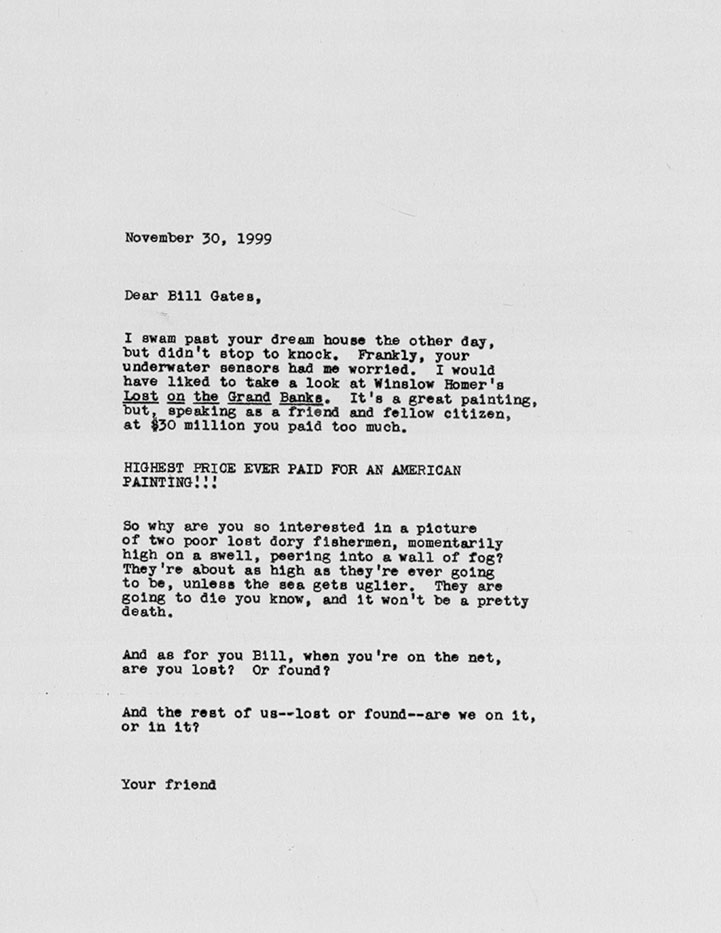
As I was posting this elsewhere I thought Maybe Vitaliy might like this one... hung somewhere on a forums' wall and so I'll leave it also here. Talking about photographers that inspired us... Allan Sekula, a tremendously honest and hard-working artist. Had the incredible privilege of assisting him for a couple days.
From Dear Bill Gates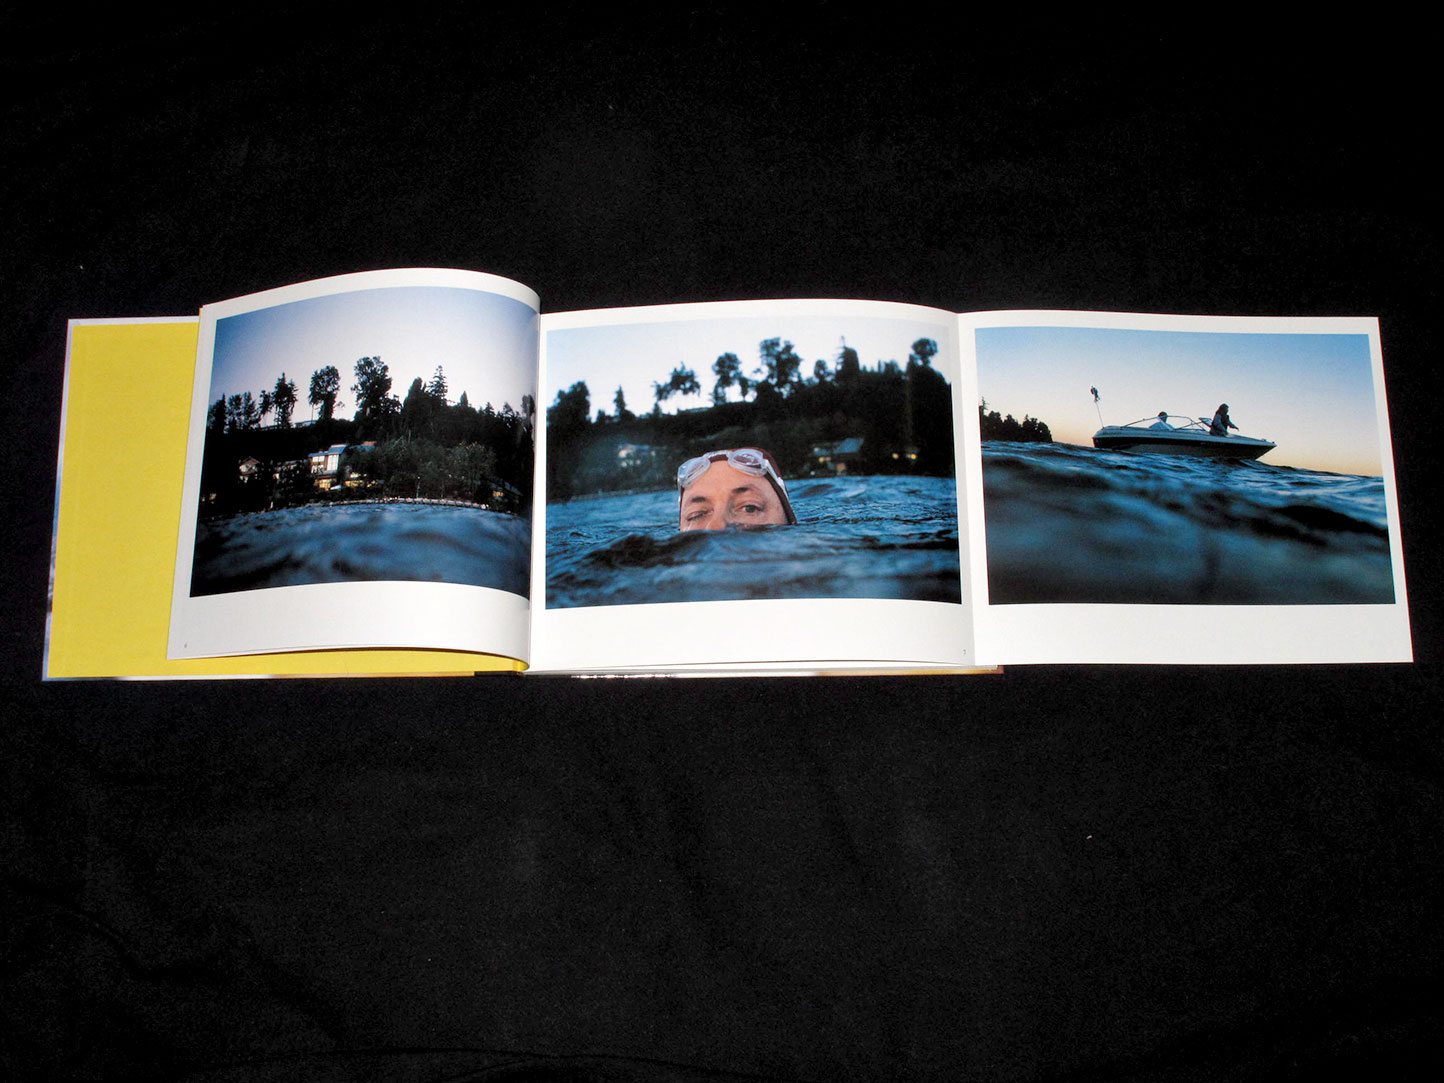
-
Quick follow up on the guetzli business:
https://github.com/polygOnetic/guetzliconverter
https://www.guetzliconverter.netMultiplatform FOSS java GUI {hicup} for guetzli. Allows folder batch, mem and proc limit and multithread when batching (!!). It doesn't do anything extra to the CLI, but some folks like a spoon to eat ice-cream

-
DOWNSCALE & COMPRESS IMAGES
What up PV's?
Latest google's compression algo Guetzli made headlines on all important tech sites. Other open-source advancements hardly ever are brought to the general public's attention. I'm not here to judge, but rather to share my view on the subject matter and some "better" alternatives. I've been using ImageOptim and jpegoptim (CLI) for quite some time, I've tested JpegMini, TinyPNG and Guetzli.IMO there's no point in bloating a thread with images that are quite difficult to differentiate at 1:1
So I'll skip directly to the cheese. The best possible quality/compression ratio I'd managed so far was downscaling in PS with Sverlov's (free) c3c - thanks @Vitaliy - set to micro-contrast and sharpness 0 or 1 and live with its small gamma shift. Then exporting with tinyPNG within jpeg flavour. Smallest possible files. Now, not always want I go to the serious pro room {fart}, so we shall find an all FOSS alternative =)So I bit the bait and went on trying Guetzli... and it's painfully slow, unusable almost, we're talking 50 to 100 times slower than say mozjpeg or jpegoptim. Guetzli's still in diapers and parallel processing is possible but only for different inputs, so forget it for now. The good thing that came out of it is that now I've changed to Mozjpeg which is better than jpegoptim, fast and to be honest 99% the quality of google's within even smaller file sizes.
From some time now, outside of photoshop I've been using Imagemagick to rescale the images. The documentation on IM's scale options is overwhelming, I've tried some of the output options and finally was happy with the standard.
Downscale with IM and compress with mozjpeg gives me a ridiculously smaller file and an IQ almost identical to c3c+tiny WF.For me it's not practical to batch these ops from the CL, so I've created watched folders that apply the settings - plus sometimes EXIF strip, tag, rename and so on - to dropped files. You can opt to simply use a bash, a service, create a droplet from automator, etc. possibilities are endless =)
The GOOD stuff
This (wrapped in a bash) for ImageMagick, 1200 pix:
convert "$f" -resize 1200 "${f%.*}_1200.jpg"This - compression 84 - (wrapped too) is what I mostly use for mozjpeg,
but you can get away with much much smaller files:
cjpeg -quality 84 -dct float -dc-scan-opt 2 "$f" > "${f%.*}_web.jpg"
JpegOptim I used with:
jpegoptim -f -m84 -b -P -v --strip-all --all-progressive "$f"Guetzli tried both with normal
guetzli --quality 84 input outputand multi-threaded
parallel 'guetzli --quality 84 {} {.}.jpg' ::: input
Wrapping up. Contrary to what everybody and their dog say, I never sharpen images after downscale, instead I use algos that retain the perceived original sharpness adapted to a smaller size. Using imagemagick for downscale and mozjpeg to compress the output render tiny files (e.g. B_chart_magic >> moz in the attached 5300KB > 143 KB) with almost zero perceptual difference. All progs mentioned here can be also installed via homebrew. For a free full-fledged GUI batch image converter, check the multi-platform XnConvert, just don't use lanczos to downscale ,-)
TESTS - 18 images
Here are some chart images if you want to peep, bear in mind they all have been stripped from any metadata. - https://drive.google.com/file/d/0Bxtrjp4jb-YsZzF2bUxYeVhfSUE/view?usp=sharing -
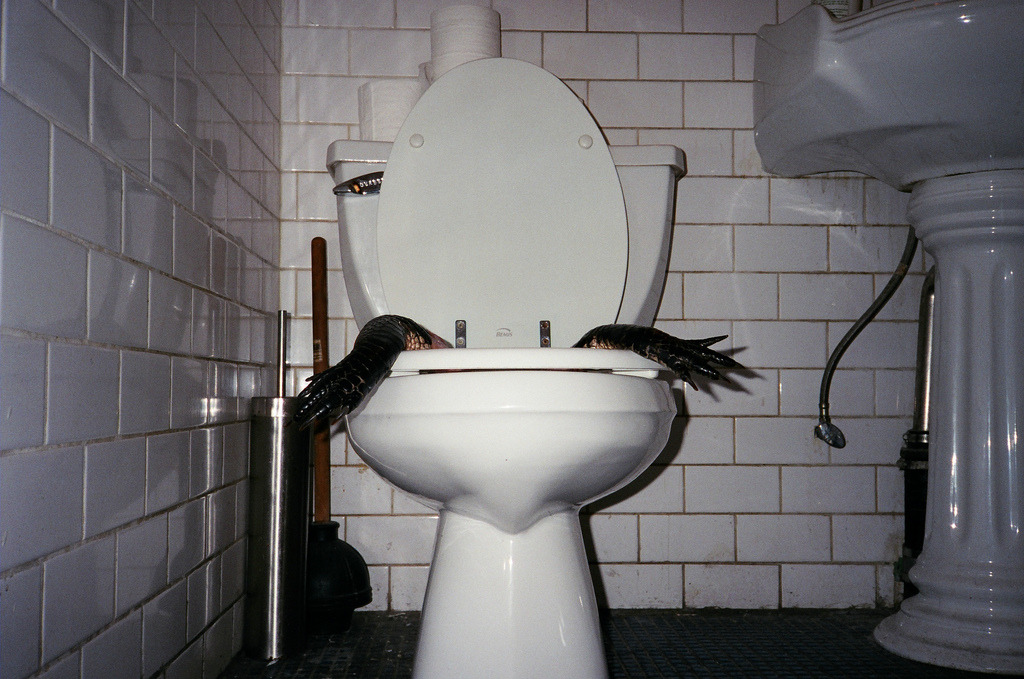
Also, whats the story with the swollen guy in the hospital?
The pic comes from Lazarus' project, Too Hard to Keep - it is linked to the blog. Anonymous send him photos or objects that are unbearable... it is a "public" collection of very personal memories that people prefer not to remember/keep.
Despite I didn't find any cat, there are lot of dogs, no disrespect.Is that really your grandmother in those beautiful "1913" photosI wish, my grandma was a cold knife thrower who lived amongst gypsies. They look very alike though ,-)
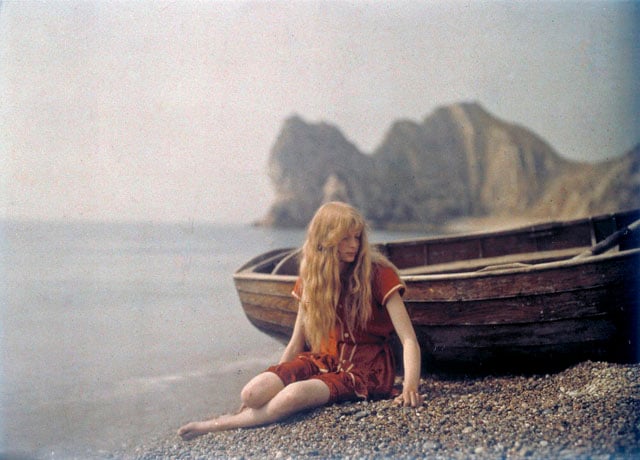
Christina was the daughther of a british electrical and aircraft engineer, Mervyn O'Gorman.
The featured beach images are from Lulworth Cove, Dorset.
If you want to know a bit more about the photographer - http://en.wikipedia.org/wiki/Mervyn_O%27GormanIf you want to read a bit more about Autochrome Lumière - http://en.wikipedia.org/wiki/Autochrome_Lumi%C3%A8re
Grupo 7 really accurate and solid thriller, La Isla Mínima and El Niño... that's the sauce where I come from =)


BTW attached is a zip with this last photo's 12 hue palette converted into an Adobe Color Swatch .aco file OGorman_01.aco.zip828B
 -
What's UP guys?!! =)
Monsieur Kiselev (kiss eleva, kisses that makes U float) :PJA ja ja I look at all the shit I've been posting here... and reminds me of a magazine... one of those that hurt when ass whipping. Anyway, more chaotic, misc stuff as usual, let's get to it:
• LR customizable
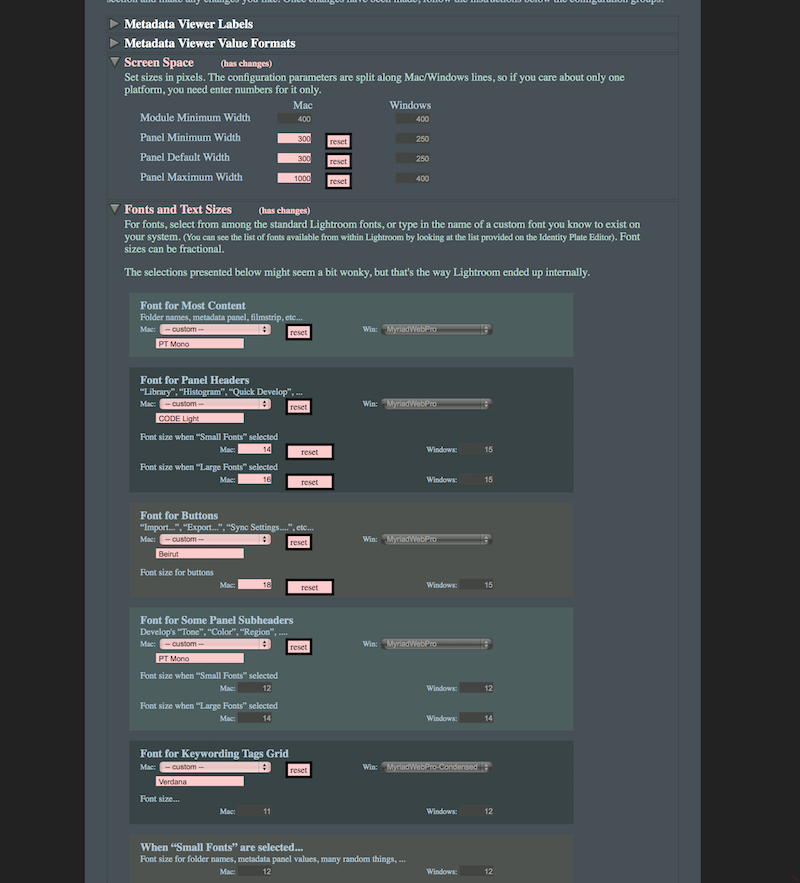
Jeffrey Friedl is quite known by his plugins. But is his LR Configuration Manager that I'm focusing here. Basically is a FREE ONLINE tool for tweaking LR's appearance; for instance changing text type, size or panel's, maximum width, etc. Very useful. It's super easy to implement - believe me - and not harming your app in any way whatsoever. Just select the parameters you want to change, save TranslatedStrings.txt and put it in the "/Applications/Adobe Lightroom.app/Contents/Resources/" folder. Voila!
A couple grabs
• Removing Halos
Recently I had an image (non HDR) that after processing got nasty halos, this TUTO by Klaus Herman was helpful
• Darktable 1.6.6 it's been out for a while, Lightzone RC 4.1 also; however I must confess I've given up on the later, despite its powerful tools, the workflow isn't... for me.
• Towards Self-Powered Cameras // papper (PDF) -- HERE
• Curio, R3 MONOBATH DEVELOPER, develop, stop, and fix black-and-white photographic film with a single bath!!

and a cat, we "have" always have to squeeze a cat

Source: http://new55project.blogspot.pt/2015/03/gallery-of-photographs-processed-in-r3.html
• High velocity sorts need bazookas, maybe
Now this is commitment!!. Despite Jim Winters doesn't know how to crop a photo, his work (planes, motorboats, car races, etc.) is solid, check it out - http://nikonmiami.blogspot.pt

• Can I borrow a TM from anyone to go meet my gradma?
Christina in 1913, Mervyn O’Gorman's Autochromes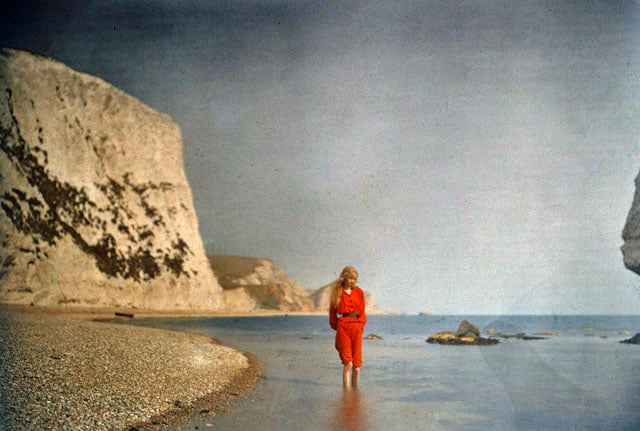
There's something magic about imaginary using physical interactive entropic processes...
• Forensic photography
• Very INTERESTING PROJECT // Too Hard to Keep by Jason Lazarus
Too Hard to Keep) is a growing archive of photos the public deems ‘too painful to live with any longer.’ This repository is a place for photographs, photo-objects, and digital files to exist without being destroyed. Site-specific installations continue to be curated out of the expanding collection.T.H.T.K. Blog


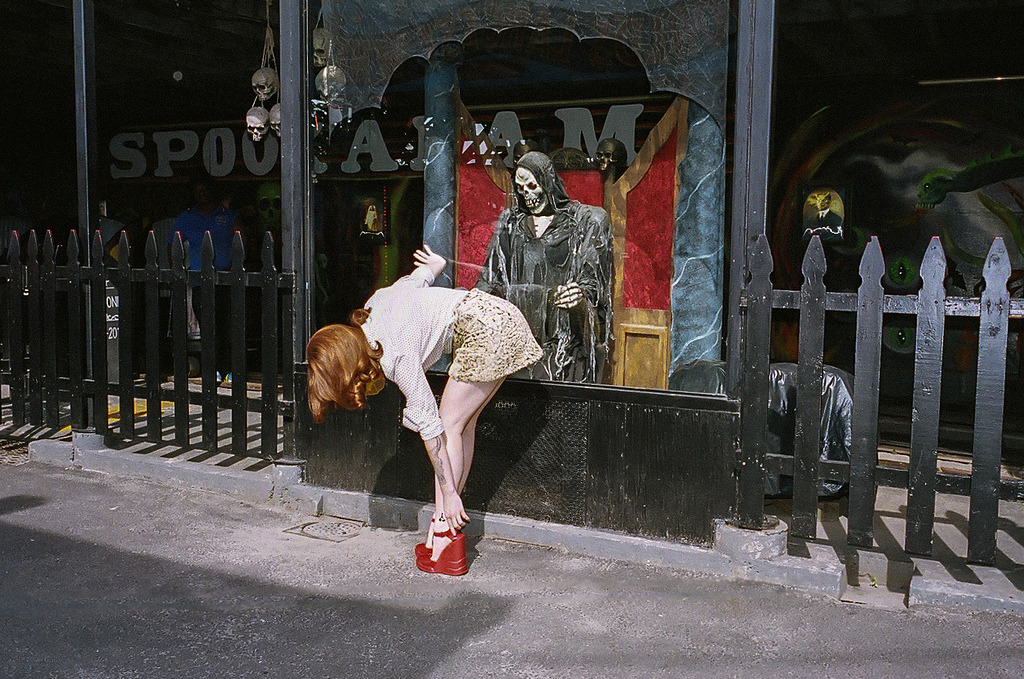
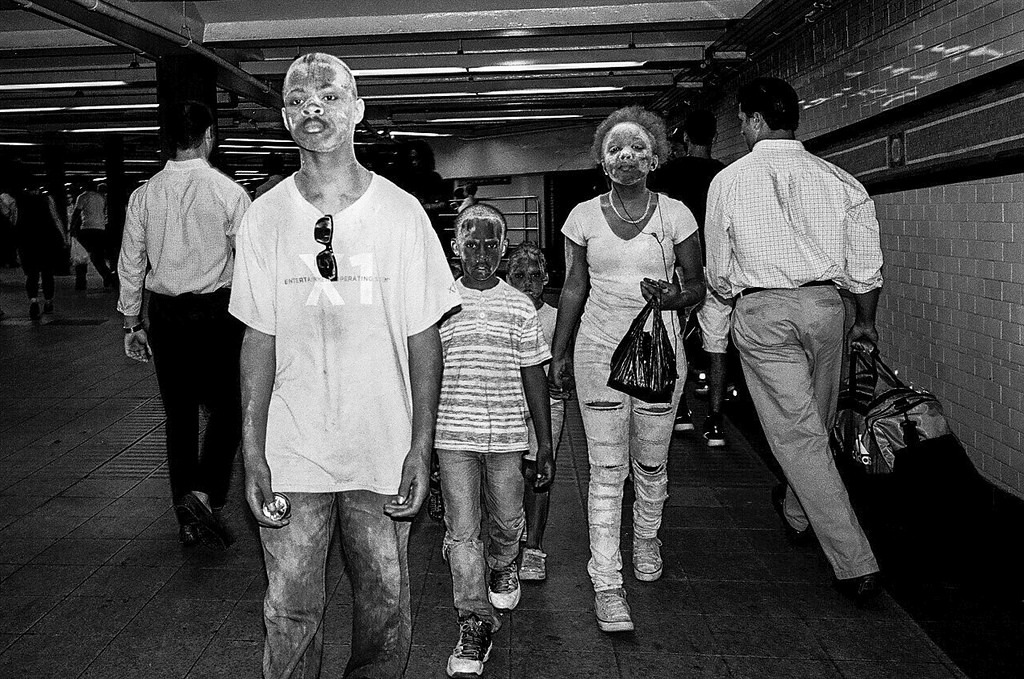
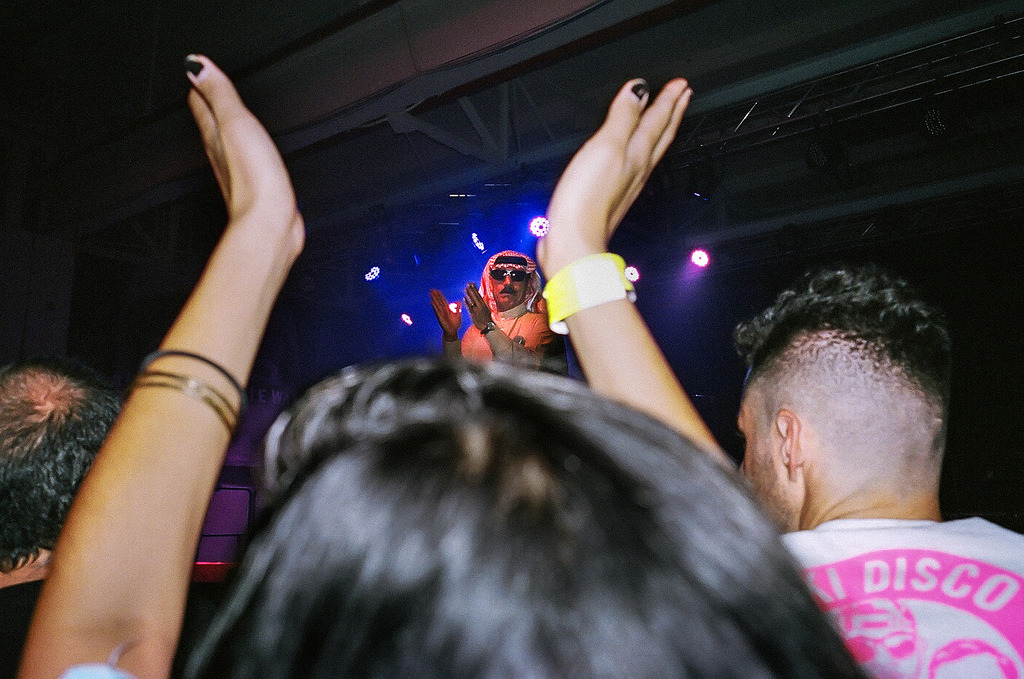
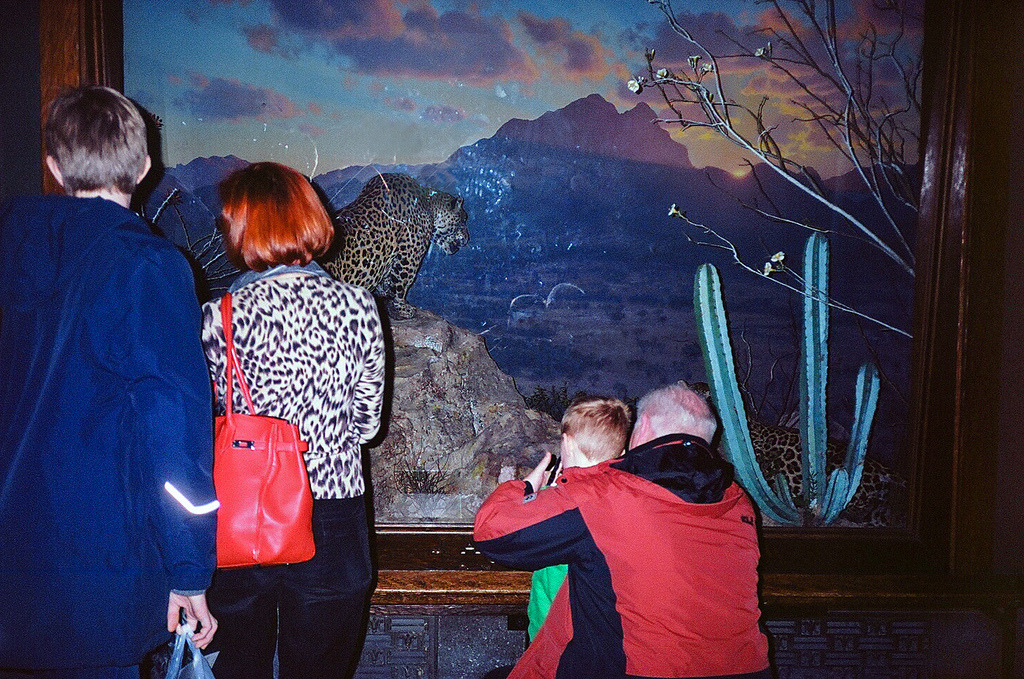
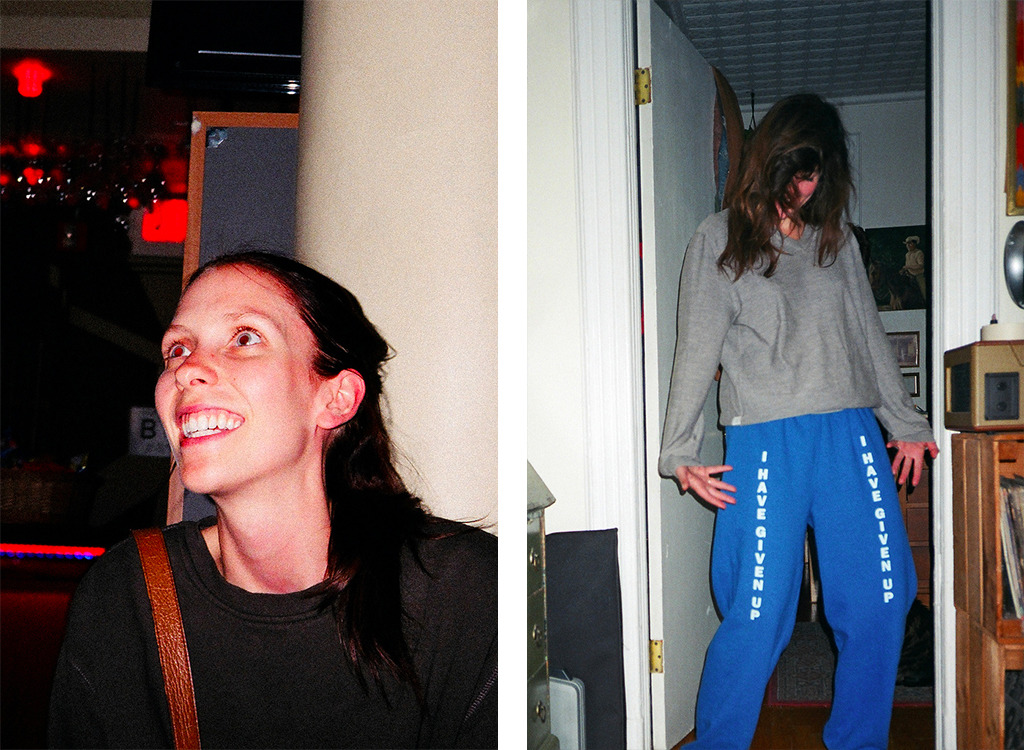
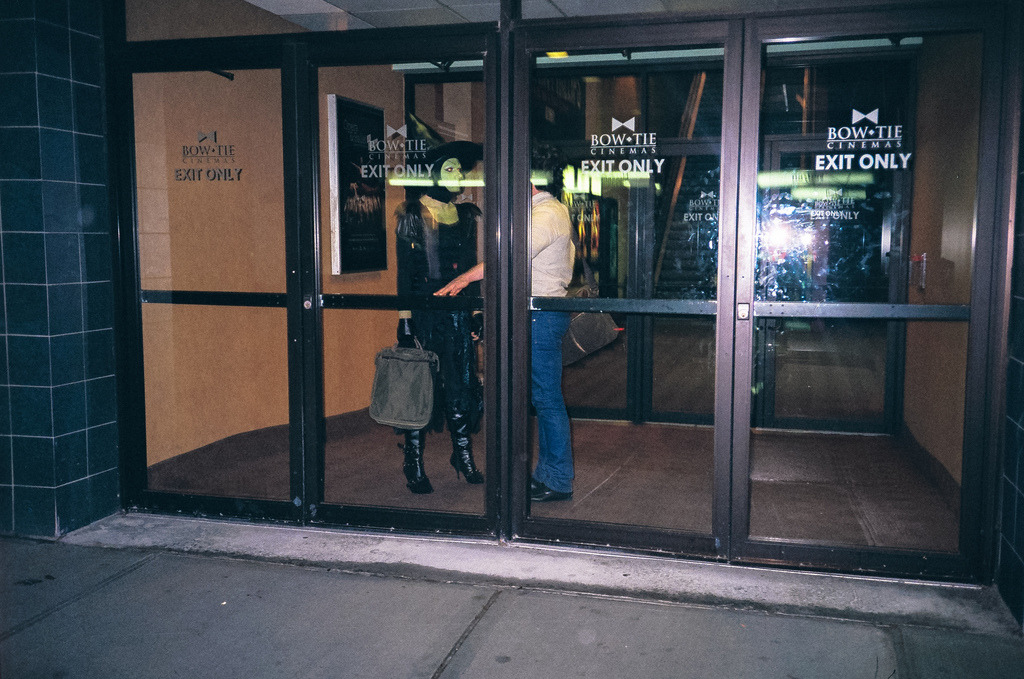
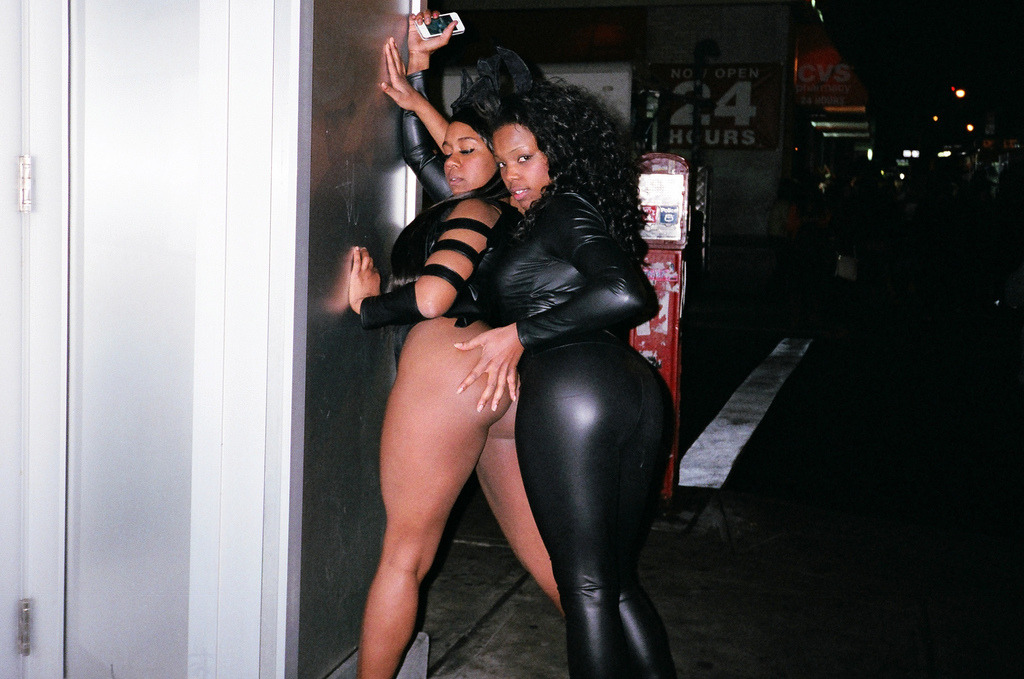
• Finally some fucking serious colour still work (IMO) by Alec Dawson
Nobody Claps Anymore
Well that's it for this batch brothers. Just one more link for the healthier pockets
gashô
-
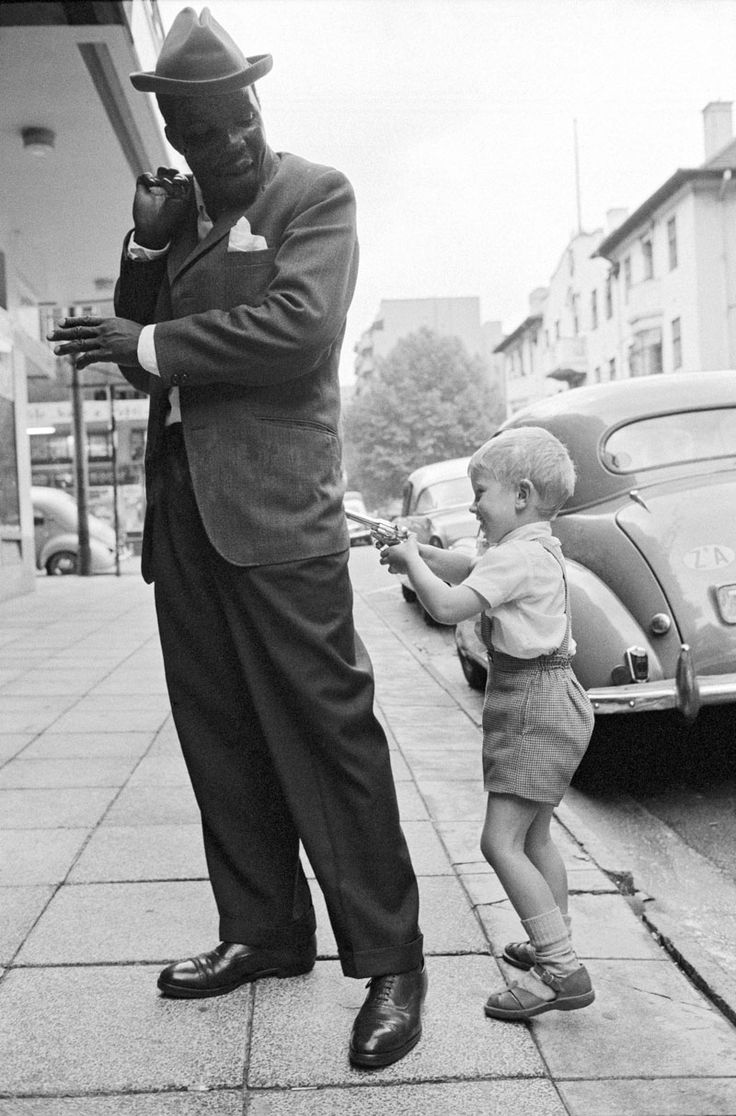
This year World Press Photo competition is nothing but a big fiasco - 20% of finalist images disqualified and one of the winners being accused by the portrayed city itself {with some important arguments} of staging his photo essay - which is something it was bound to happen.
First of all the idea of making an exhibition with photojournalism material is... "indelicate". Despite I only have attended to 1 WPP exhibition and was because at the time I was working at the host museum and of course curious, it was immediately clear to me that hanging a huge print of a tutsi man with his head deformed {by a machete stroke or something} and all stitched up in "the temple of most elevated craft done by humans" - museums are yet another story for a better occasion - was something rather contradictory and literal that I would want to avoid in the future.
I'm all for improvisation, instinct and guts... but sometimes it seems that there's a lack of thought and analysis for more delicate matter. Example; when I started with photography everybody reverenced Sabastião Salgado. Then I saw the pictures and thought to myself "these guy is a technical monster"... it took me some time before I understood that despite all the plethora of aesthetics and rhetoric bullshit there was something brutally cynical underneath the immense skills and wonderful technique; he was earning money, getting famous and respected for anesthetizing people's misery.
I hope nobody confuses here the work I'm talking about, it is not photojournalism - for which I have a big respect - it is documenting the alienation of fellow humans and elevating that to art. There's no denouncing, not a true care, the emphasis lays on capturing the moving scene and make it breathtakingly gorgeous.Anyway I don't know what S.S. is doing these days and if he ever understood, acknowledged and/or made anything to heal his liability and socio-cultural footprint still present in hollow prizes and "philosophies" as the one hold by WPP. Honestly I also stop caring about him and channeled my energy to understand by my own means the emphatic way we see ourselves, we understand and care for each other; and finally how to express and relate that to a code, a language.
One of sources -http://goo.gl/gwqeag
Ahhh, I had to let this out of my system, ufff.
Onone is offering perfect effex 9 for FREE - here
Finally and despite MikeLinn has already post it, I think this 2 part tutorial is rather watchable and Z Arias acts as and probably he's a cool guy. Enjoy it or at least enjoy Page's incredible exercise on... holding her own hands :P
-
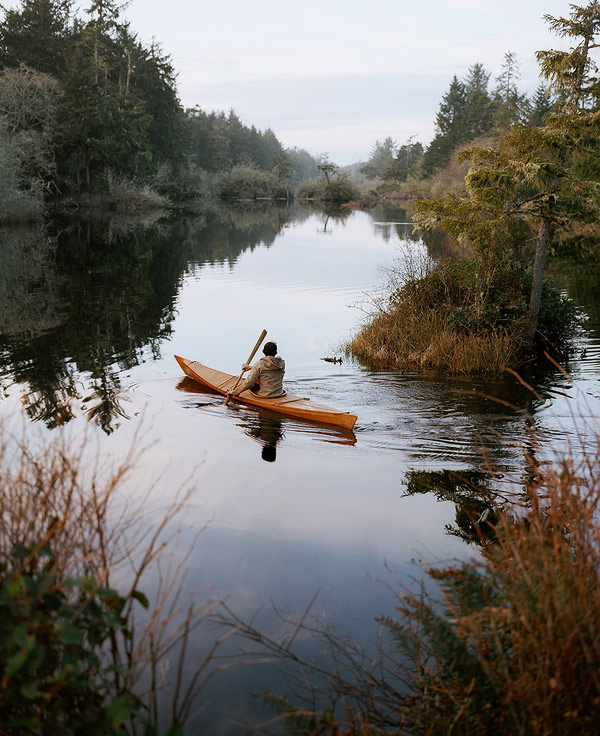
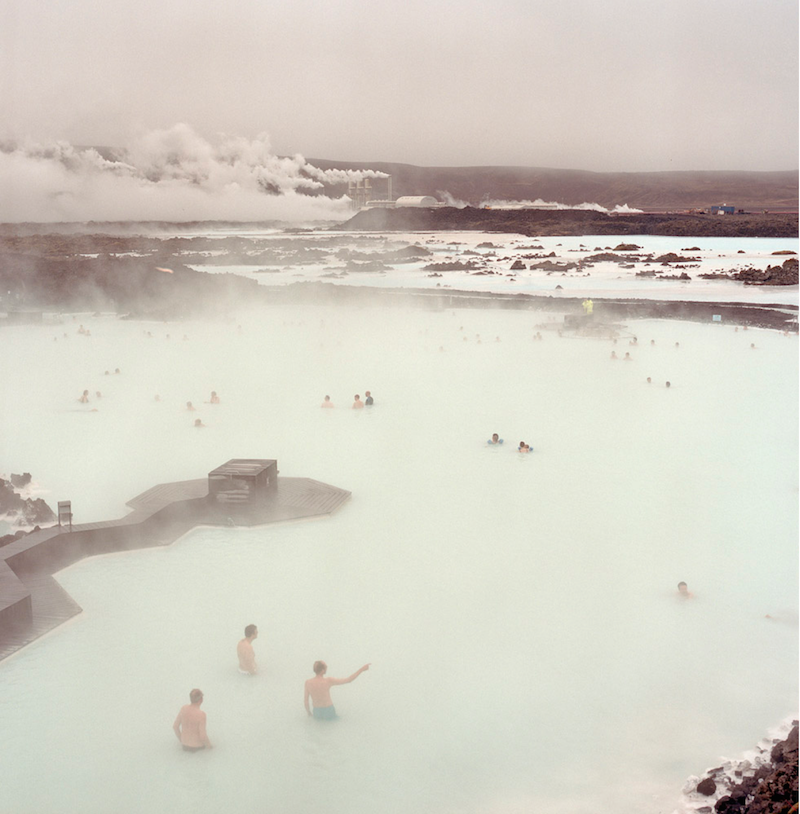
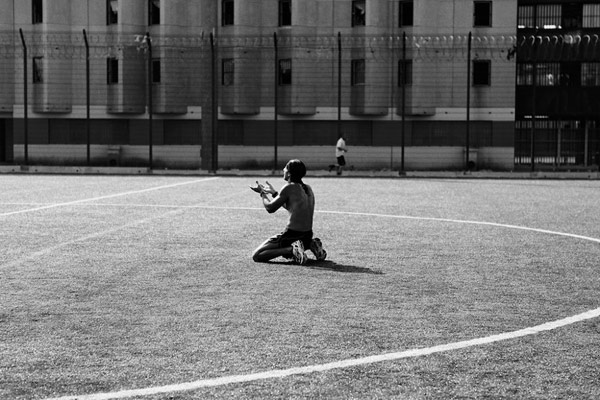
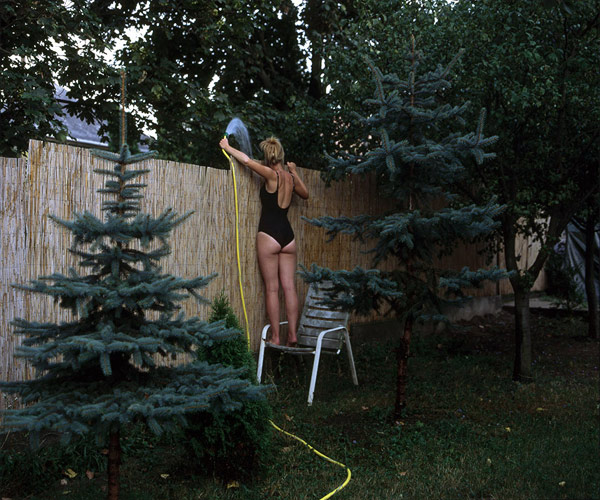
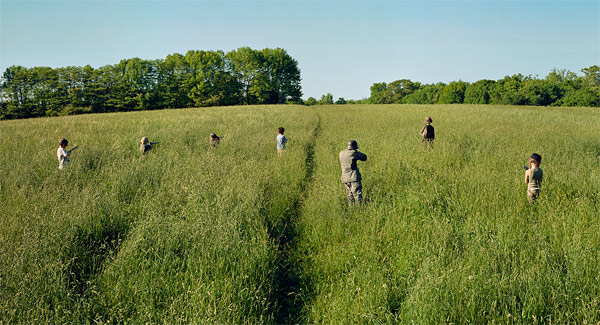
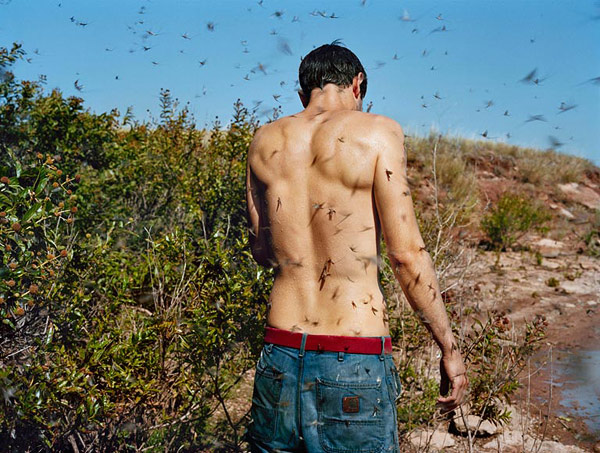
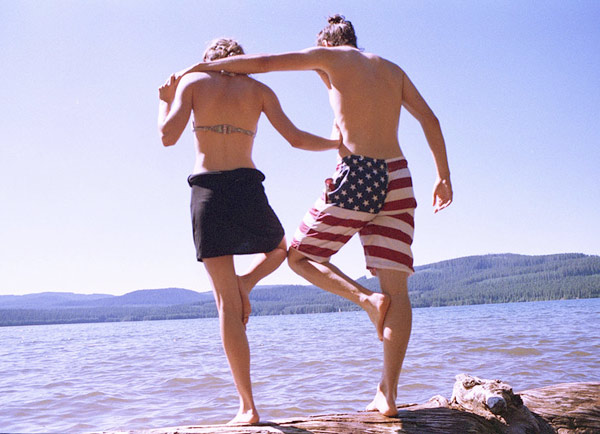
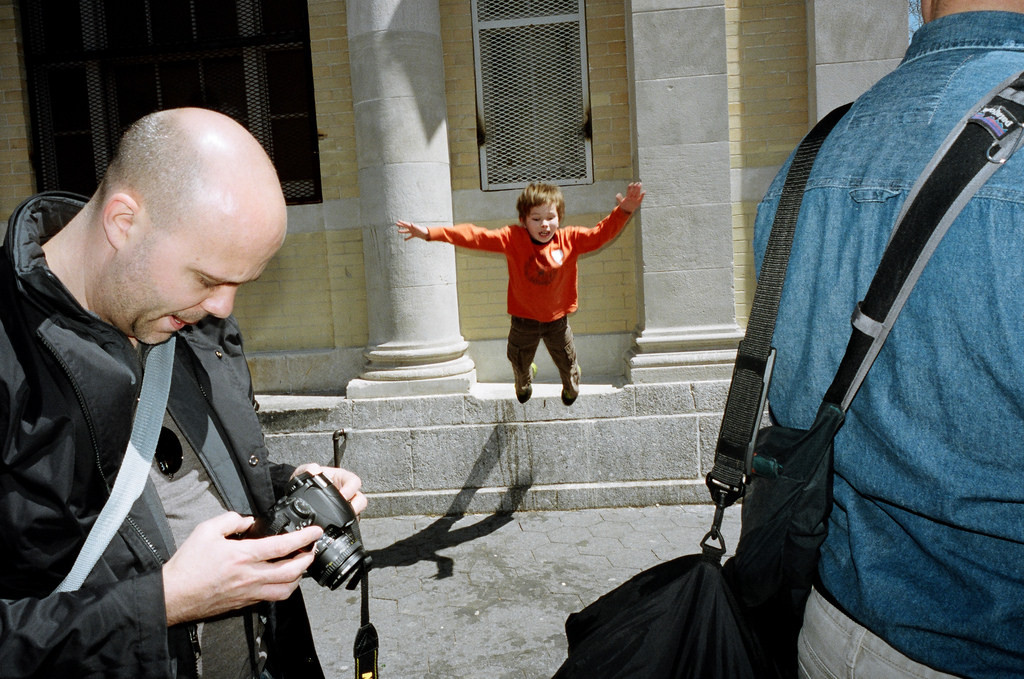
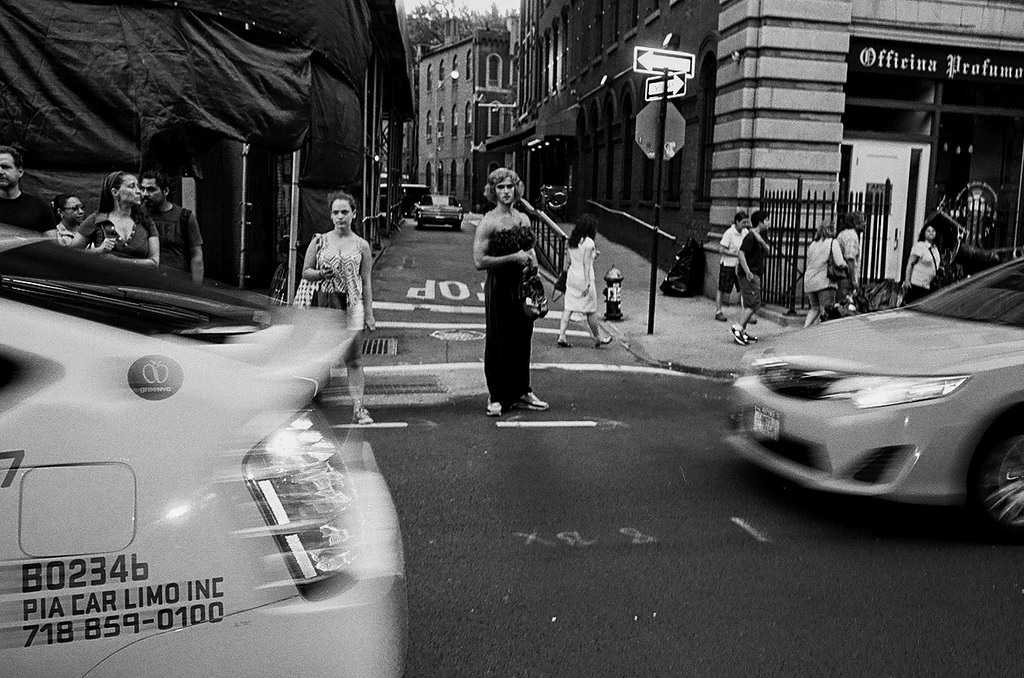
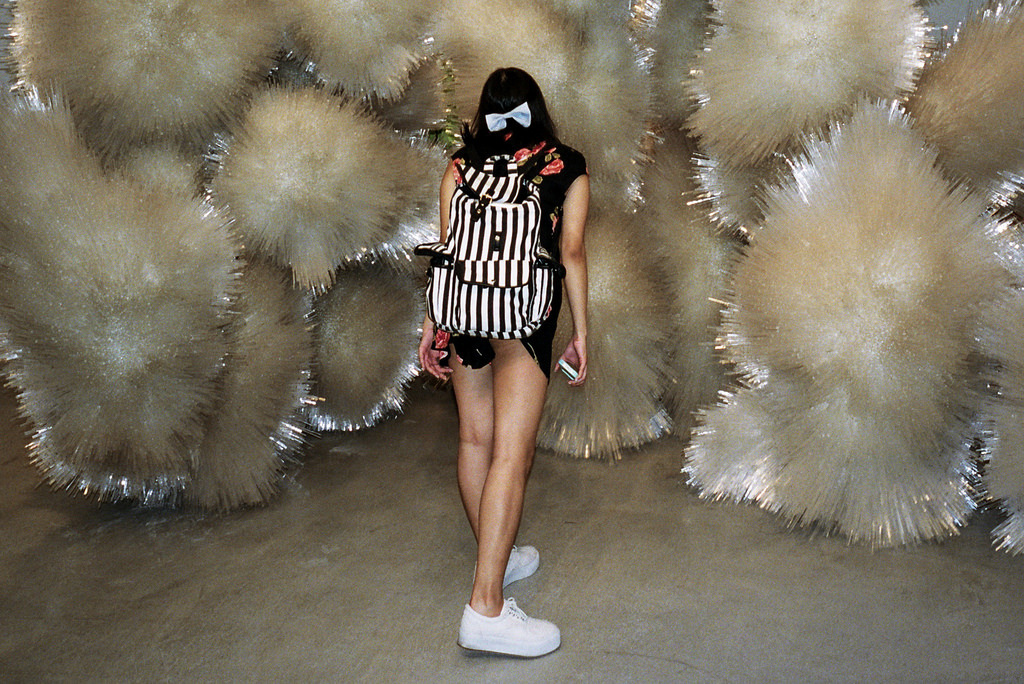
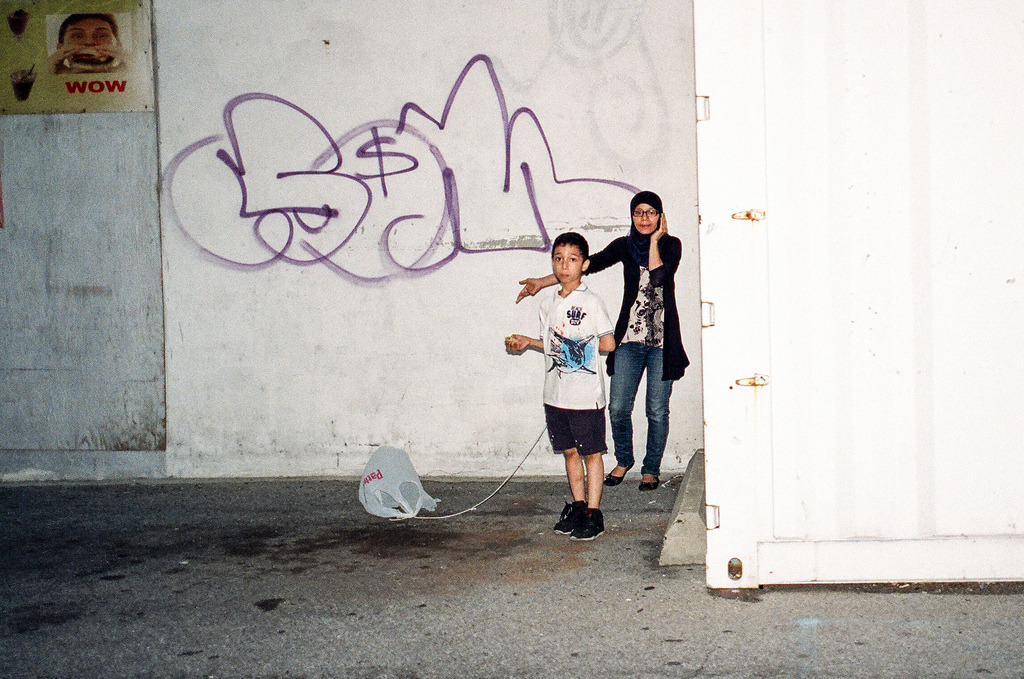
some inspirational photos while digging the Boooooom
Jenny Hueston
Fred Huening
Samuel Bradley
Cedric Dubus
Lucas Folglia
Jason Domogalla
Zaria Forman
Iris Humm
Puzzleman Leung,
Max D’orsogna
Mustafah Abdulaziz
Elias Carlson
Kari Medig
Juan Aballe

Christophe Negrel
Carlos Jaramillo

Danila Tkachenko

Gábor Arion
Harlan Erskine
Holly Lynton
Nika States

Dale Rothenberg

Olivia Bee
Rickard Aall

Nicholas Hawker
BTW, petapixel had today a very interesting article - should go on aesthetic ethics but here will also do =)
http://petapixel.com/2015/02/26/town-accuses-photographer-of-staging-his-shots-that-won-world-press-photo/
This one is interesting reading too
http://www.nytimes.com/2015/02/22/business/peter-liks-recipe-for-success-sell-prints-print-money.html?_r=5
Despite the publicity move, this one's "rescues" some nice pictures and whys
http://petapixel.com/2015/02/07/10-photographers-share-favorite-pictures-shot-leica-m-rangefinder/The techy video
An a heads up, the Affinity app is every bit as good as PS but faster, still beta and FREE
http://www.personal-view.com/talks/discussion/comment/190743#Comment_190743 -
Hi there PV's folks =)
Todays' BS versa sobre Possible mostly free 32bits photo developing OSX workflow
Though most tools have linux and win version too =)

Things you'll need:
Raw Photo Processor (OSX only)
Darktable (linux, OSX, win)
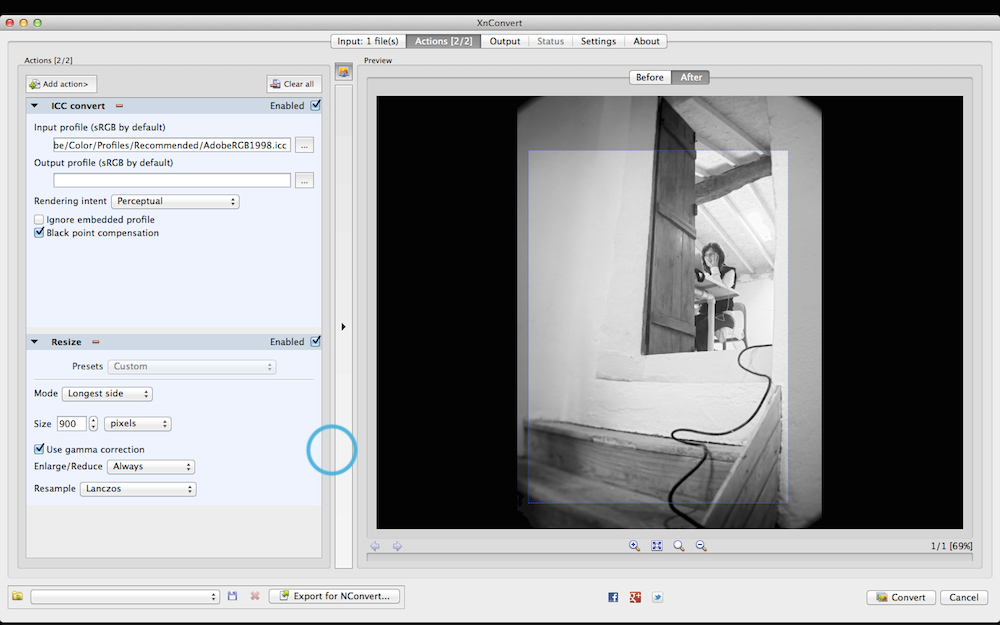
XnConvert (linux, OSX, win)
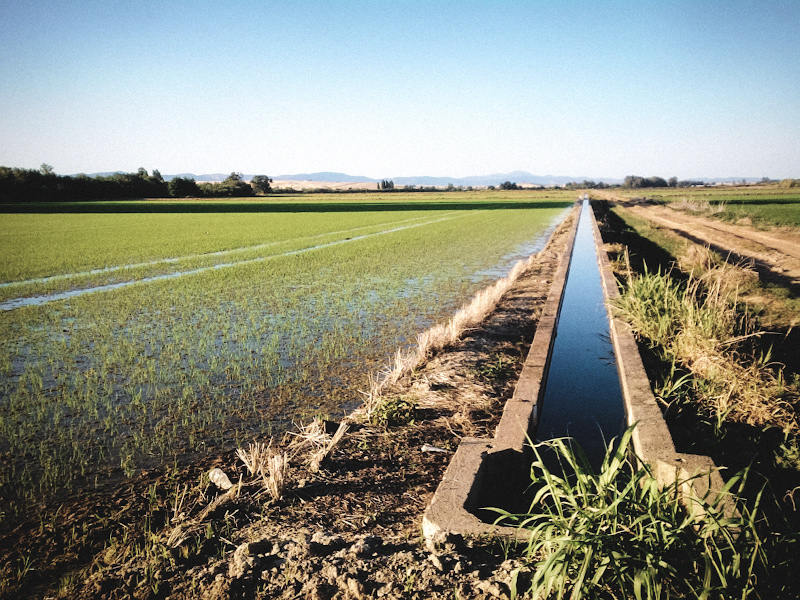
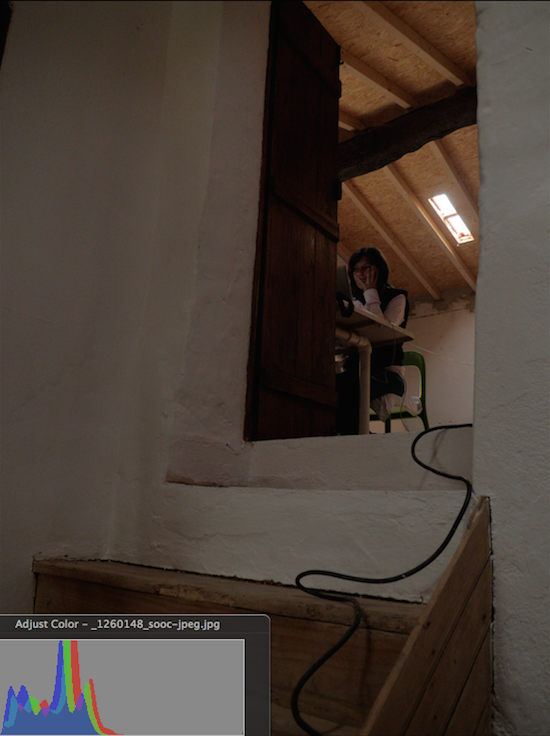
So let's start with the SOOC jpeg, I shot raw and extracted the embed jpeg below. You can clearly see a kind of darkish-amalgamation-with-uttermost-implausible-future-whatsoever-matter; mr. histogram confers =)
I always get amazed by Ufraw, RPP, darktable, Rawtherapee, LightZone's, etc. (all free) colour engine (mostly based in Dave Coffin's dcraw) and how much they manage to extract from the raw, specially side to side with the big boys. For further reading this very interesting Review of Raw Processors by Nine Degrees Below. And also below's a comparison between RPP and Lightroom. See that RPP got so much image that one can see the lens' hood, crazy!!
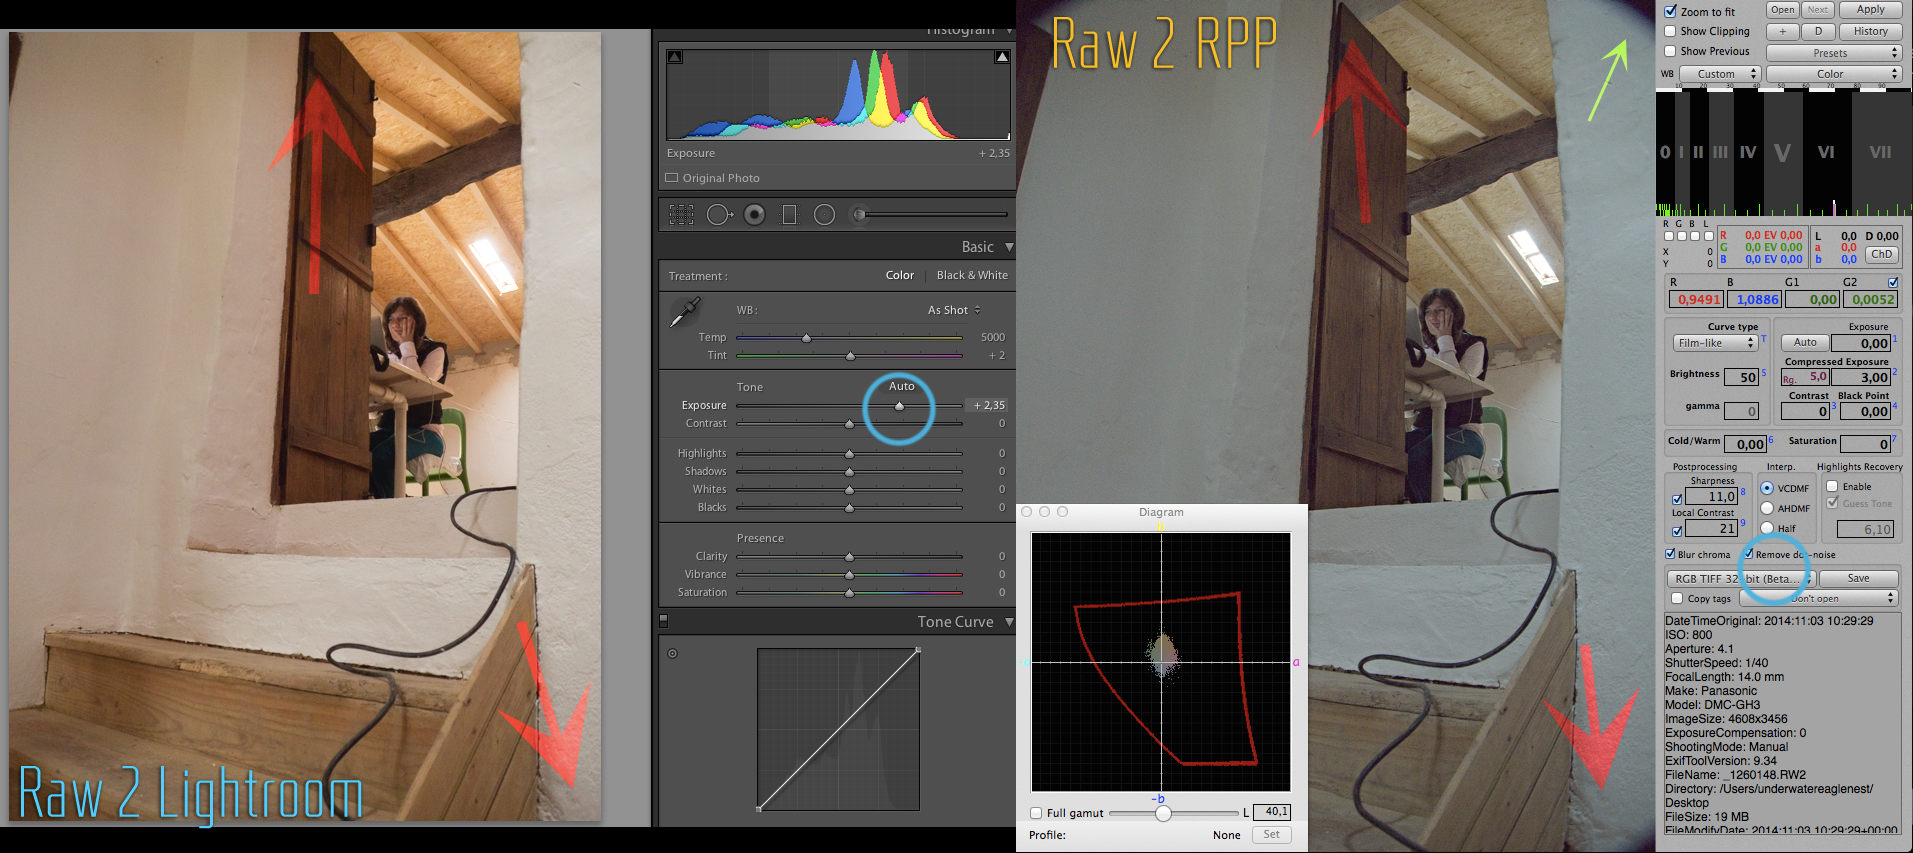
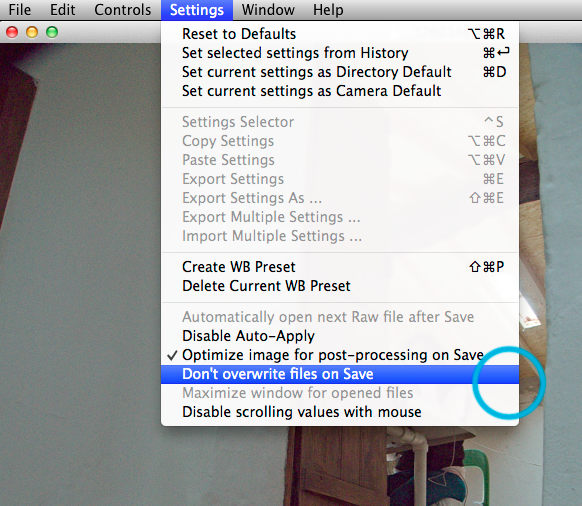
RPP it is not complicated, we could even say it's fairly simple. After some tweaking and tinkering with its controls, one should get comfortable and satisfied (oh no, you're sinning big time brother, you cannot be satisfied!!!) with a set of chosen settings. In my case I experimented with 32bit ProPhoto Tif export. BTW I checked the Optimize image for post processing drop down menu, not that disregarding it would ruin your output, but once Andrey Tverdokhleb (developer of RPP) has created that option, might as well use it, wouldn't you say?
With the tif under my armpit, poor tif, we went into a stroll to chopotop, I mean photoshop. If you want to edit 32bit image there are not sooooo many options out there. There are some drawing/vector programs that can handle it, I tried a couple, there's also Pixelmator. Darktable is an amazing cataloguer and non-destructive image processing platform, it can also export 32bit tif and EXR. Though I have covered it before in this thread, I really like its set of tools and specially fond of their beziers and the possibility of blending every single setting within (I normally use average one) anyway I've used PS for more than 13 years and it's not that I feel like cheating, it's just less hassle (see Fincher's Gone Girl).
So below and just with demonstrative (o demonios tratados en castellano) purposes I applied a couple very simple layers: levels and kodak 5218 - 2353 LUT. When going from 32 to 16 bits one can further tweak the image or make a pause for a nice glass of Douro wine.
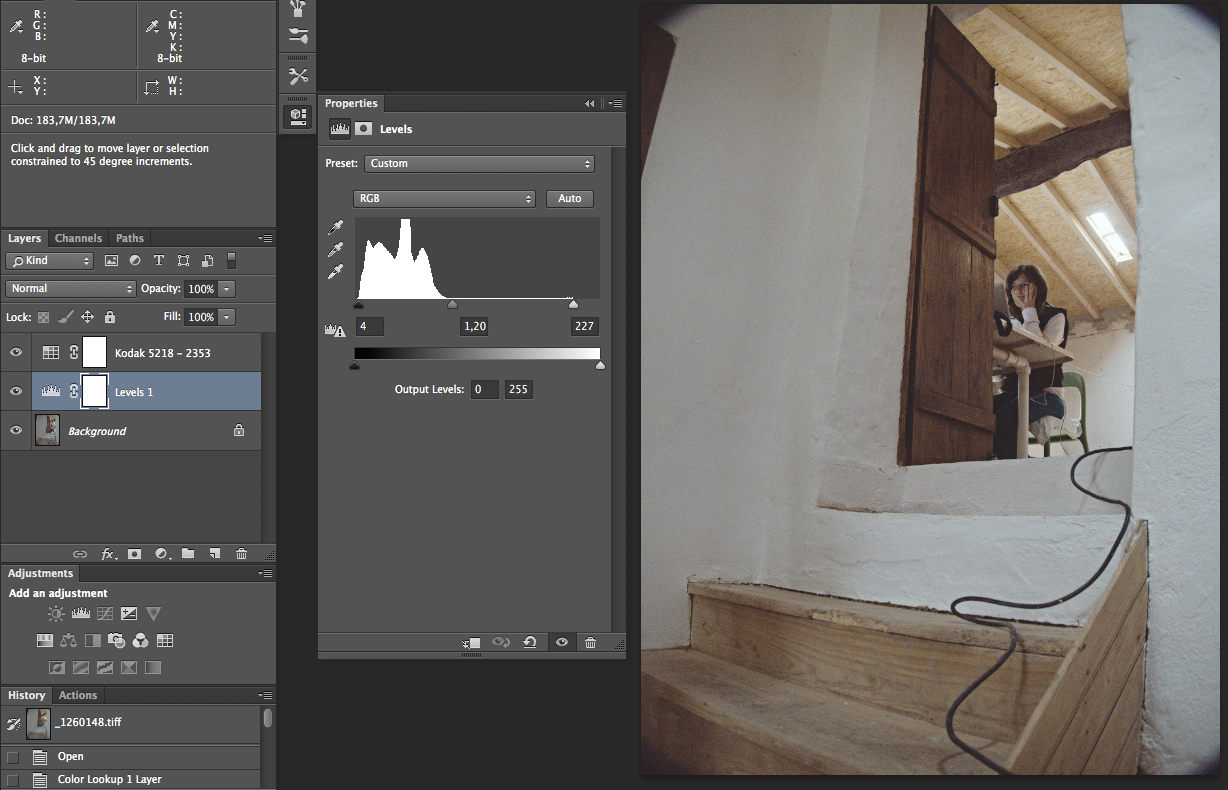
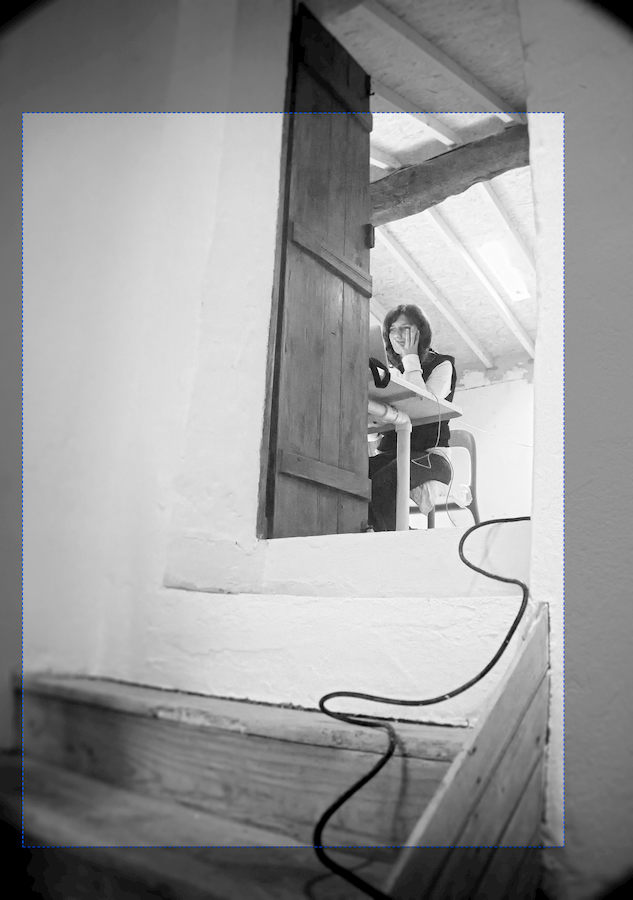
Denoised, vigneted, perfumed and completely desaturated, I end up with the pic at the bottom. Still I haven't decided if and where to crop it, just left some possible marks. That's how lovely Diana checks her email, on autumn rainy Tuesdays while the men are working inside the house =)
XnConvert is a fantastic batch image processor, easy, yet complete and accurate. Very important also free :P I use either good professor S. Sverdlov’s C3C algorithm (handles grain better) - @Vitaly's good advising - or XnConvert (lanczos) to downscale my images, to change colour space and to other daily tasks. Effects and properties are easily stackable and there's a myriad output formats and options for the geeky users =)
I also used ImageOptim to further compress the jpegs/pngs for the web and SetExifData by Marc Vos, both free. If you're using any of the before mentioned apps for commercial work, please donate to their developers, chen kiú
Finally seize the opportunity and fill up your vehicle's gas tank (it might be your last trip, juo jua juahh) • gashô
-
haha, good post, keep em coming
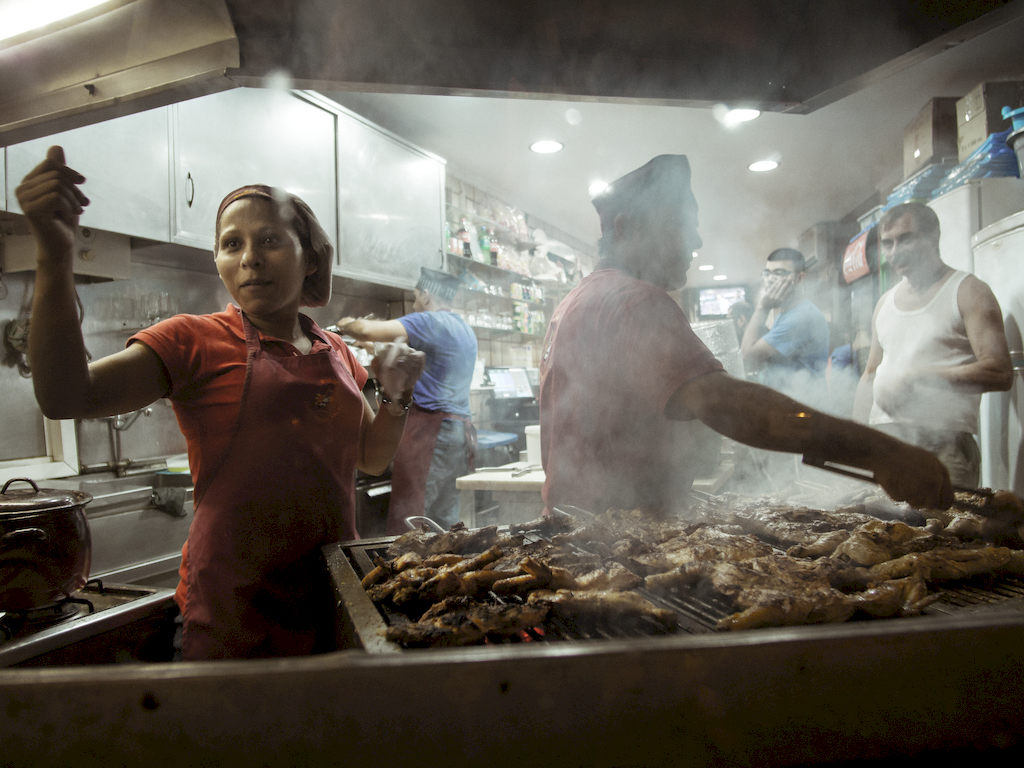
@MRfanny every time I read that sentence (in general) I can't help to visualise overfed, featherless and scared chicks massively running away from a huge dark, smelly factory-farm =)
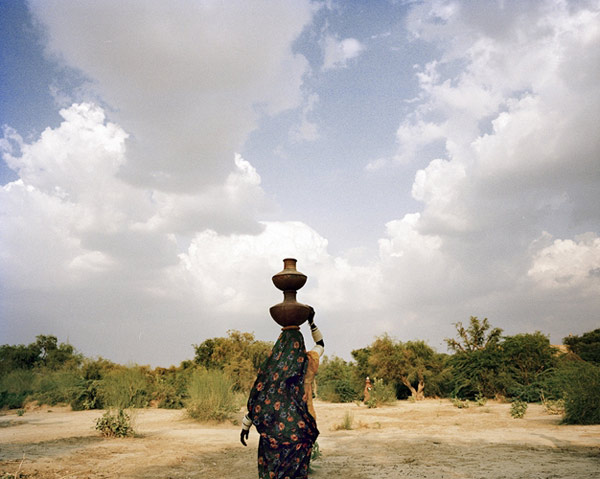
Anyways, today will be short. I would like to emphasize the importance of choosing/stabilising/creating a colour palette for your photographs. With the intent of getting pompous, redundant and preachy, I'll say that is a second subject, an unveiled story, a visual harmoniser (or trigger) adding and aiding the purpose of the work. Sounds pretty smuchy ok.
The colour might be there, almost always are, even if one does not consciously notice or aim for them, they're already grabbing our attention. Normally I'll let myself be "trigger" by the whole (subject, light, context, etc. etc.), then frame and most of the times is immediately after framing that I would start noticing more subtle details, hues, stains and dead flies.
I used to be more concern about the precision of the framing, nowadays I prefer to give other "subtleties" a chance; so I went a bit wider and more relaxed. Then the magic starts in the darkroom... well the shiny screen.
I develop 95% of my stills in Lightroom; why? 'Cause it's just a base, a kind of "neutral" 1st grade that will suffer further tweaking. I found that LR's camera settings will most of the times be best colour complement to WB. I force myself to leave contrast flat as I prefer to apply an analog film response curve emulation (many times my own recipes) afterwards. Very seldom I apply sharpening after this 1st export. Like in a grade, tweaking the colours will also give you more contrast and enhanced separation/sharpening/structure.
All of this mambojambo is very subjective and it has to be, because each person has a unique way of rendering; to the inside and to the outside, je je. Personaly, it's a big priority to understand (and it has not to be a rational process) what kind of "ambience" I'm after... there's a lot of playing around though.
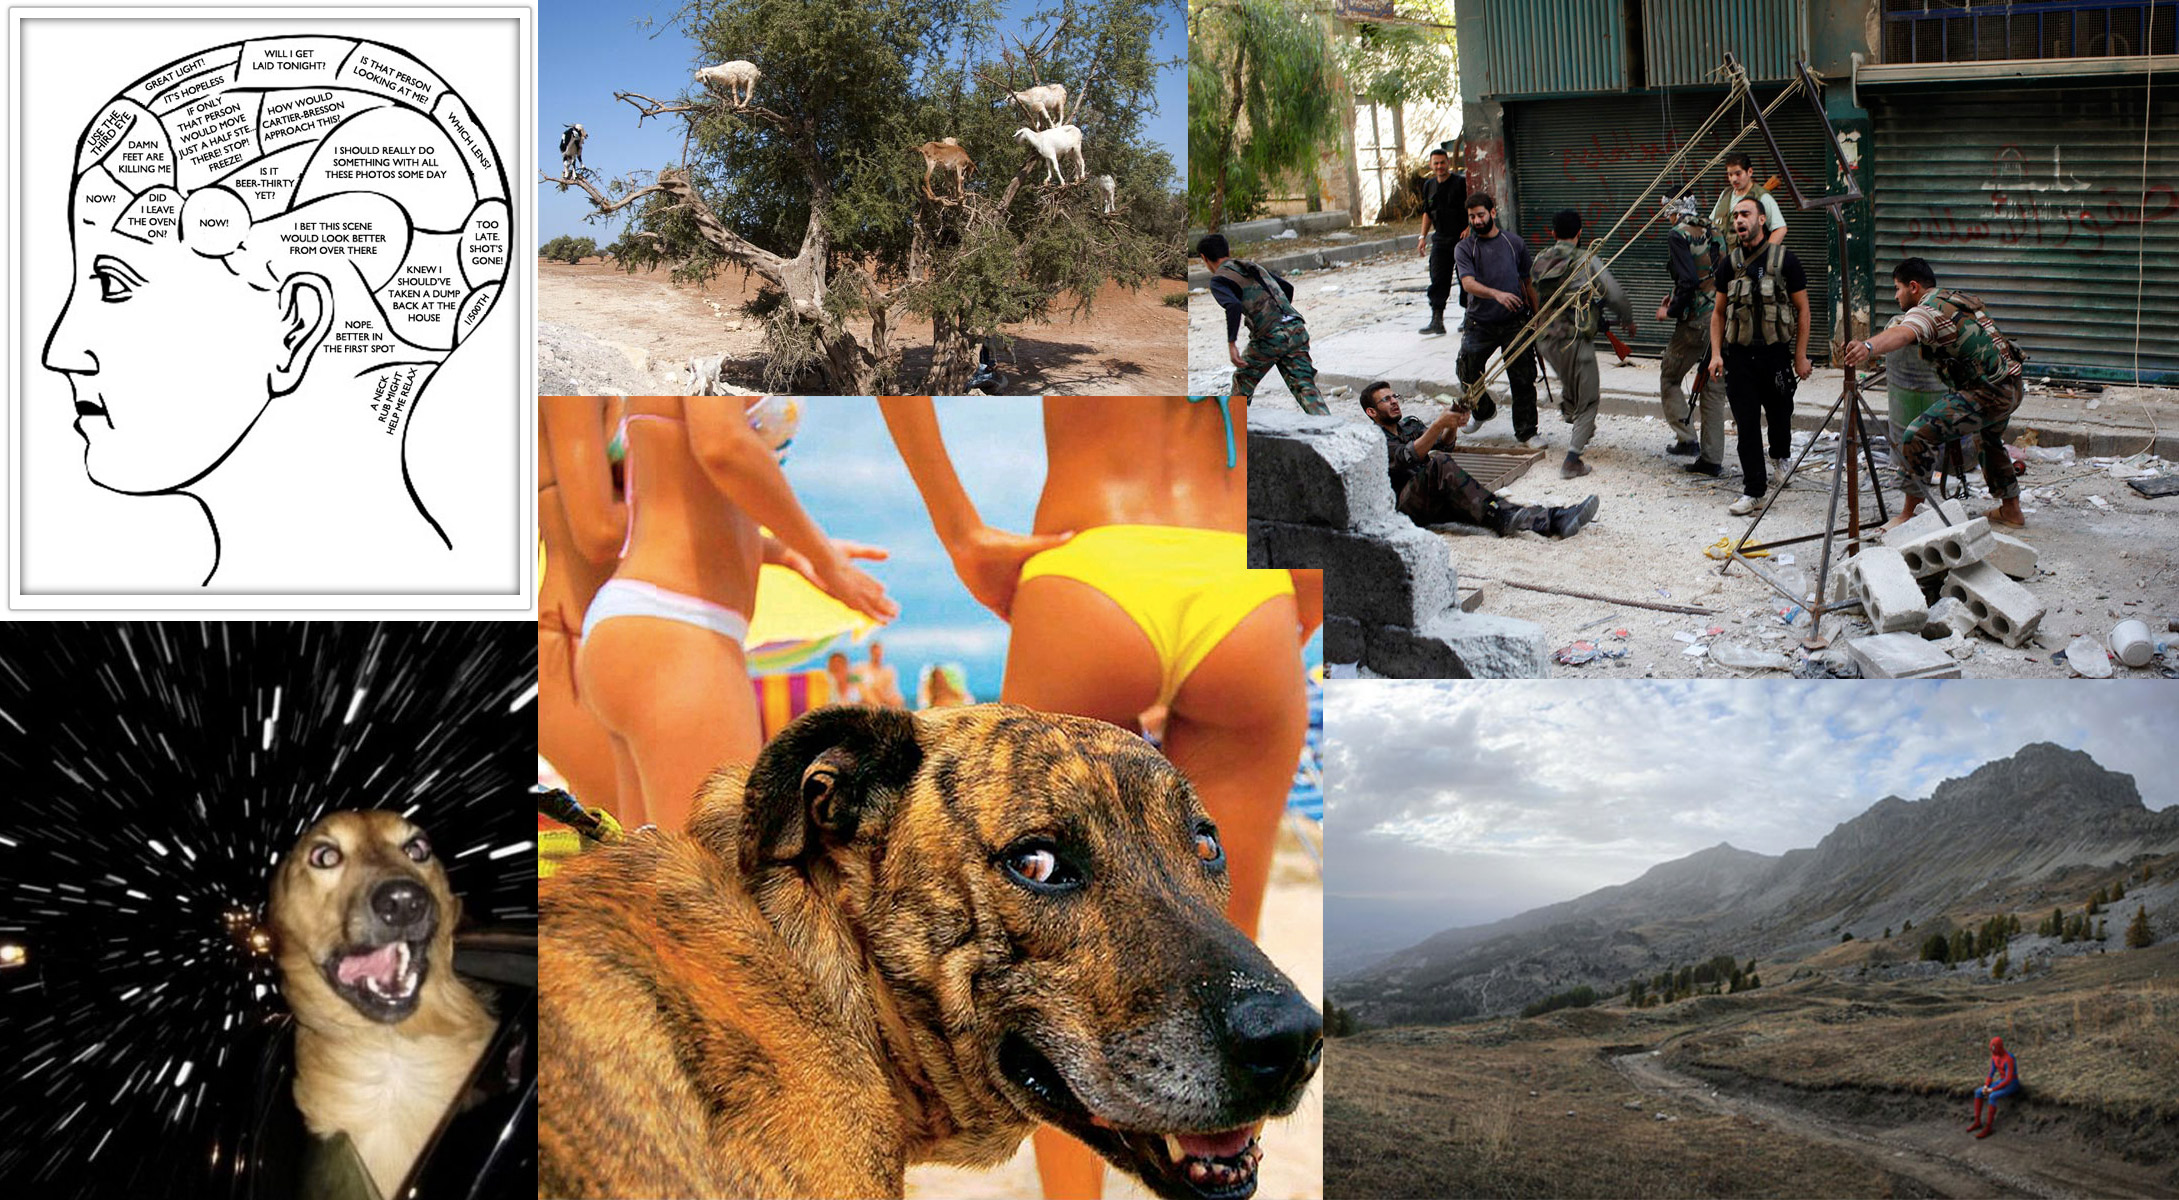
Now three examples
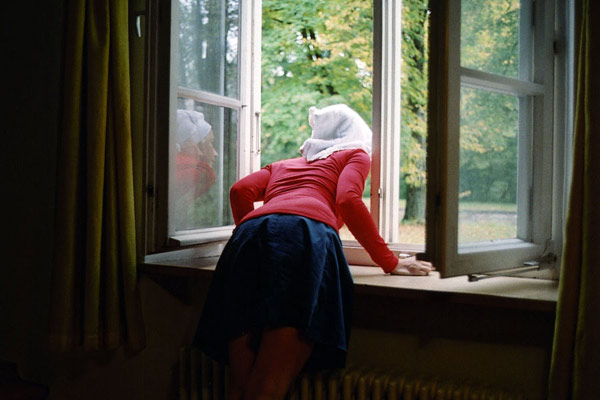
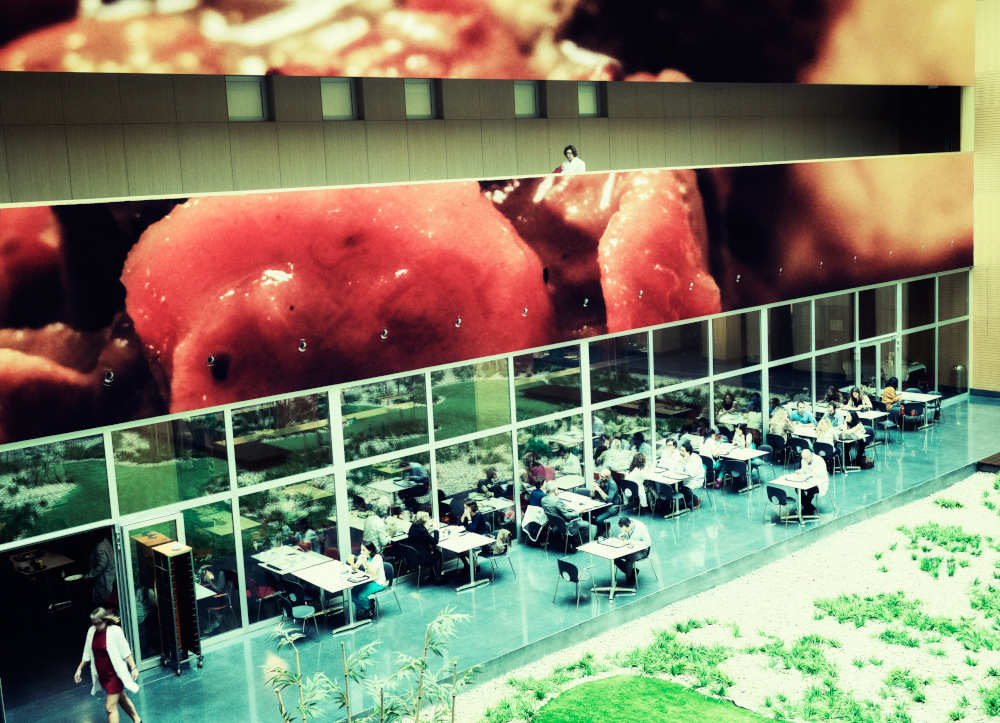
In this one (a collage) I imagined a weird Institute's (hospital, mental facility, quantum mechanics food fusion lab) open space - http://personal-view.com/talks/discussion/comment/185251#Comment_185251 - so pale brown sugar, yellowish HL and pastel plastic greens and turquoise cyans came out. I didn't aim for horror so I massage the deep reds to a watermelon burdeos :P
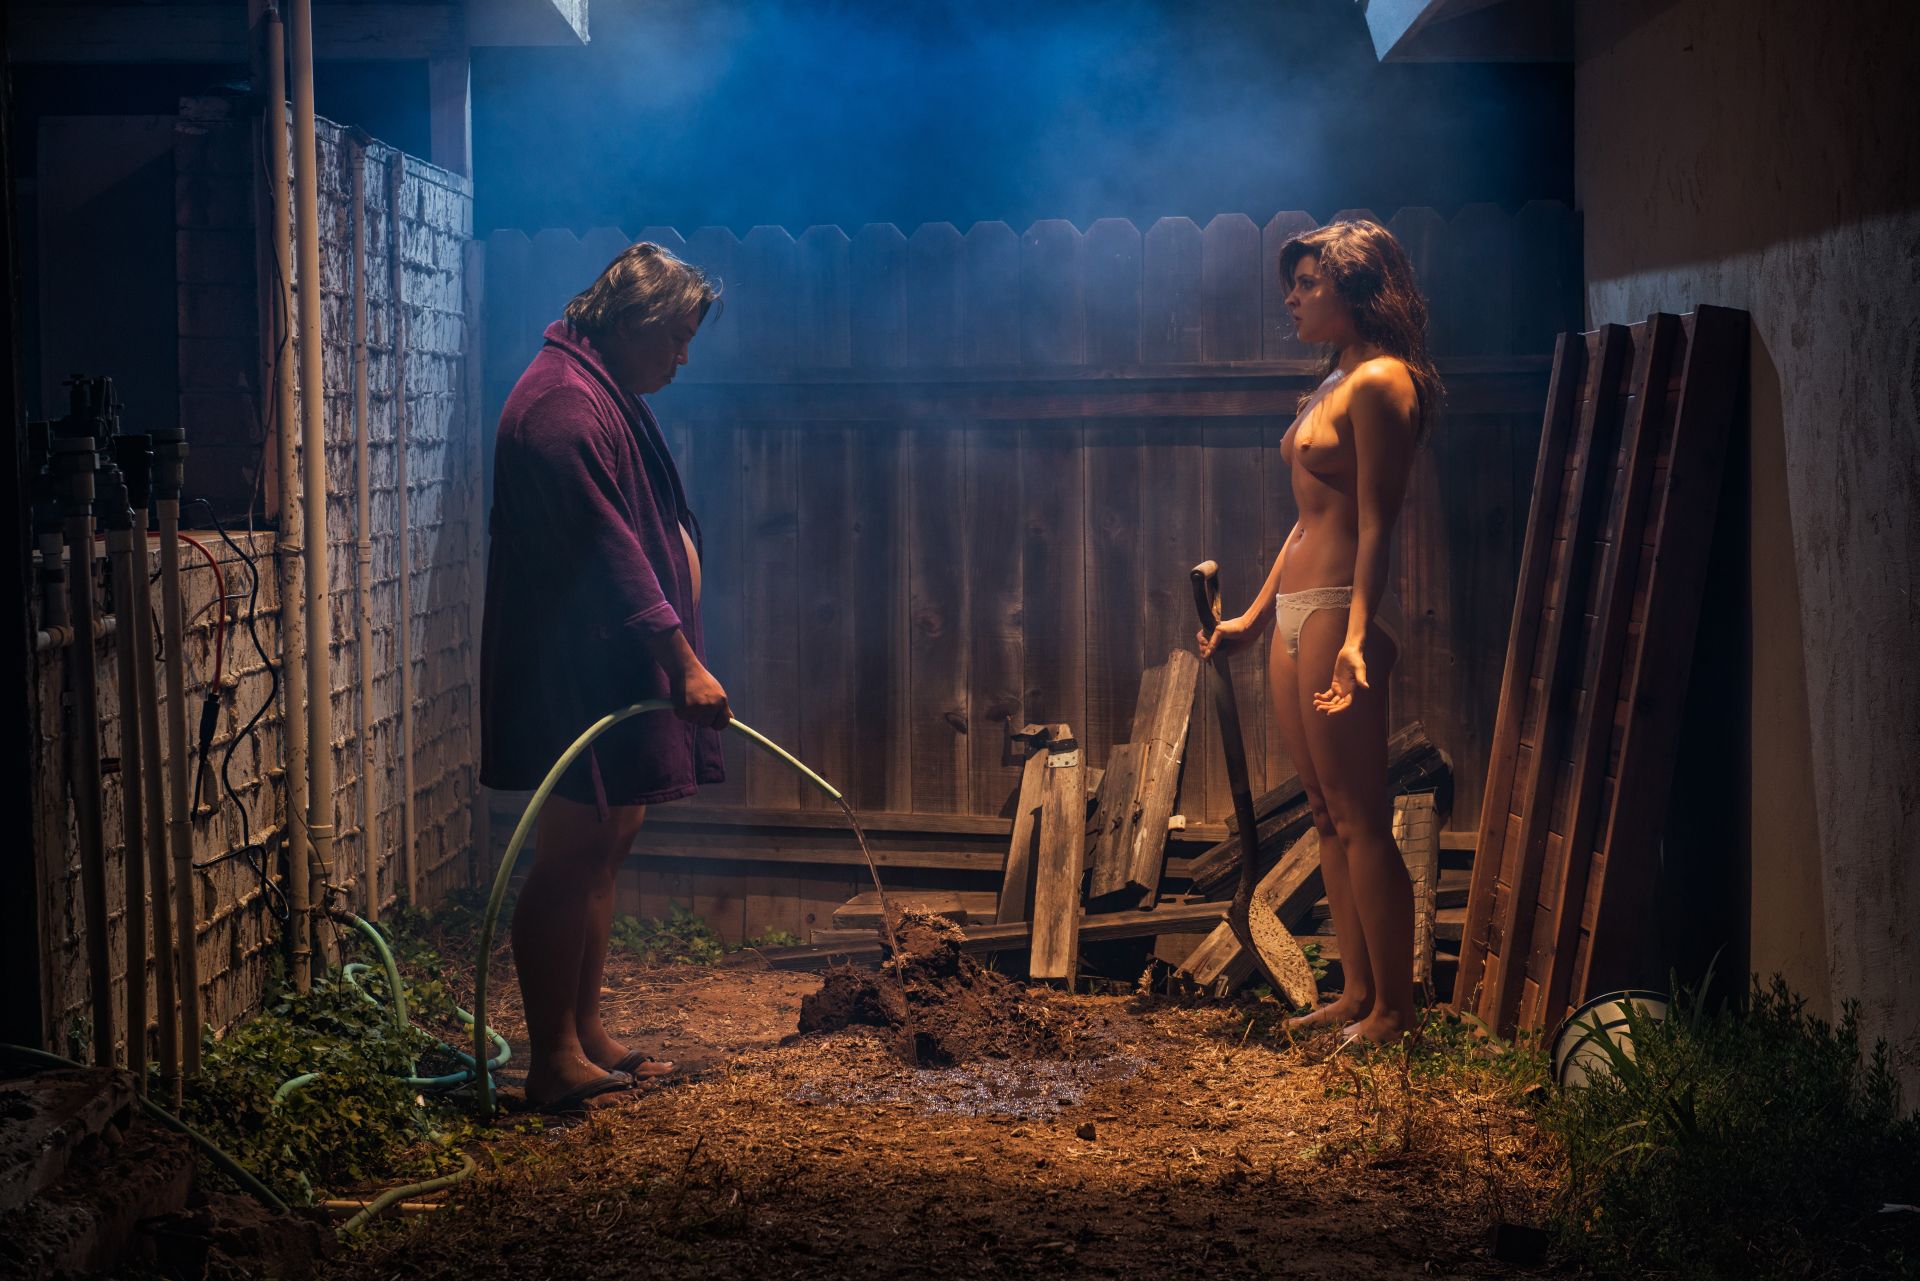
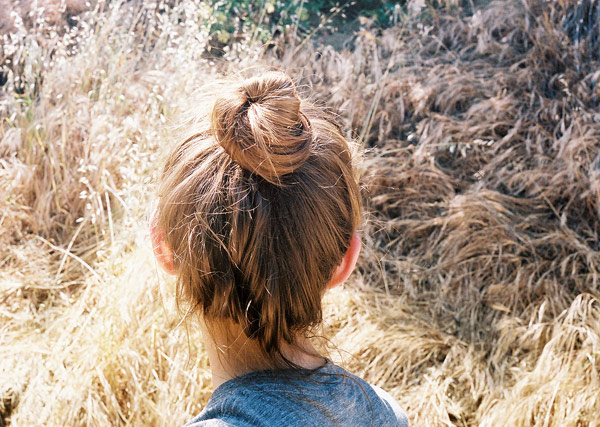
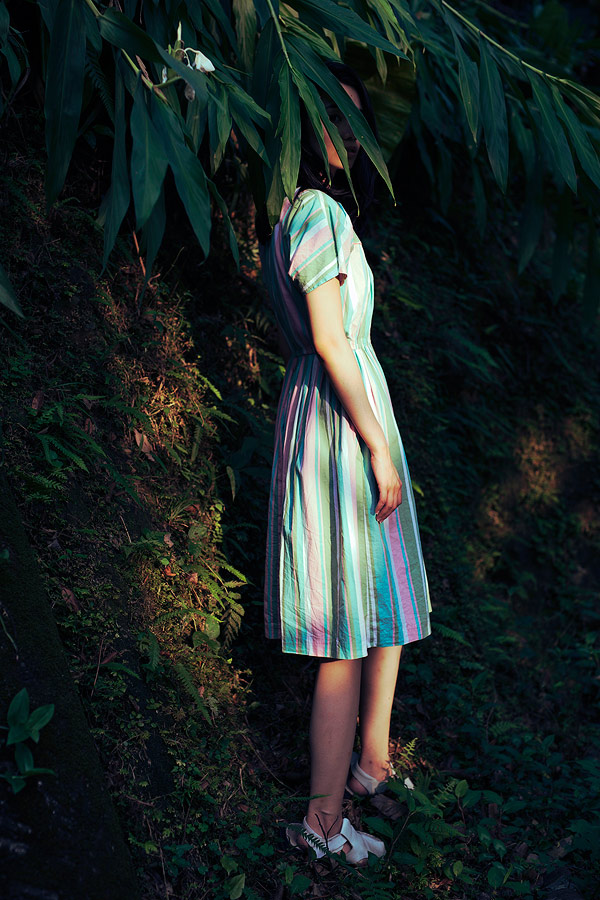
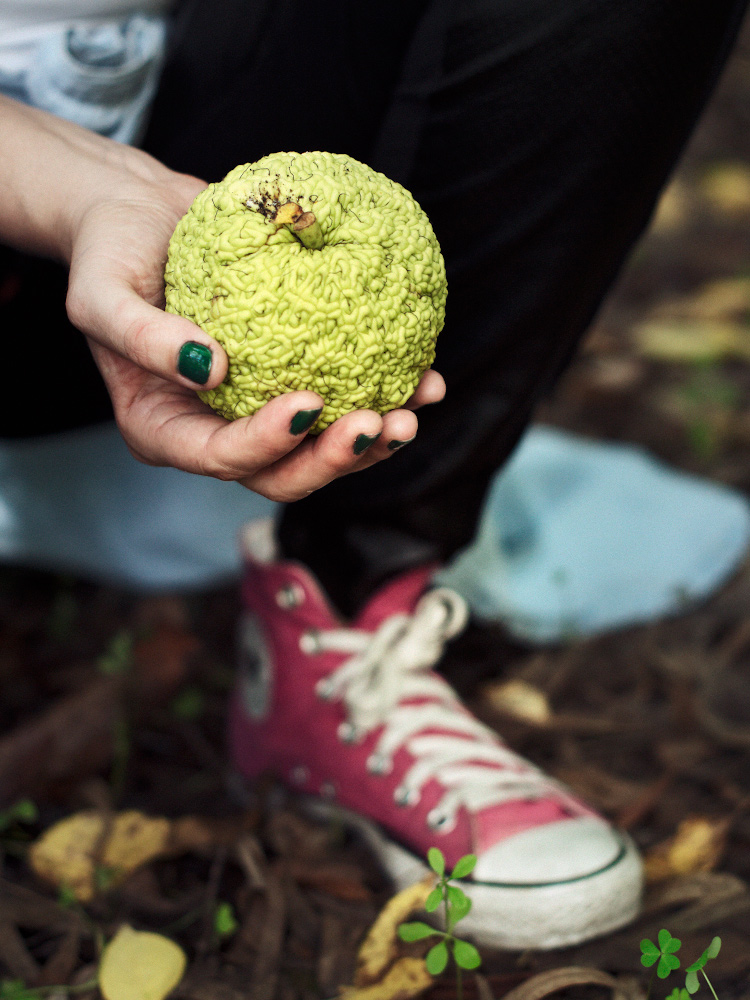
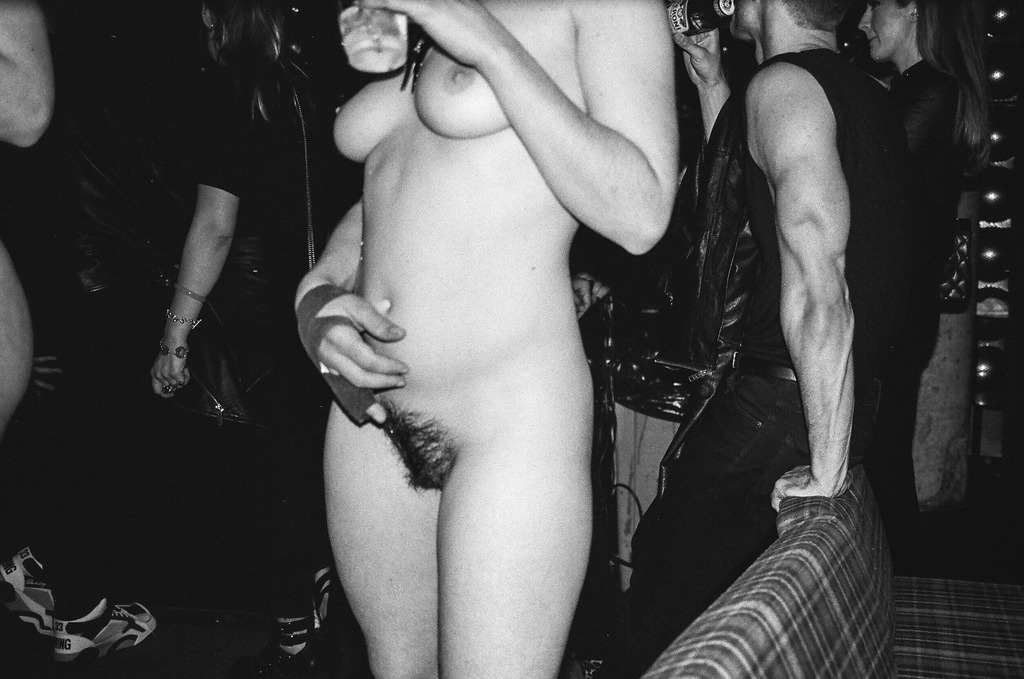
Here I just fell in love with acid green, celeste and pinkish trio; which the green splash of the foreground leaves and the deep jade of the fingernails complement well. If I don't recall badly, I also went with a mix of cross processing, film curve and cross balance + my own tweaking of Fuji Superia 1600 grain & curve. I still have to understand what the fuck is that thing in her hand!!!
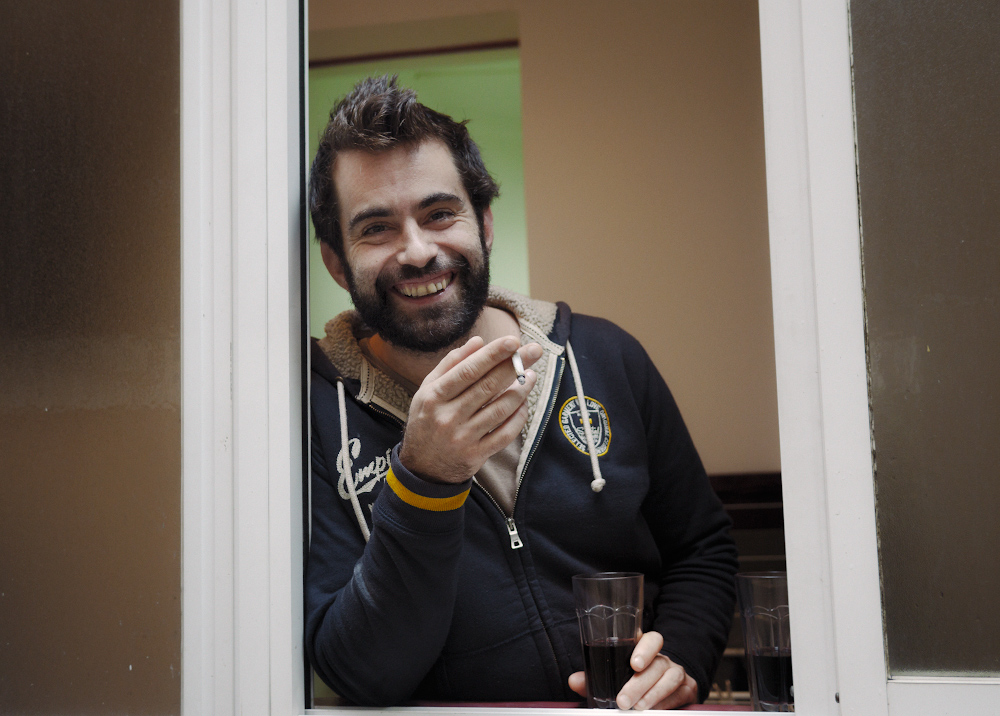
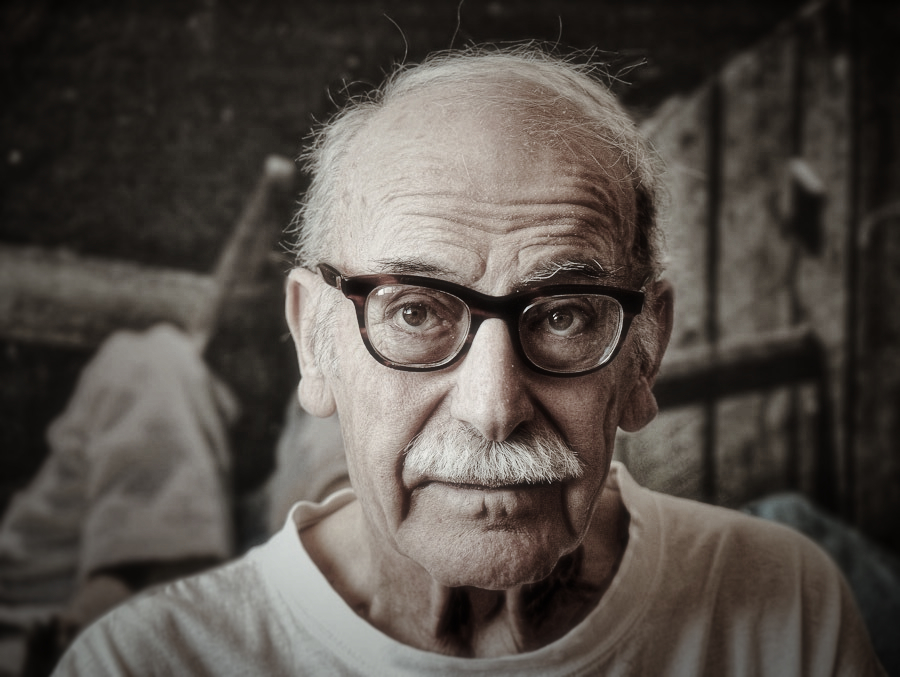
A portrait of great percussionist, kinetic artist and friend, Paulinho. Joint in one hand, glass of wine in the other, the belly full, he's happy and so was I. In this photograph I liked how the green aurea background showed up above his head and the brown cane on the sides of the window and a more pale (serene) version on the BG wall; that and the yellow ribbon of his sweatshirt I tweaked and cranked a bit saturation. I think I used Kodak portra... or was it ektachrome curve? And a bit of glamour glow =)
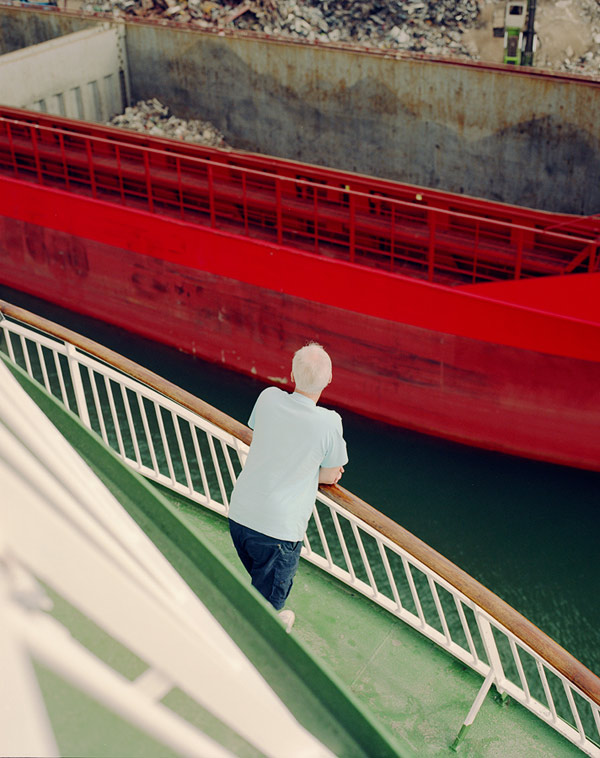
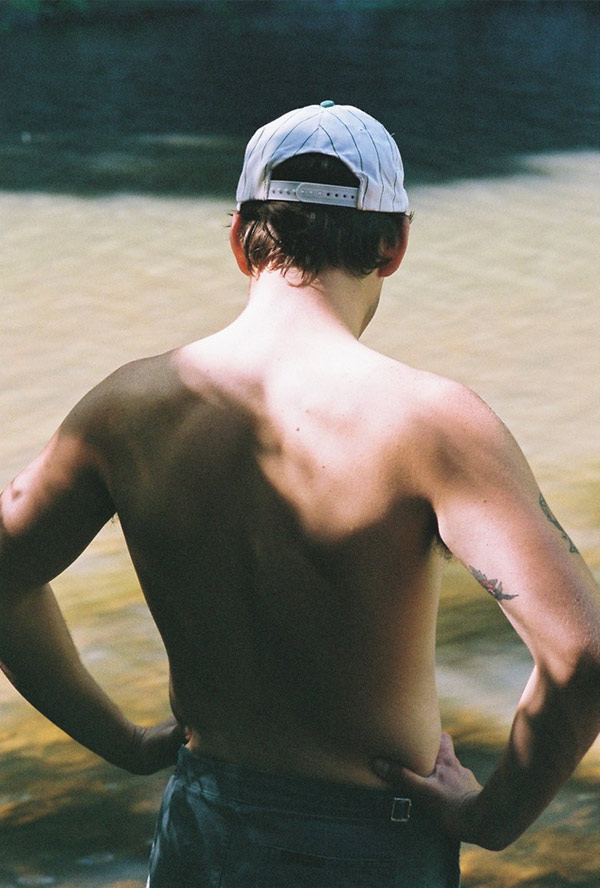
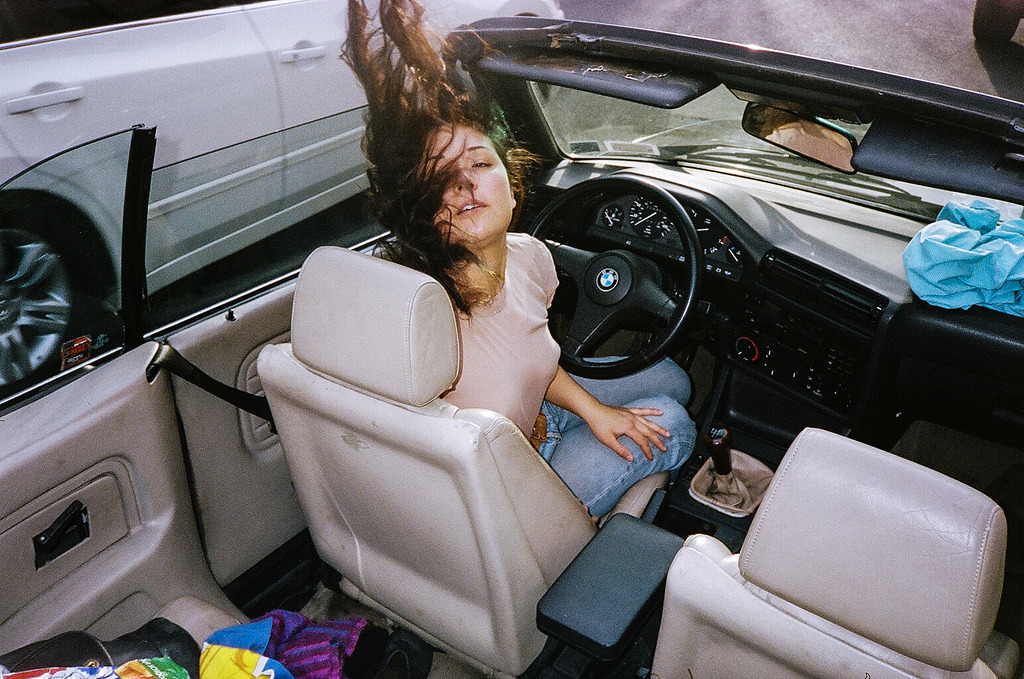
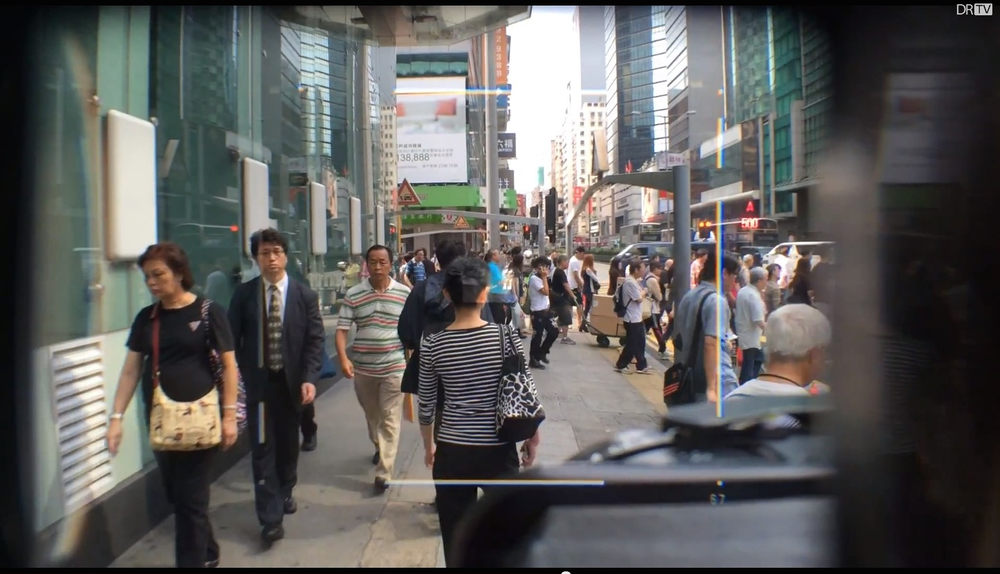
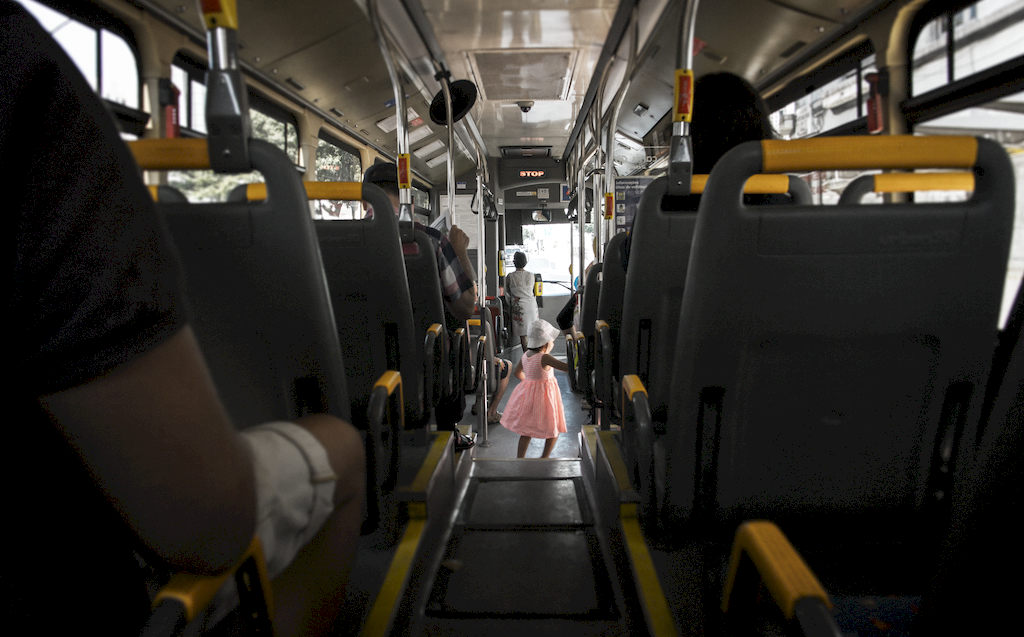
This one doesn't need much explaining. The blue sofa, the blue construction wall, the guy in blue, balconies of BG building in pale blue, the sky with blueish shades of grey, a metro fingernail in red and some stripes and splashes of yellow. Desaturated in general 'cause the vision didn't convey much happiness or joy. I want to remember that this one was developed in Capture One, I wanted very precise control on colours.

So, that's it; here are some other examples posted in these forums (1, 2 and 3),
I wish I had more time or better examples but life's is what we have at hand =)
Almost forgot THIS -
haha, good post, keep em coming
-
Whazup fooool(k)s?!!! =)
Let's get to today's pile of photographic related bullshit, shall we?
Tony Roslund SUPERB beverage product photography TIPS
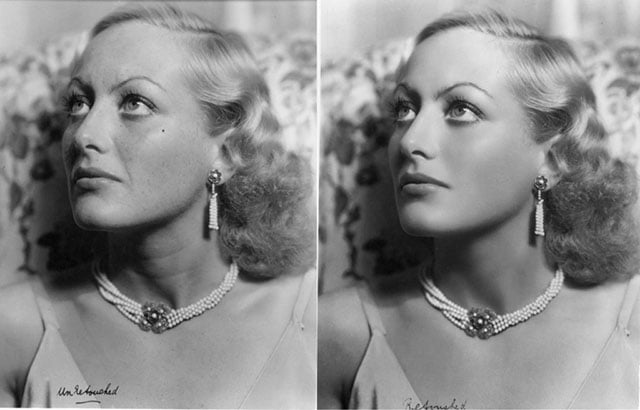
Grandfather of photoshop
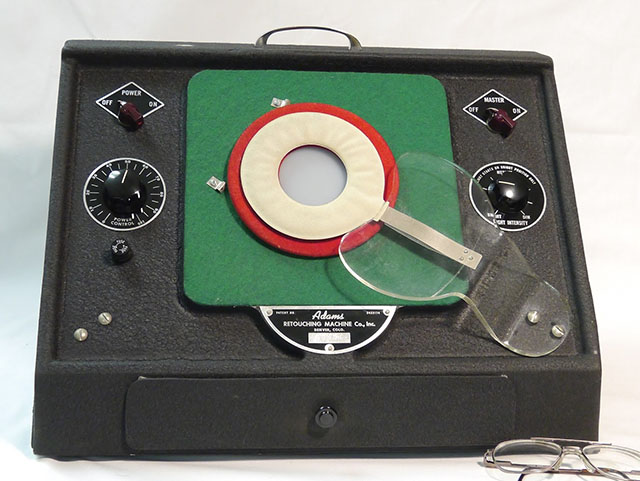
To make Joan Crawford look good in 1931 film Laughing Sinners
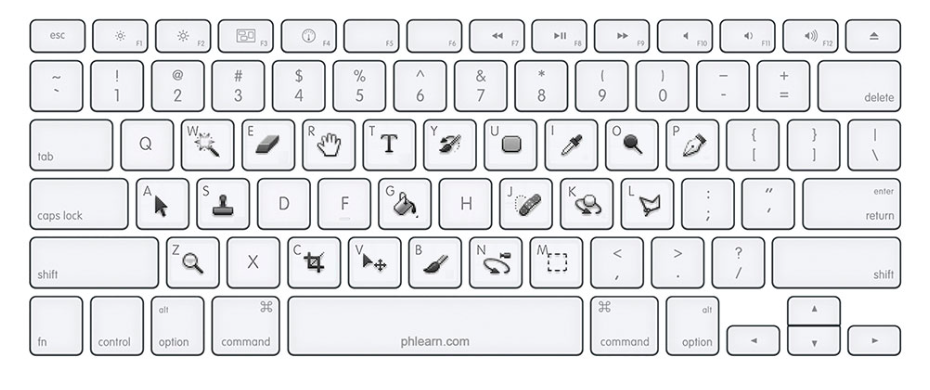
PS keyboard shortcuts by PHlearn and some penta blade porn
Nevermind attention deficit Gragger; if buying an Otus would come with 2 days spent with this guy at his office, I'll sell my other kidney ,-)
All the glamour of photojournalism :P
Daniel Arnold, an artist whose work I admire :-)


And a nice life story
Now get crazy and go shoot somethin'
-
Howdy pip(iolo)s =)
Let's see what perversions are there in this week bag, shall we?1_This is a free LR pluggin for adding metadata to manual lenses; VERY USEFUL
http://www.essl.de/wp/2012/05/07/adding-foreign-lens-info-in-lightroom/
there's also the show focus points one but I really don't find it as interesting2_Next, CINEGRAPHS in a nutshell (PS instructions)
3_A bit of Kai's humorous bullshit
4_Example of someone (totally unknown) who has a fine "touch" developing an image... IMO
http://www.kowska.blogspot.pt
4b_Example of someone (a girl,,, drullllinnngg) which style I also like
http://temptingalice.com/wonderland/lifestyle/ and (wide spread) experiments
http://temptingalice.com/wonderland/tinderella/5_Related on achieving SUCCES and/within web social platforms
I have a fun story regarding the whole "go comment, make friends, and you will receive comments in return".So I had been using this photo community site (name not disclosed, but it's a big one) for a couple of years, and my photos were decent, a few good ones. Whenever I posted a new one, I would get maybe 5 comments and a few upvotes/downvotes. A dozen people added me the their favorites over the years. Nothing major.
At the same time there were a few dozen posters there with absolutely shit photos and they always got a hundred comments and nearly perfect ratings on every single photo.
So I looked at what they did - and, as a programmer, I thought - I could write a bot that did all of that. And so I did. It did a very simple set of actions on every new photo posted:
•   Give it 5 stars.
•   Write a randomly generated comment made up of chunks like "absolutely amazing", "so beautiful", "you're talented", "adding you to my favorites", "A+++", etc.
•   Added the author to the favorites.
•   Gave the author +rep or something along the lines
Before I launched it I posted a few very average photos under the bot's account, who also had some random girl's pic in the profile.
Then one evening I launched, watched it for a few minutes, and went to sleep.
When I woke up, HOLY SHIT.
Every single photo of mine had perfect 5 star ratings with dozens and dozens of votes, tons of comments from the happy noobs who got "discovered" by me, almost all of them added me to their favorites, I had like 50 friends overnight.
During the day when the site hit peak traffic, it went even more insane, everything quadrupled, my latest photo became the photo of the day on the front page.
By then a few people figured out wtf was going on, because I was too lazy with writing randomized comments, they didn't have much variety. By the end of the day the bot got banned. But the damage was done. I posted on their forum explaining the whole thing. Many people were angry, because it exposed how full of shit the photo critique communities are, many were laughing and laughing. A few regulars quit. And so did I.
That's why I only ask for the negative feedback to my work. Getting positive feedback is just too easy.
http://www.reddit.com/r/photography/comments/2h6kjn/art_of_photography_competing_with_cat_photos/
6_Some online photo mags (also contests and context) - I wonder why don't they cover their eyes instead...???

Strip Tease Tent, Charter Fair, Pinner, 1971
By Homer Sykeshttp://deepsleep.org.uk
https://www.lensculture.com
http://www.the37thframe.org
http://www.fstopmagazine.com/home.html
http://www.filemagazine.com
http://www.bjp-online.com
http://zonezero.com
http://www.seesawmagazine.com
http://www.socialdocumentary.net
http://www.positive-magazine.com
http://photoworks.org.uk
http://flakphoto.com
http://hornygirlswithtightasseshavingfunwithmeanbicepodousaliensmeanwhilensacarefulscruttiny.com
http://www.burnmagazine.org
http://digitaljournalist.org
http://www.source.ie
http://pixelsandprose.net
http://www.1000wordsmag.com
http://www.lunaticmag.com
http://www.frontroom.org
https://daylightbooks.org
http://www.ahornmagazine.com
http://www.purpose.fr
http://www.pixelpress.org
http://jmcolberg.com/weblog/
http://www.chambrenoire.com
http://lightbox.time.com
http://www.fractionmagazine.com
http://lenscratch.com
http://blog.photoeye.com6_A list of 321 c-lenses
http://www.us.c-mount.passion.proSources: petapixel, reddit, the www in general; where else, the biblioteque?
That's all folks, don't do stupid things without documenting first =)
-
I find this technique useful, specially if you're doing (fashion) portraits and retouching
watch out for the dimensionality :P
Talking portraits and studio, Phase One just launched Capture One pro 8.
Here it's rainning like the end of the world!!! All good -
Hi there PerVerts :P
• TLTools 2.0.54 Beta is out
• LR 5.6 is out and so Camera Raw 8.6, win and mac
• DxO is giving away FilmPack 3 emulation soft till August the 15th
There's also this Tonality new B&W raw conversion soft integrated with LR, PS (also Elements) and Aperture. Pro version's 70$
Is it good? No, it is the best, it really is; even the 15 days trial is fully operational (mind you need net connexion).
It is Silver Effex ten levels ahead, intuitive, very responsive, nice UI and just every tool one needs to make a great B&W pic.
You can save not only the presets but the workflow file and export in multiple file formats. The inbuilt presets are helpful as a starting point too.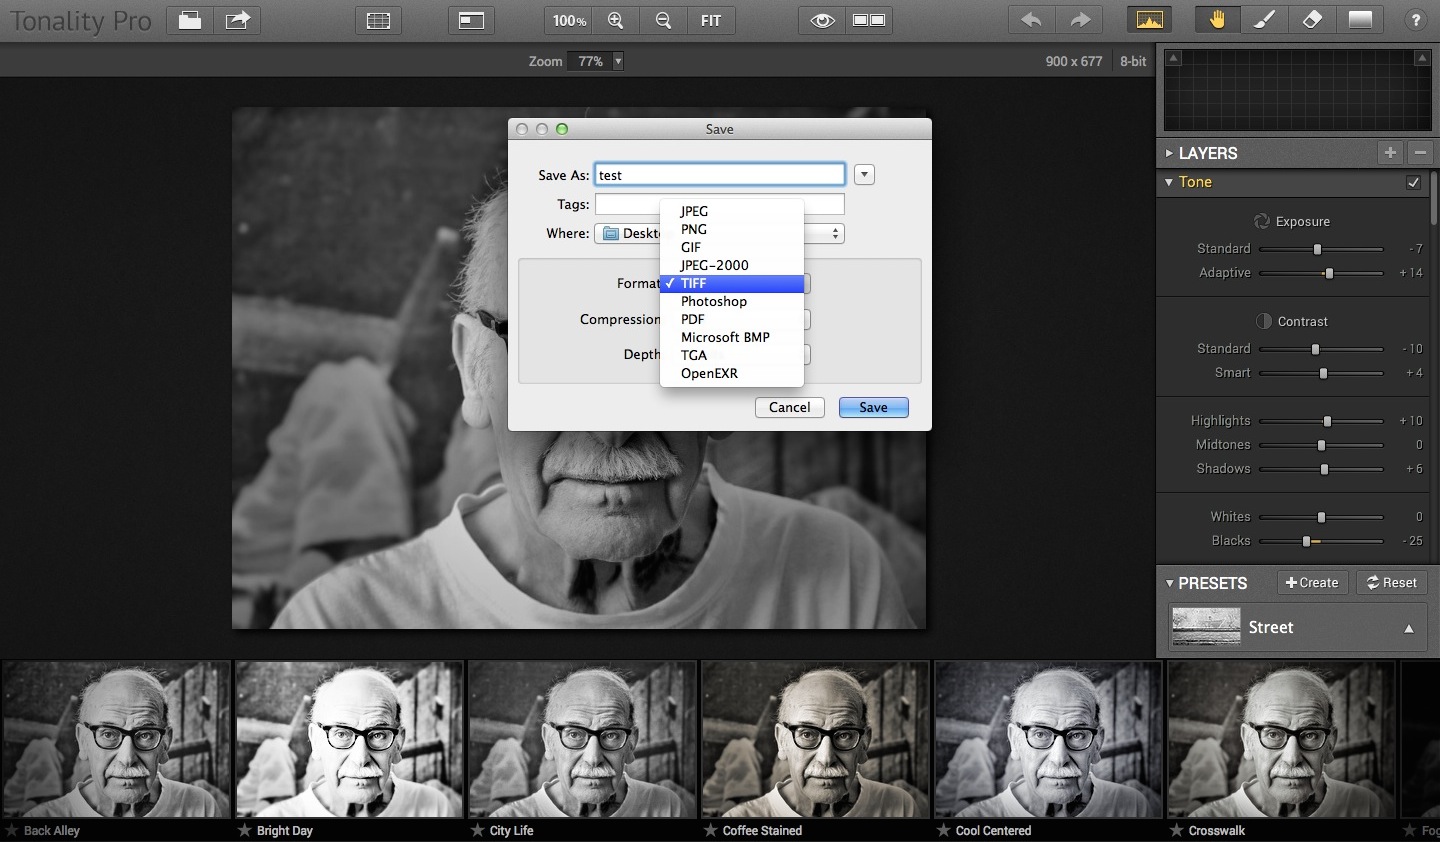
Quick and dirty (first) conversion, dragan style
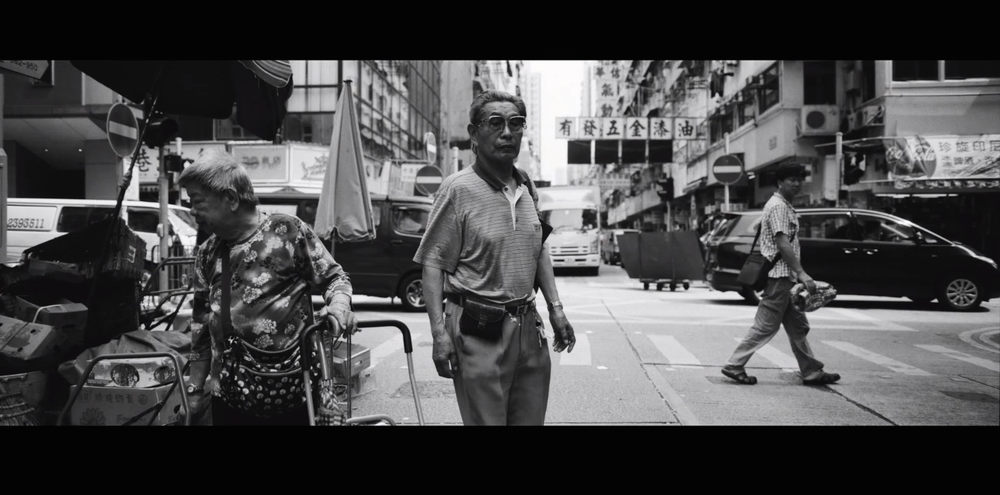
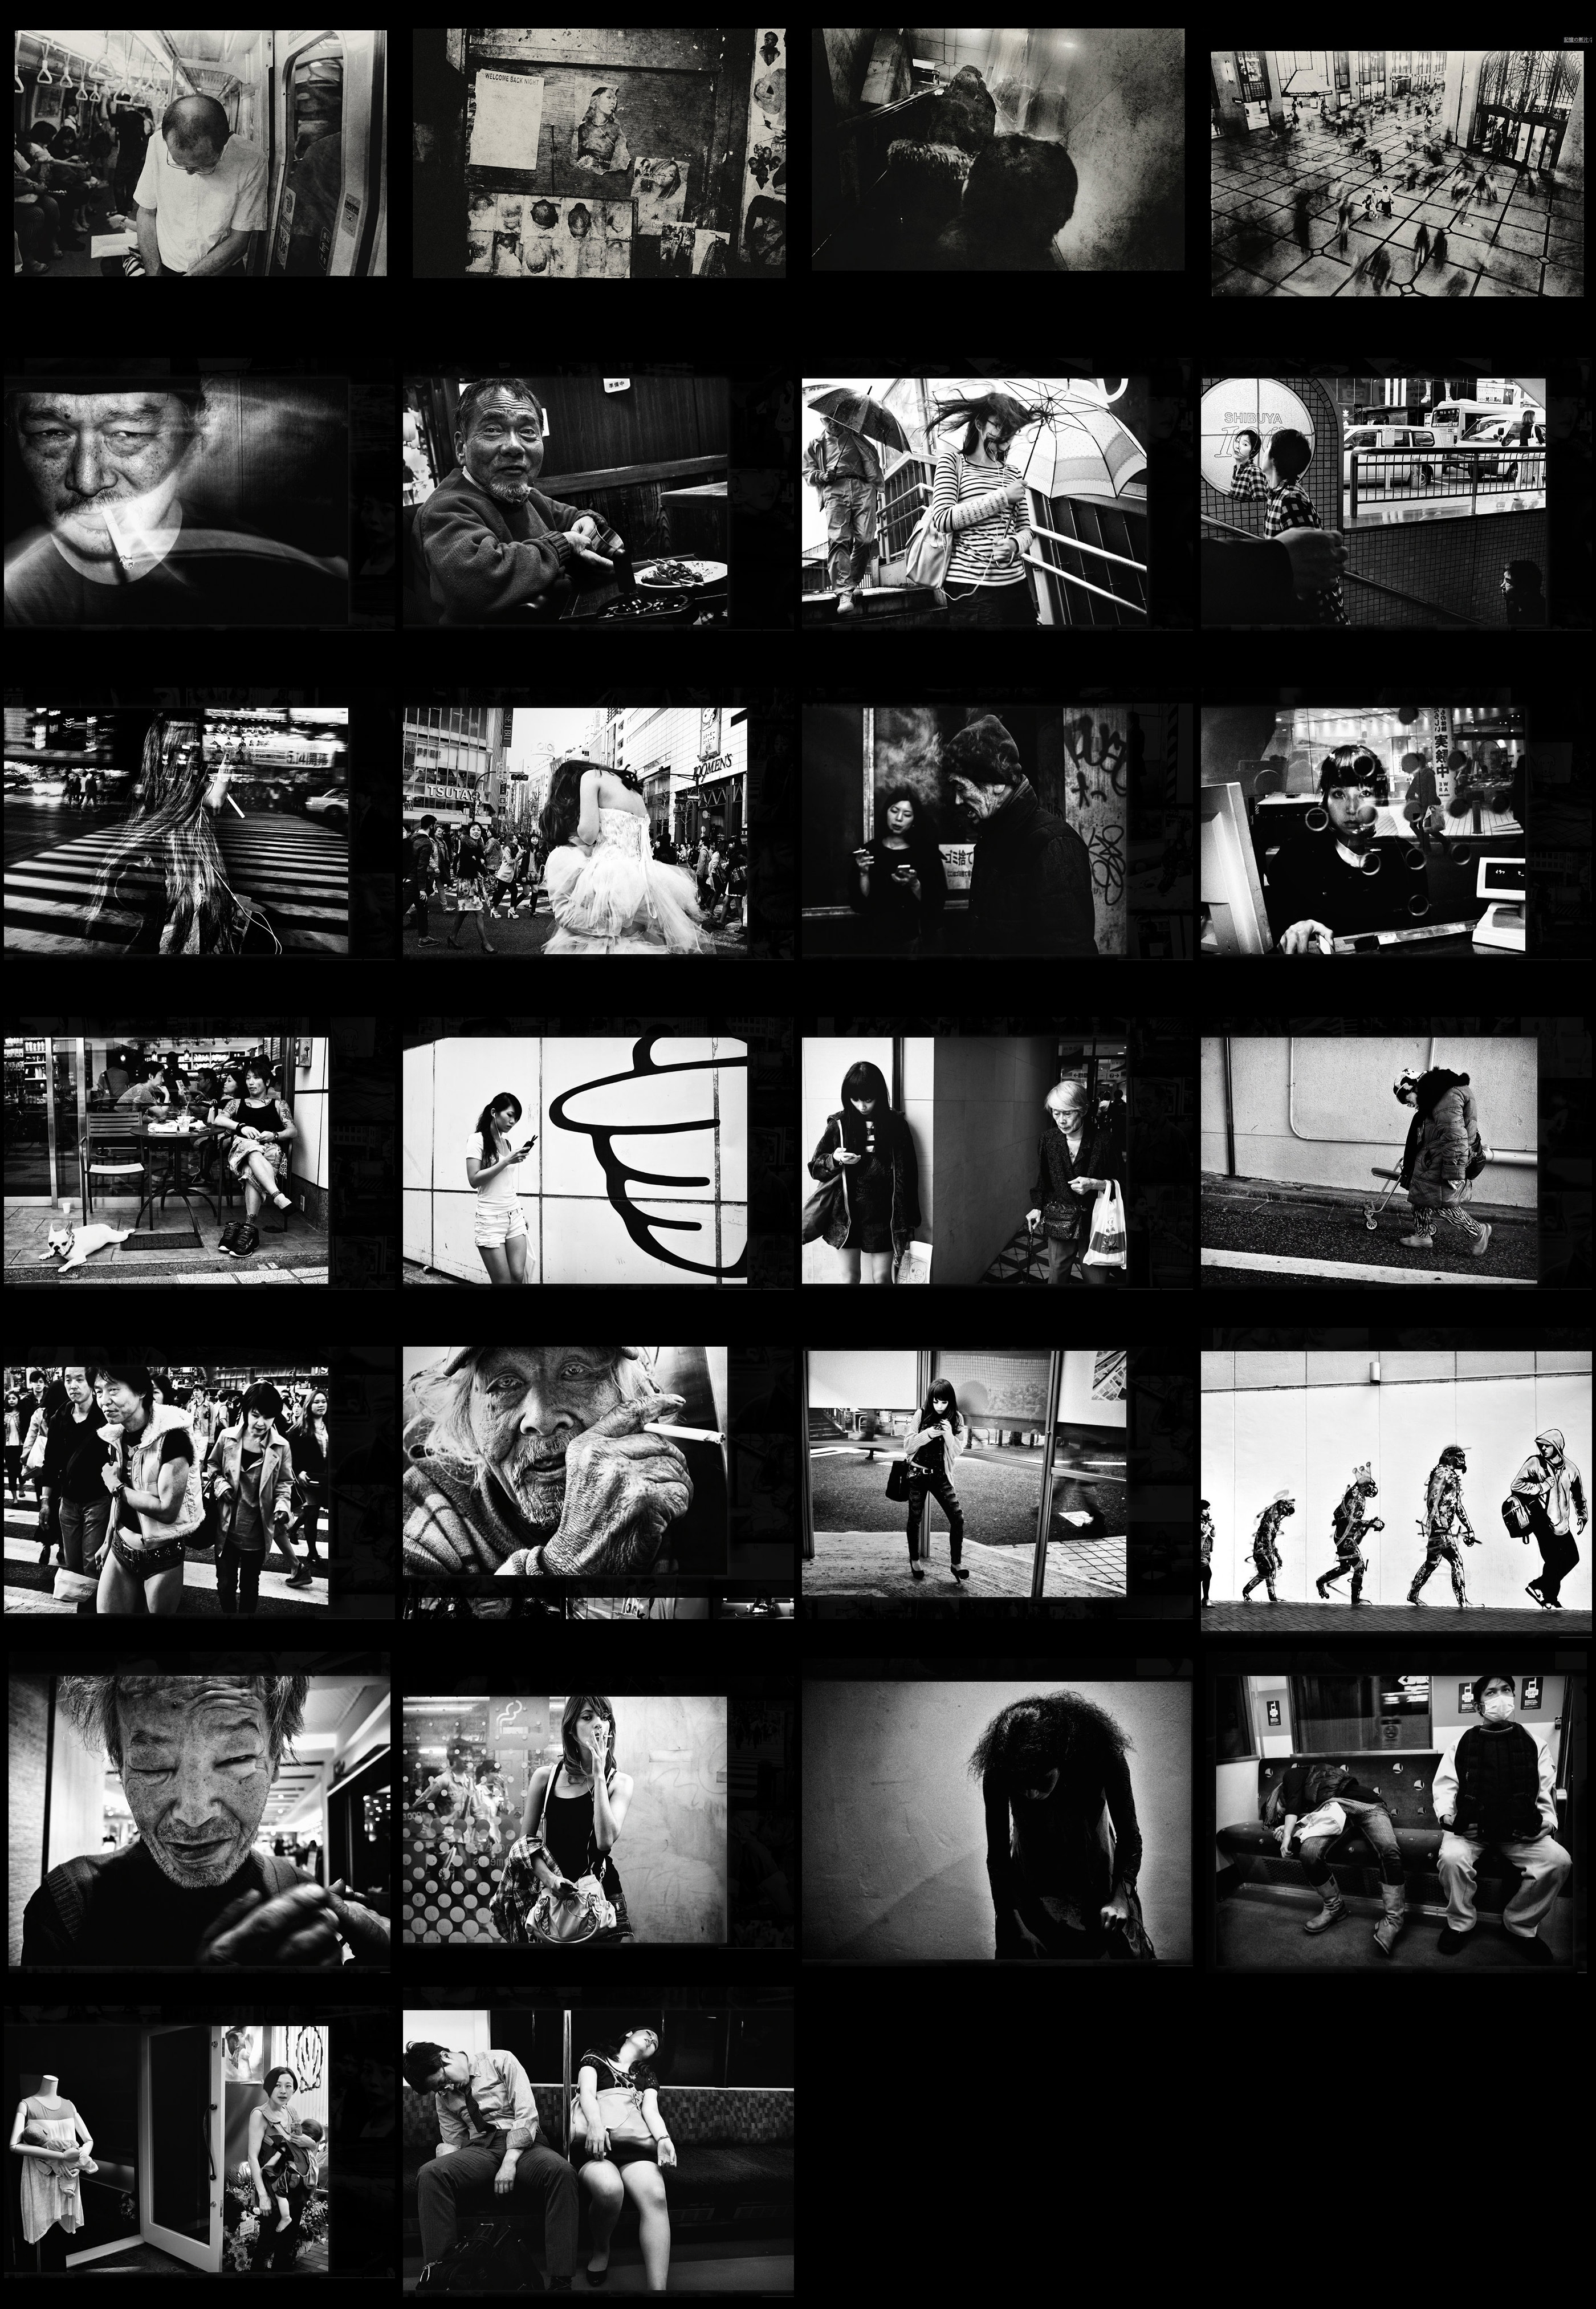
Now, to finish, a master blaster of B&W street photography,
Tatsuo Suzuki
-
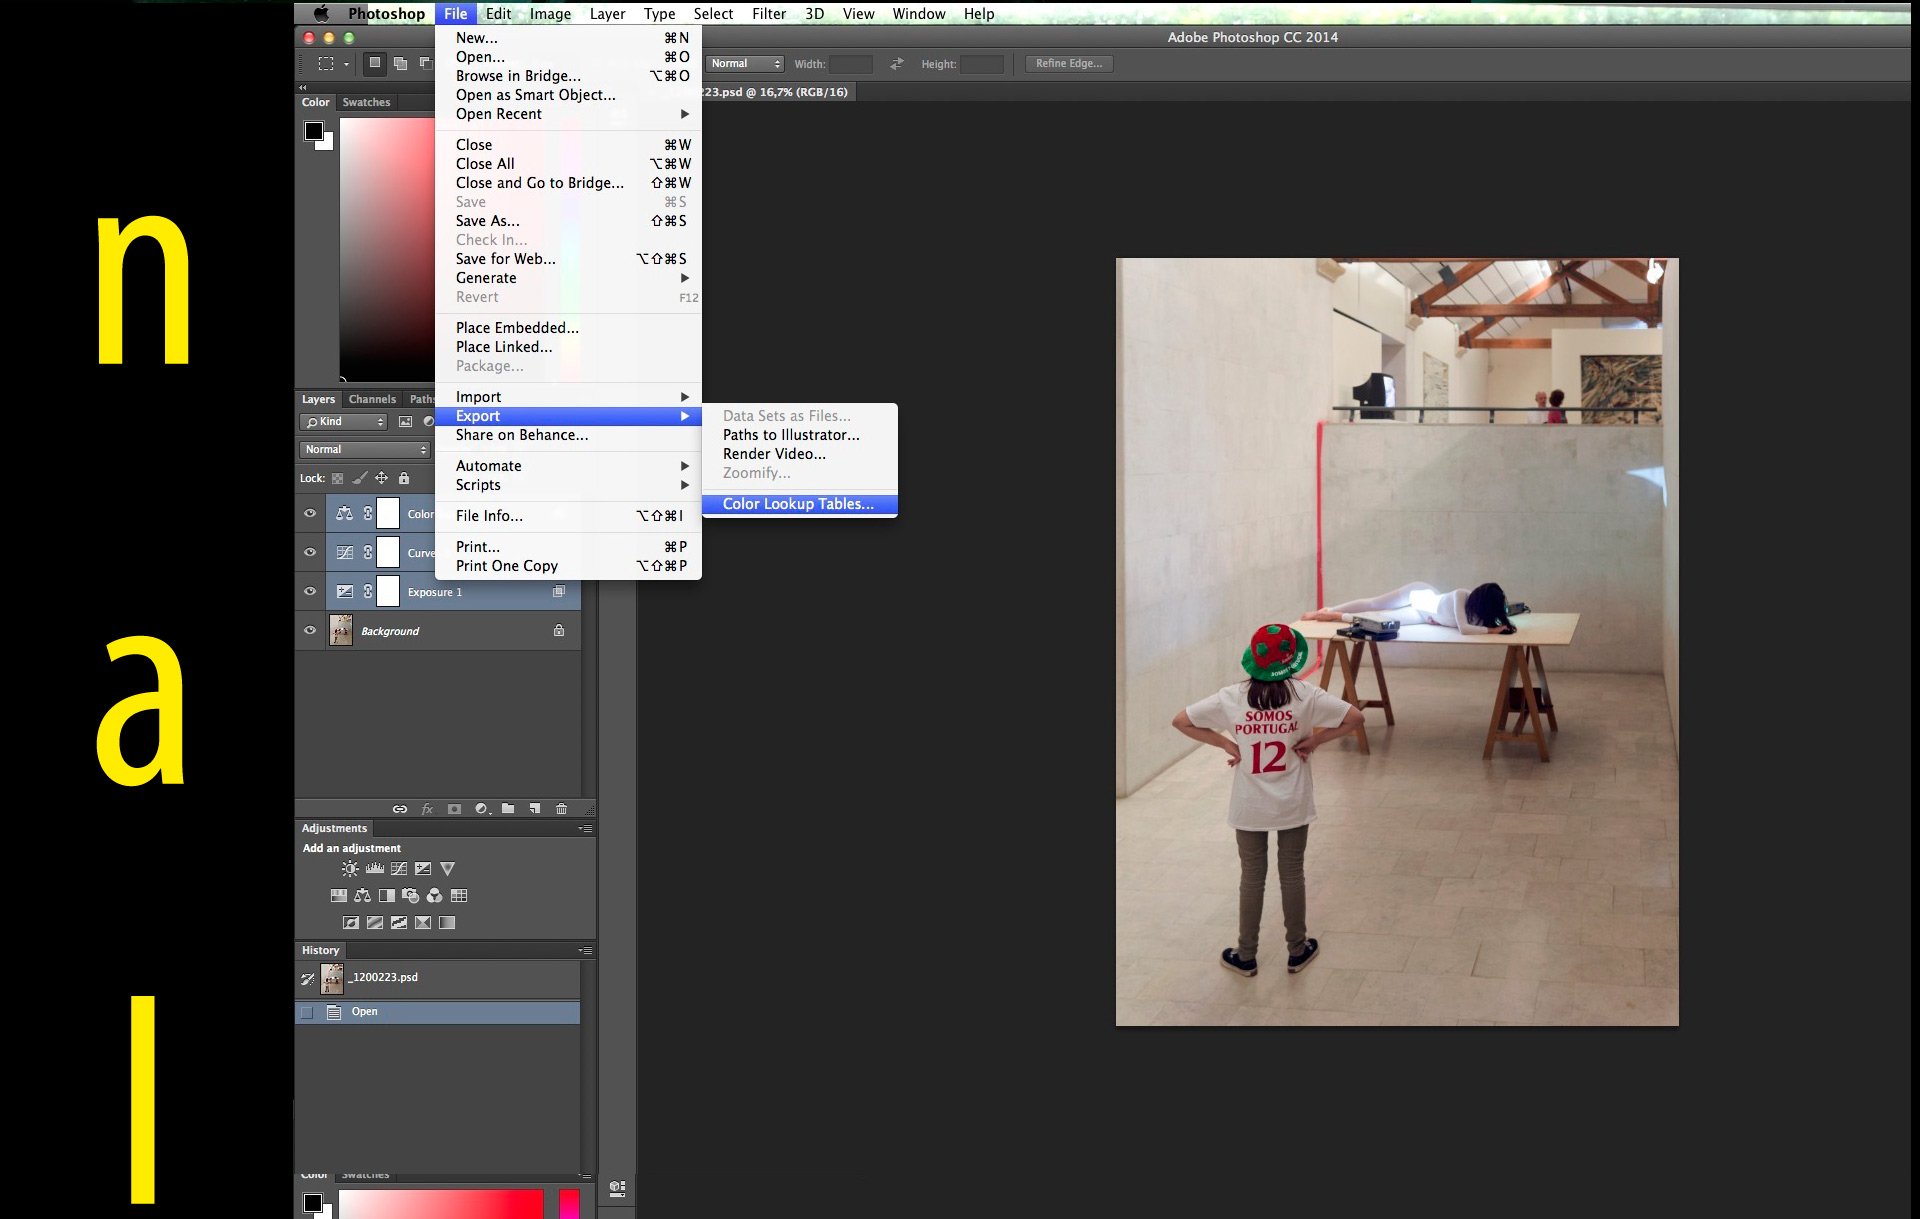
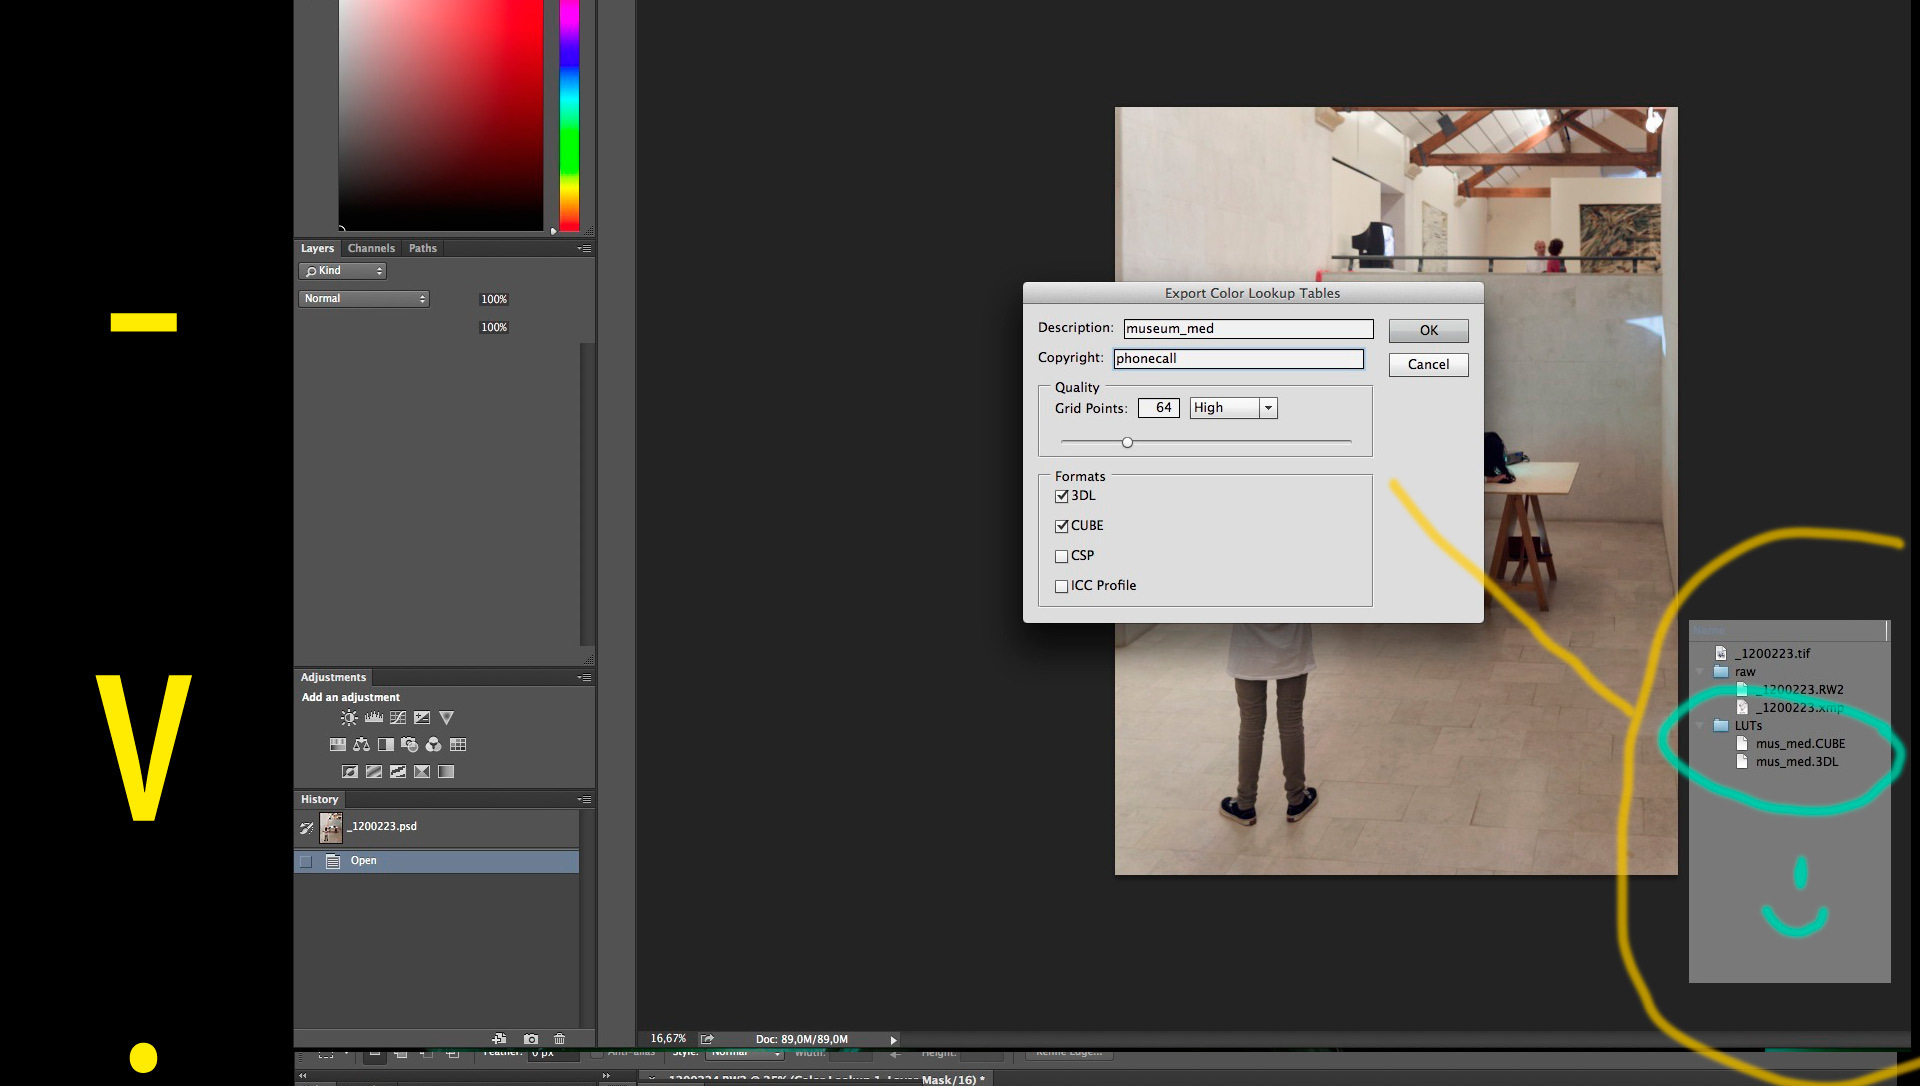
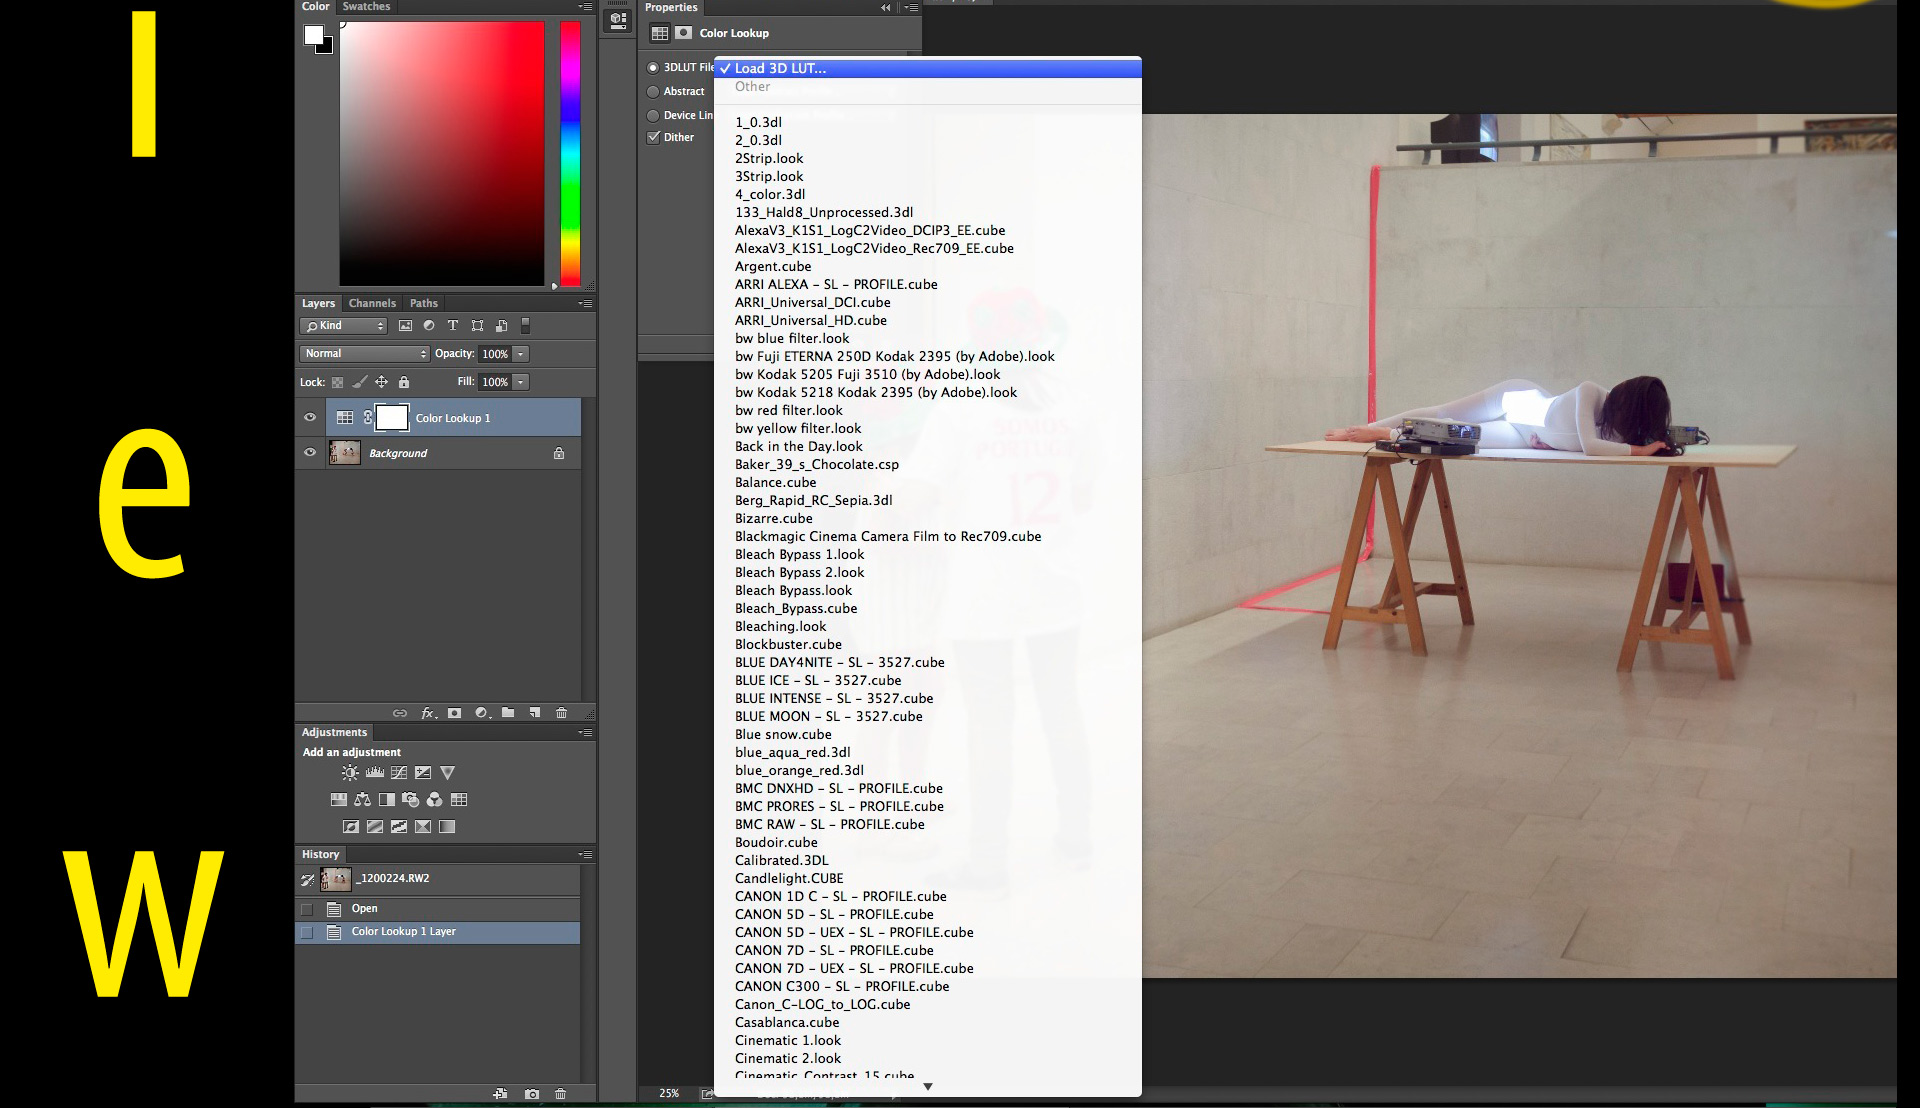
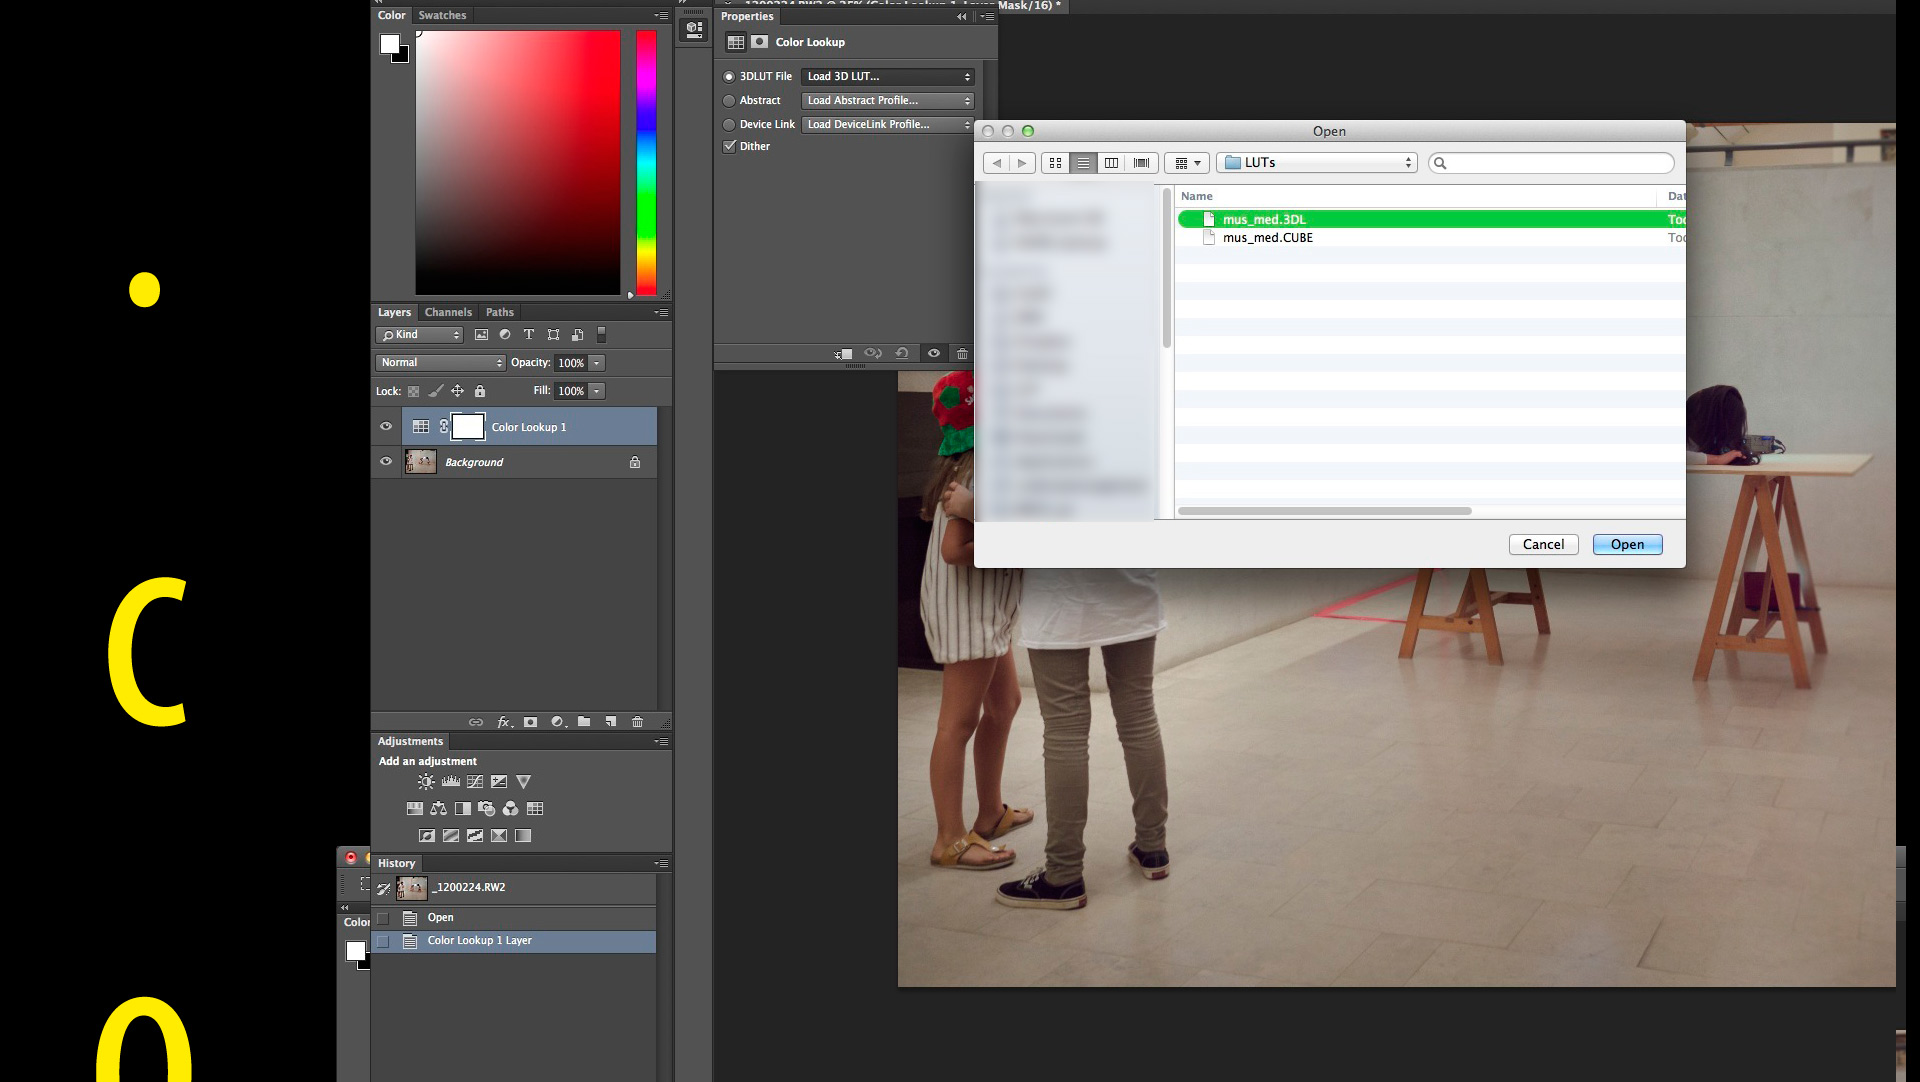
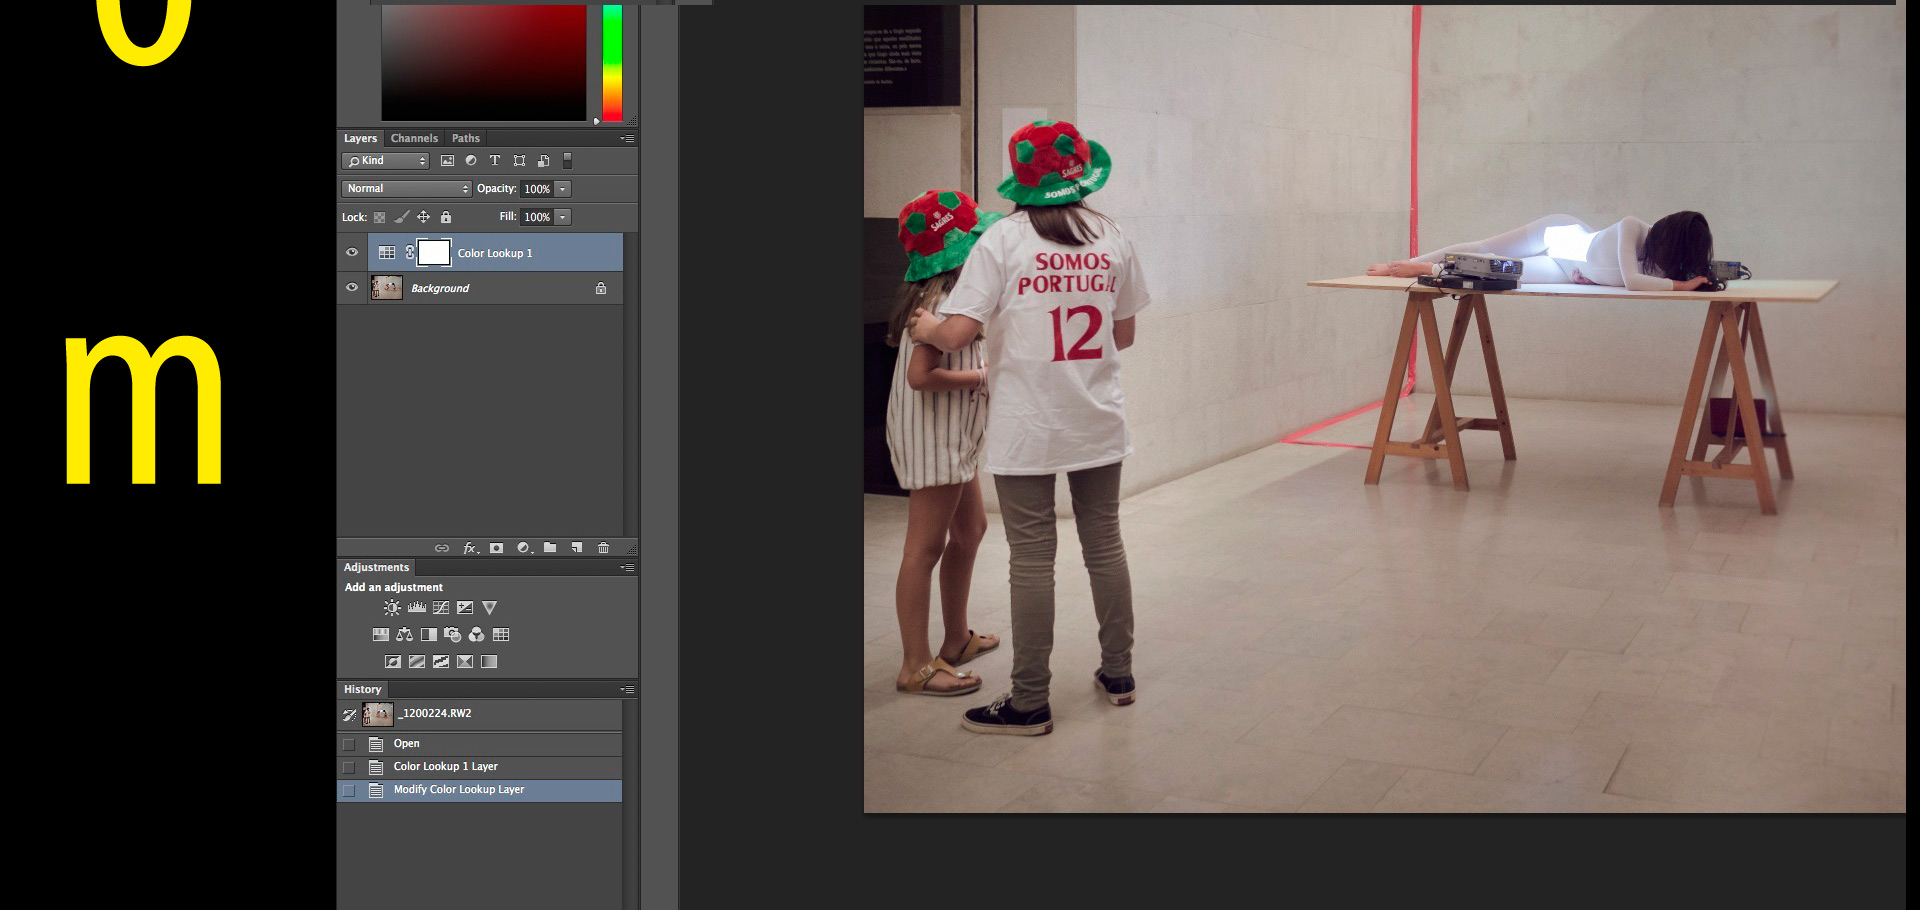
HOW TO EXPORT ADJUSTMENTS AS LUTs FROM PS CC

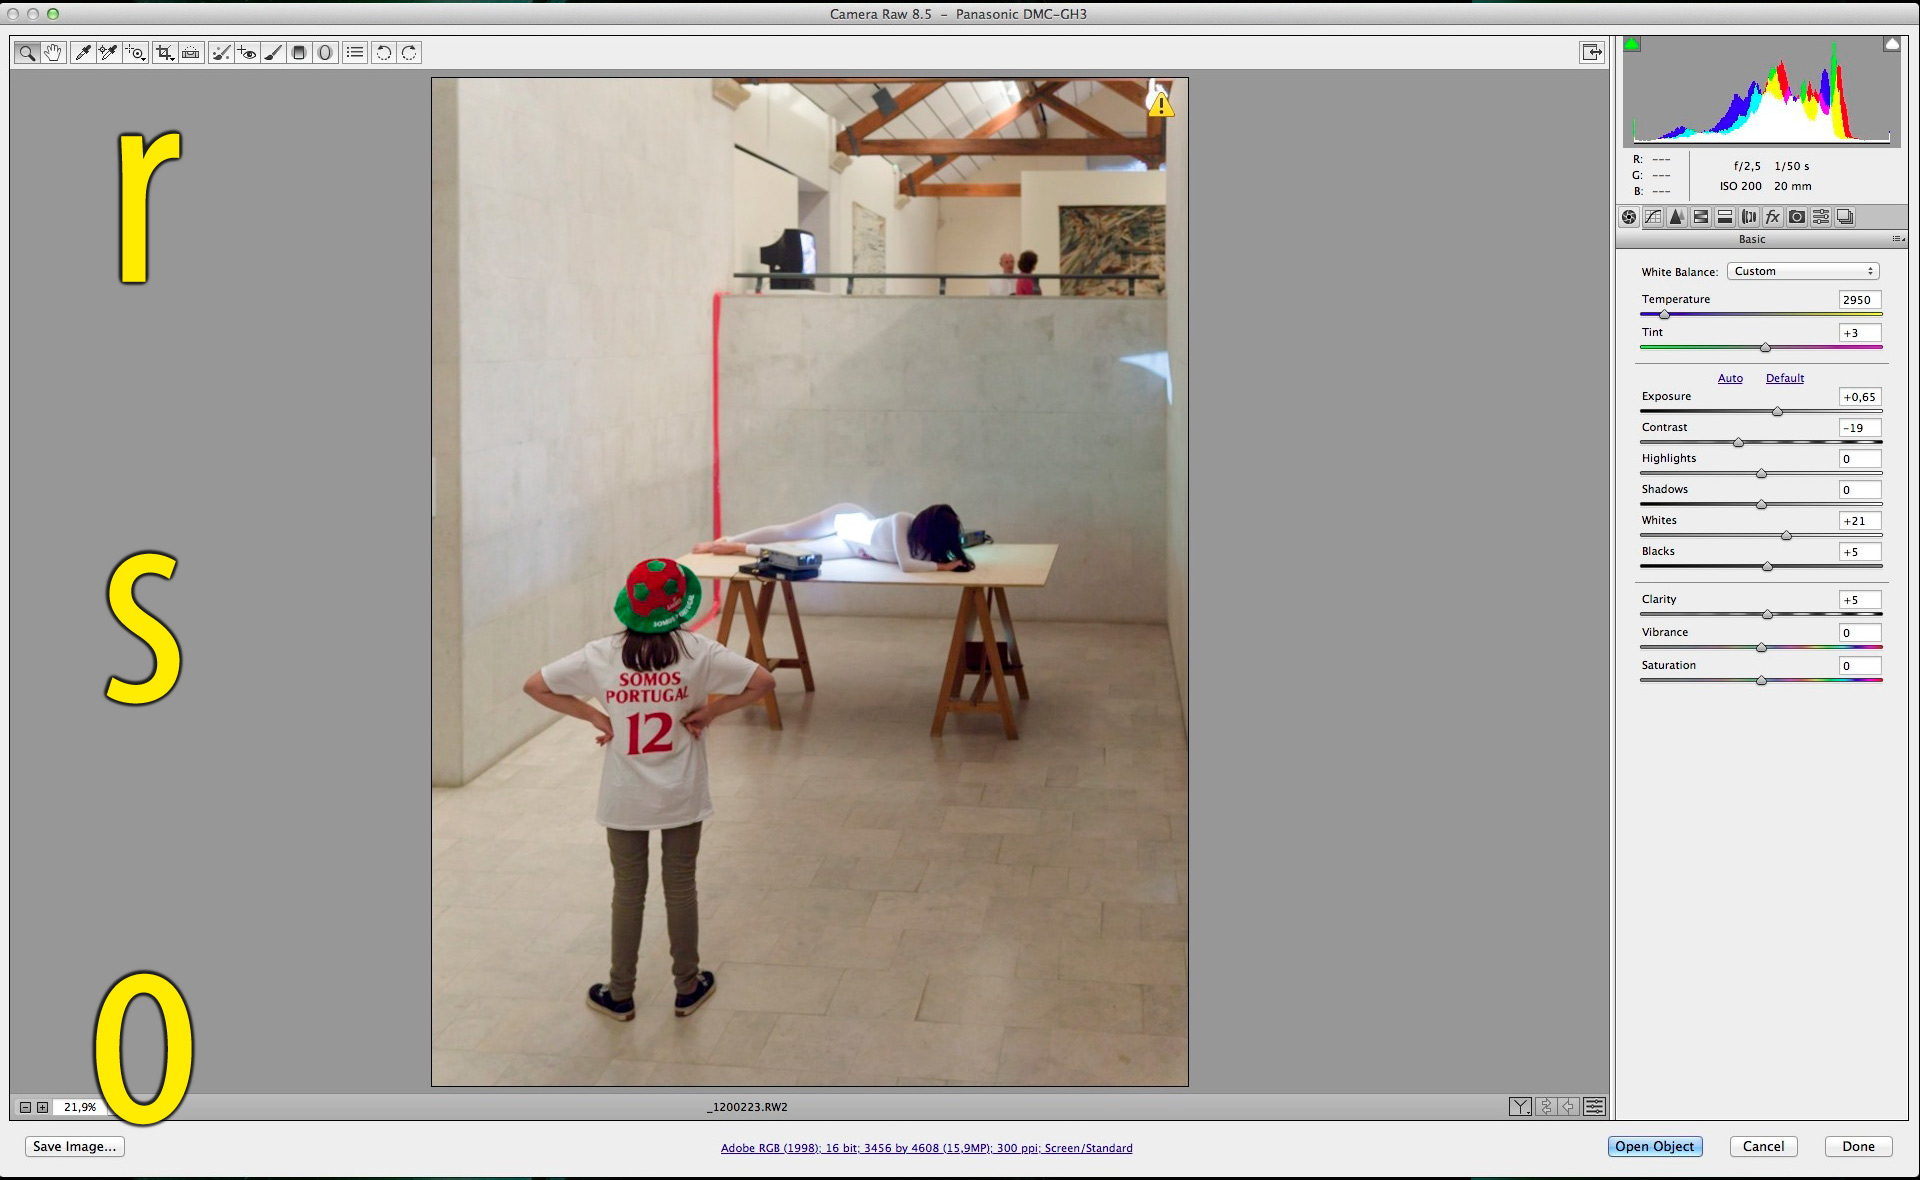
BTW if you're suffering from camera raw 8.5 "bug" here's the quick fix
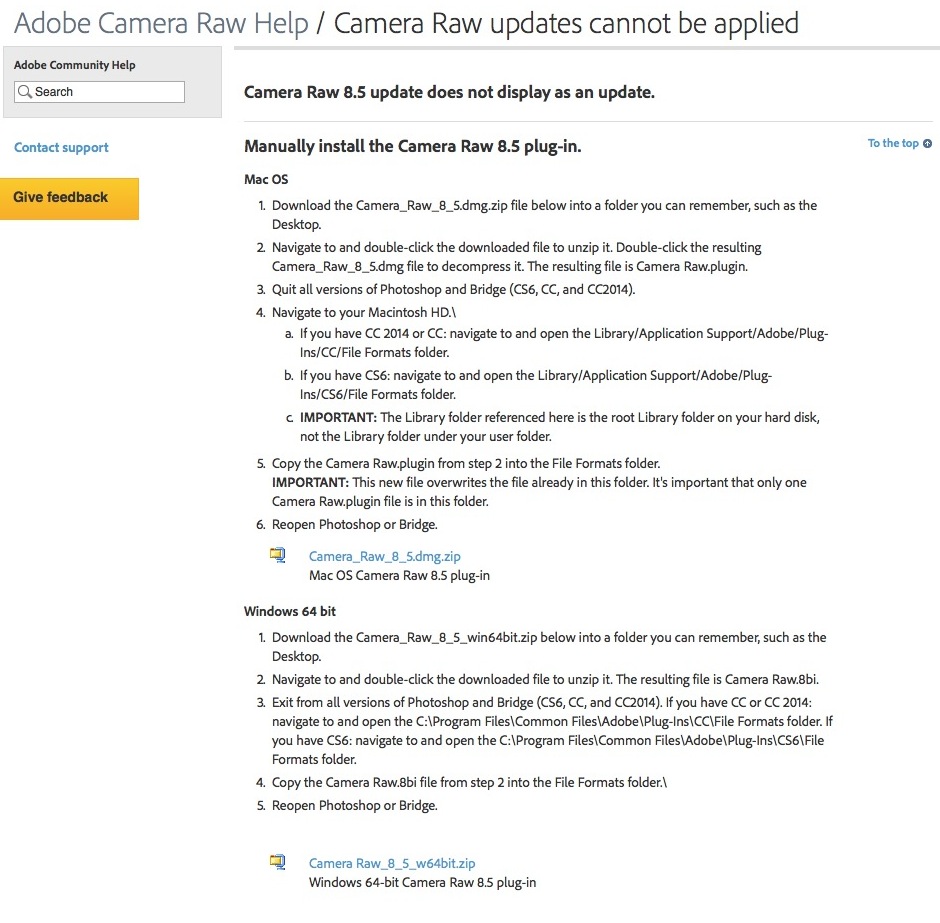
and download links for convenience ,-)
MAC
http://helpx.adobe.com/x-productkb/multi/camera-raw-applictions-cannot-updated/_jcr_content/main-pars/download/file.res/Camera_Raw_8_5.dmg.zip
WIN
http://helpx.adobe.com/x-productkb/multi/camera-raw-applictions-cannot-updated/_jcr_content/main-pars/download_0/file.res/Camera%20Raw_8_5_w64bit.zipWell, that's all folks, that and my condolences to brasilians fans :P
 export_LUTs_from_PS-1.jpg1920 x 1147 - 252K
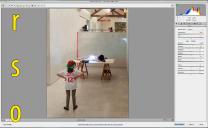 export_LUTs_from_PS-2.jpg1920 x 1180 - 289K
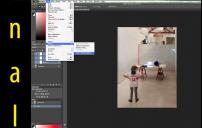 export_LUTs_from_PS-3.jpg1920 x 1219 - 280K
 export_LUTs_from_PS-4.jpg1920 x 1086 - 204K
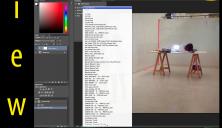 export_LUTs_from_PS-5.jpg1920 x 1108 - 378K
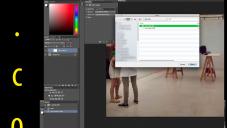 export_LUTs_from_PS-6.jpg1920 x 1082 - 249K
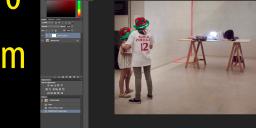 export_LUTs_from_PS-7.jpg1920 x 910 - 254K
 CR8.5_bug-fix.jpg940 x 923 - 156K
 -
Nevermind the mediocre photo examples, this is a pretty solid LR workflow explained in great detail and without what seems to be today's hurry hurry standard. There are a couple of things though I personally find to be better practices, specially with µFT raws: 90% I heavily use negative exposure (which also helps reducing noise), lessen the contrast (but here I've to say I'll apply a LUT or specific film contrast and colour responses afterwards), to leave alone the shadow adjustment slider, don't abuse on negative highlights, take advantage of smoother changes done with CURVES, more detail and far more masking at sharpening module if image it's going to be resized for web, it's very rare I have to go so far up with luma NR (only when above ISO 800), USE grain, sometimes worth playing with camera calibration. Other than that a pretty solid workflow with great tips =)
Forgot something else, never ever process a portrait with capture one pro, you'll never go back :P
Lightzone is now beta9 (4.1.0) -
Thanks for the tips @BurnetRhoades =)
Kai might be a dirty little fucker, but he knows what to do with a lady :P
Not even going in the IQ, DR or colour rendition wet dream; just drooling over those beauuuutifuly massive OVFs XD
BTW Rawtherapee 4.1 is out
and so Darktable 1.4.2
and TLTools 4.0.53
-
That second setup would work great with a "book light" setup as well, if you don't have a softbox. Instead of using a softbox source you're firing a spot or flood or LED, etc. at a reflector that's set at an angle like that from the diffusion surface. The light itself is at a 45 degree angle to the bounce.
-
Hey there guys
For those of you interested/focusing on studio photography, great tips here.2 fantastishe PRODUCT PHOTOGRAPHY tutos by Alex Koloskov
I must say, Alex may lack the glare of other show photogs but I love that there's absolutely no bullshit =)DIY LED Lighting for Studio Photography
How to create a gradient reflection with large soft box
-
A couple of 3 PS tutos with great tips and tricks
Match tone and colour
Tinkering with skin tone & colours
Advanced PS
-
Whatzzzzupp!!!
Not much as far as I can see... hmmmmm
Anyway, this video is funny as hell, Kai may be an obnoxious son of a bitch, but he's funny and sharp =)
+
I don't know if you've seen it - How to correctly sharpen GH2 footage or any footage! -
but @Gardner, @BurnetRhoades and I have been messing around with sharpening methods.
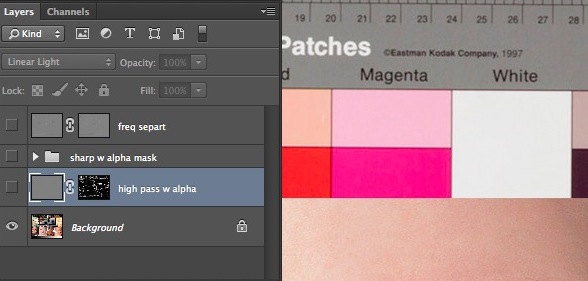
What does that have to do with you? hmmmmmSo, for you guys of this forum only I created a photoshop action which explores 3 methods:
- frequency separation
- high pass (with alpha mask)
- unsharp mask with lighten / darken separation (also with alpha mask, like the kernel one from link above)
https://www.dropbox.com/s/d7rtc15jv10nu4b/sharpeningx3_for_PV.atn.zip
The action was created in PS CC, don't know how compatible it is, you can report back ,-)
Now like everything in life, it's not good for every situation / photo. You can change that.
Gaussian blur used in frequency separation = 2 | Levels, that its up to you, you'll want well defined thin lines in order not to spill sharpening noise into surroundings | gaussian blur for alpha mask = 0.5 | unsharp mask values, beware a wooping 500 / 0.3 / 4 , or somethin' close - this can be changed and you can introduce more than one pass of sharpening ( kernel for video had 4) and it's going to be screened anyway by the alpha mask and even further by light / dark and percentage in blending | high pass = 0.7 (here there's a lot of possibilitties, i.e from 0.3 to 5) | high pass blending mode, basically there are 5 you can use, from overlay to linear light... beware some might introduce contrast... doesn't have to be bad.Well that's it, gone to smell the rain • don't forget
PS
Just saw this and though could be a nice complement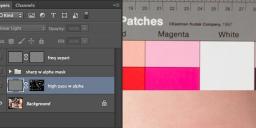 x3_act_grab.jpg588 x 281 - 40K
 -
Recently I came across this tutorial, I must say this guy empowers opposite philosophy of what I think it's healthy; do shitty photos, don't delete anything, fix them in post. WRONG!!!
One should experiment away, specially with pussy cats and humans :P, but also should't settle on mediocre results and expend hours fixing or sugar-coating them. Delusion is very dangerous. You took a photo of grandpa teeth in the glass, nice... most of times it's not going to be timeless new Lartigue's or C. Bresson's... and maybe you don't even want it to. NOW if one wants to improve, 97.395736% of the work it's gonna happen inside our heads, by learning, by comparing and analysing results, by being attentive and conscious, by re-learning how to see, relate, and establish relations (being these conceptual or sensory in nature) also becoming better human being.
I imagine this may sound like clogging BS. It's not, I try to address matters from my personal experience, that's all.
Ok, for a more positive example, Michael Woloszynowicz is a retoucher, so he has to be very precise and to the point. It may seem same thing than the other, but it's not. This guy starts with already good material (studio or landscape) and works very meticulously to enhance its qualities. Furthermore he gives away really useful techniques like high-pass/soft light sharpening, 50% grey noise, colour cast removing, etc. etc. These can be used in video too =)
-
Hey guys, whazup?!
Best open source raw processors comparison/review I ever read by ninedegreesbelow and swear to $ it's not 'cause our opinions match, though it surely makes me happy ,-)A Review of FLOSS Raw Processors
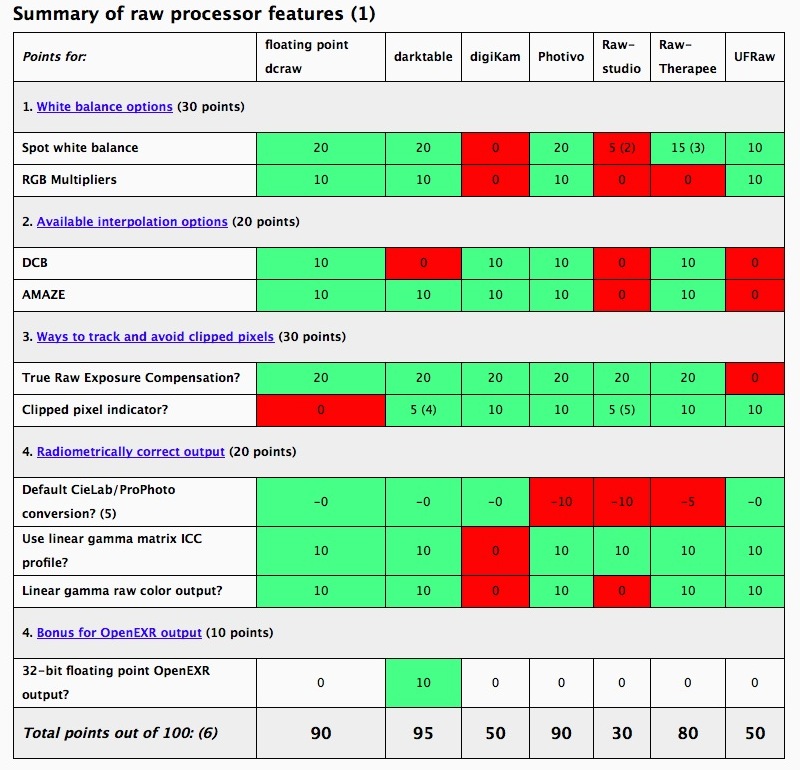
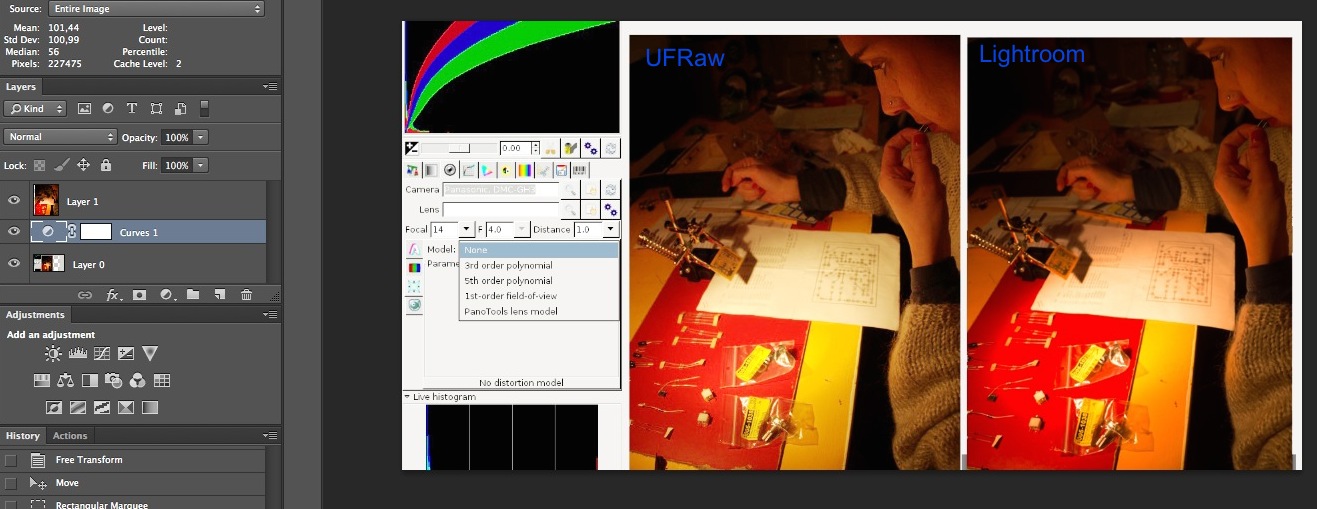
Must say latest UFRaw (1.9.2) lens module is stunting, based in panotools lens model, it does superb work. It made my day when I had to correct wide angle arquitechtural shots (not the one below) and much needed that extra pixels rescued from raw data (dcraw). Read there are some issues with win version, also people work out some solutions. On mac, I installed Gimp portable, but din't make the trick, as its UFRaw outputs only to Gimp in 8bit colour depth. You'll need to build UFRaw with macports/homebrew and the kind, plus XQuarz and that stuff to get it working as standalone, believe me, totally worth it.
Grab comparing how UFraw and LR "extract" data from the raw, no adjustments whatsoever, just a curve in PS to equalise them
•
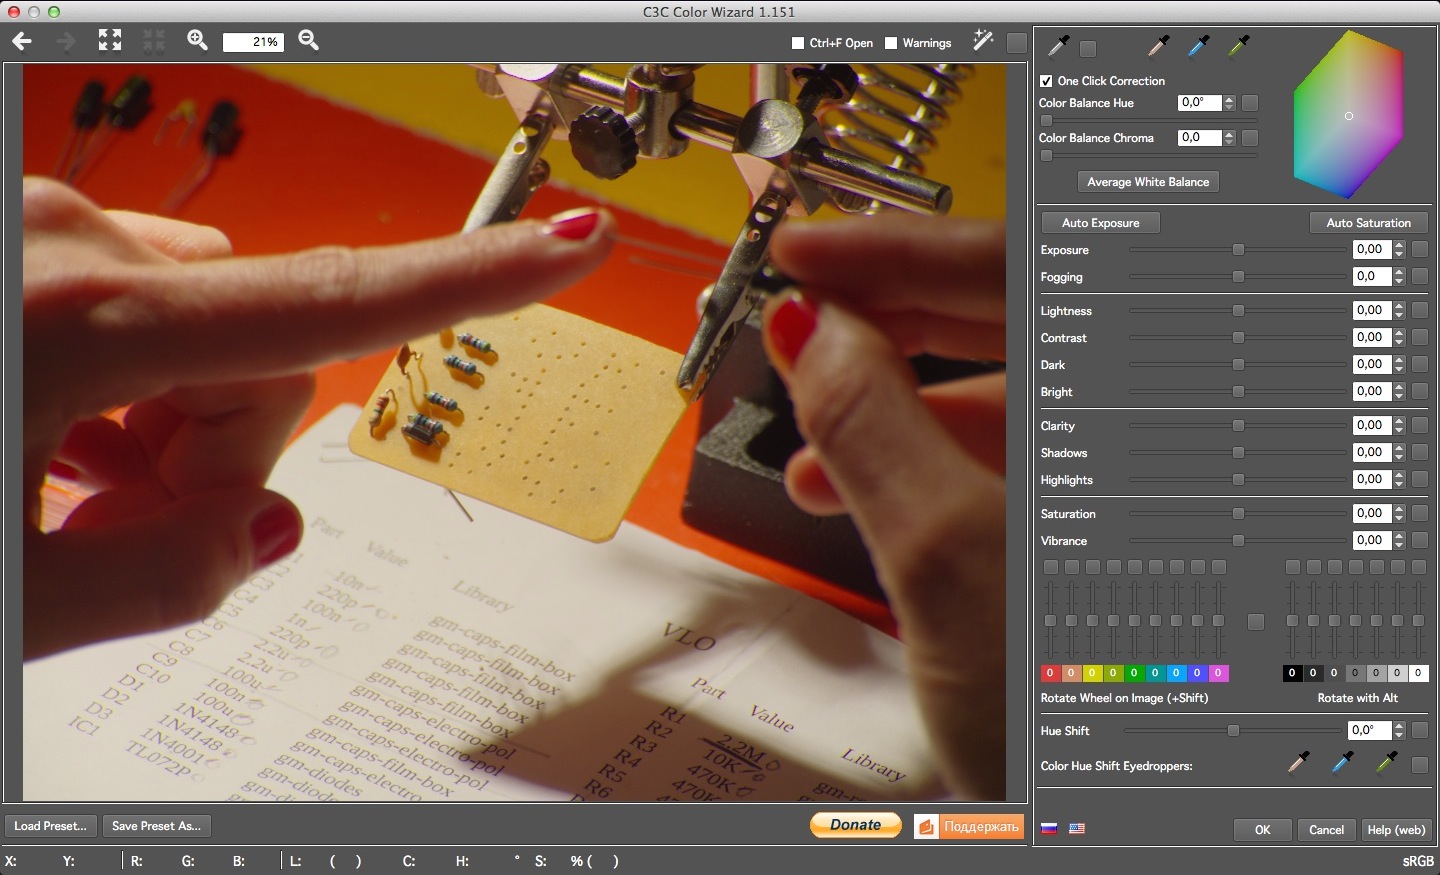
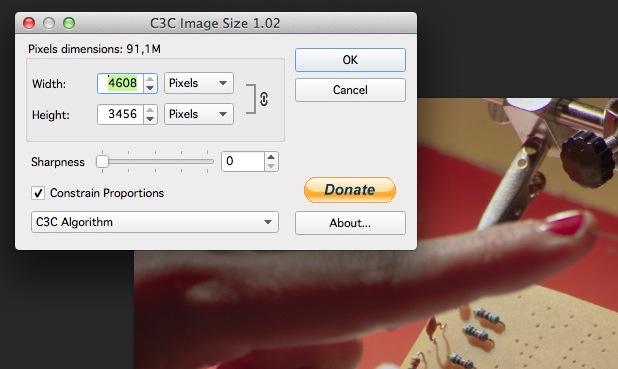
BTW Mr. Sverdlov has an improved version (win and mac) of C3C image resizing plugin for photoshop, best free resized plugin for PS there is, much better than adobe's. For batch conversion XnConvert (win, mac and linux) in lanczos is superb and also free =)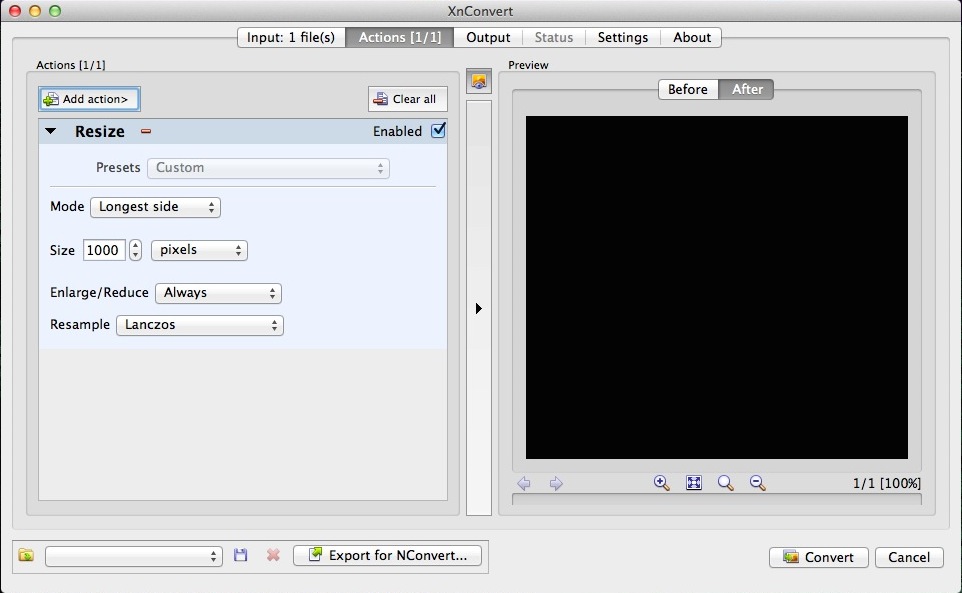
You'll also make sure to check his C3C Color Wizard, really good stuff. • thanks to @Vitaliy
Quick and dirty BEFORE
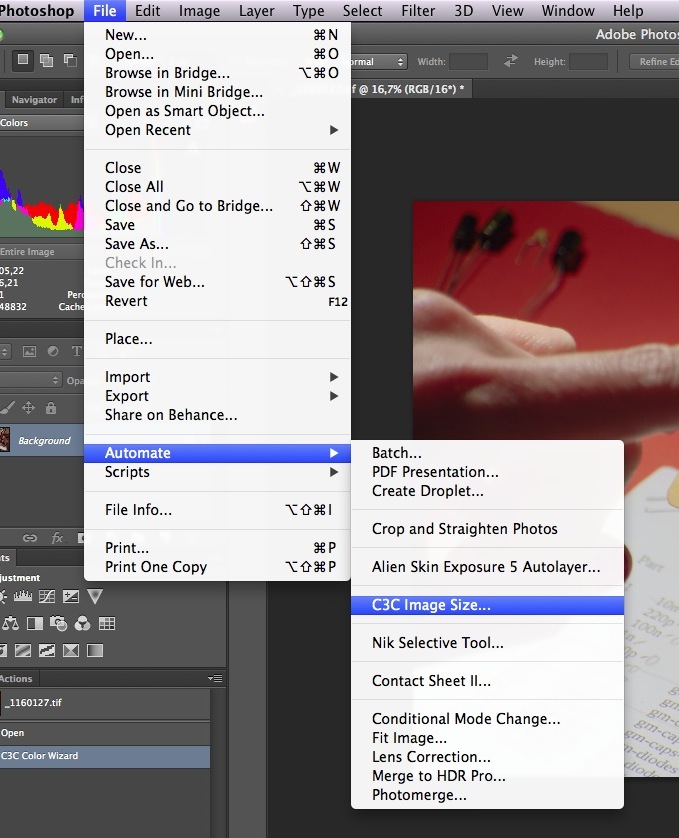
AFTER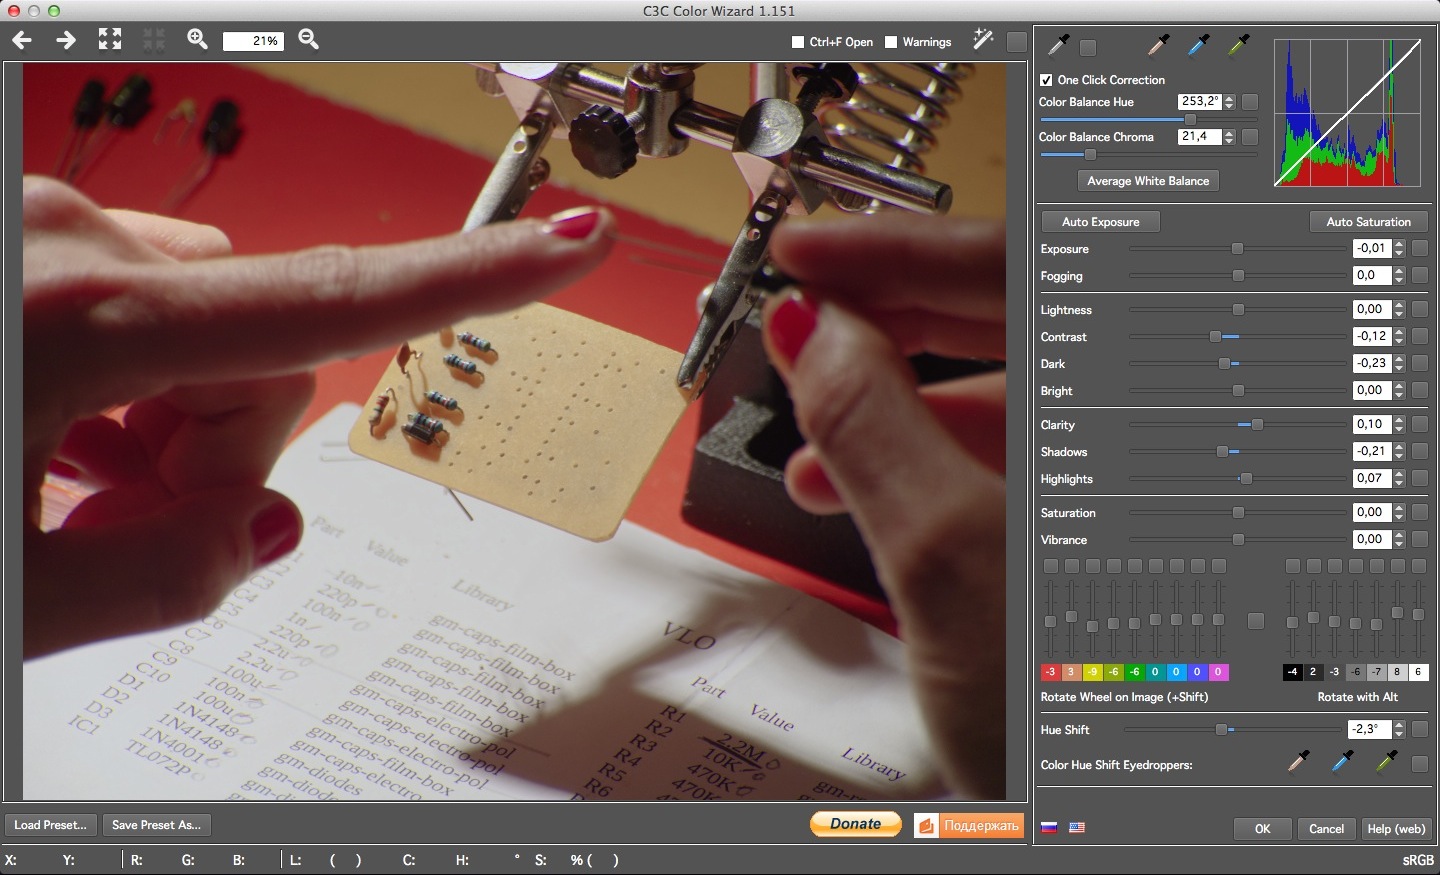 Resize is a bit hidden in Automate menu, you can create an action for faster access
Ahhh... just one more thing
 9degbelow.jpg800 x 770 - 121K
 C3C_before.jpg1440 x 875 - 259K
 C3C_after.jpg1440 x 875 - 253K
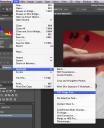 C3C_menu.jpg679 x 838 - 120K
 C3C_resiz.jpg618 x 369 - 47K
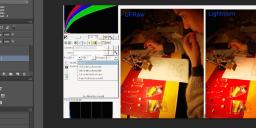 UFvsLR.jpg1317 x 509 - 160K
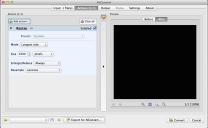 xn_lancz.jpg962 x 593 - 68K


Howdy, Stranger!
It looks like you're new here. If you want to get involved, click one of these buttons!
Categories
- Topics List23,992
- Blog5,725
- General and News1,354
- Hacks and Patches1,153
- ↳ Top Settings33
- ↳ Beginners256
- ↳ Archives402
- ↳ Hacks News and Development56
- Cameras2,367
- ↳ Panasonic995
- ↳ Canon118
- ↳ Sony156
- ↳ Nikon96
- ↳ Pentax and Samsung70
- ↳ Olympus and Fujifilm101
- ↳ Compacts and Camcorders300
- ↳ Smartphones for video97
- ↳ Pro Video Cameras191
- ↳ BlackMagic and other raw cameras116
- Skill1,960
- ↳ Business and distribution66
- ↳ Preparation, scripts and legal38
- ↳ Art149
- ↳ Import, Convert, Exporting291
- ↳ Editors191
- ↳ Effects and stunts115
- ↳ Color grading197
- ↳ Sound and Music280
- ↳ Lighting96
- ↳ Software and storage tips266
- Gear5,420
- ↳ Filters, Adapters, Matte boxes344
- ↳ Lenses1,582
- ↳ Follow focus and gears93
- ↳ Sound499
- ↳ Lighting gear314
- ↳ Camera movement230
- ↳ Gimbals and copters302
- ↳ Rigs and related stuff273
- ↳ Power solutions83
- ↳ Monitors and viewfinders340
- ↳ Tripods and fluid heads139
- ↳ Storage286
- ↳ Computers and studio gear560
- ↳ VR and 3D248
- Showcase1,859
- Marketplace2,834
- Offtopic1,320


