It allows to keep PV going, with more focus towards AI, but keeping be one of the few truly independent places.
-
Shot a year ago on the original version of Cake (before v1.1 firmware, I think). This is a "before and after" of what you can do to rescue insanely bad (and I mean, BAD) lighting and exposure. I was playing in the concert and had to set up the camera and trust to luck (wrongly, as it turned out)!
The first 17 seconds is the original exactly as shot, then it switches to the results of two hours of experimenting with grading and noise reduction stuff. Look in HD to see the noise that I was faced with. A real testament to the GH2, Cake, and the power of software that it pulls out at least a usable image after a lot of Guantanamo Bay style pixel-torturing. At 17 seconds in, it's as if someone turns the lights on. I think it's amazing.
Obviously it would be great to get it right in the first place, but sometimes you're stuck with something less than stellar and have to rescue it.
PS NO AUDIO
https://vimeo. com/40645611 (for those with portable devices - remove the gap in the URL)
Hopefully other people might have examples / stories of rescuing stuff.
-
Nice work.
-
yes nice recovery i feel the same its better to have it wright at first but some times its nice to know good post to recover!
-
Thanks! Generally I reckon it takes 10-20x longer to recover something that's wrong (assuming you can, at all) than to do it right in the first place. So for example taking an extra 2 minutes checking a mic position, or moving a light or whatever, will save you at least 20-40 minutes further down the line. This is born of experience correcting endless bad sound in my BBC days. And (even like above) if you can correct it, it never looks really good, just "acceptable". It's SO tempting to rush or leave something out, and I have ALWAYS regretted it later.
That video took about 2 hours (spread over a day or so) to tweak including several trial renders at about 2 frames per second (and I did it because I wanted to know if you could do it). If I'd wanted to correct and render out the whole concert it would have taken many hours to process. I reckon putting up a light or two would have taken 20-30 minutes at the very most (wasn't my venue, but just an example). Plus of course, having proper lighting would have looked better for the audience in the church, too, so other people benefit from good planning!
But it's still amazing that you can do this to very badly-exposed footage if you really have to.
-
Personally I kind of prefer the look of the original footage. Remember it's not a mistake...it's a "artistic choice"....your footage is dark and moody not underexposed. ^_^
If I was in that situation, one thing I've now learned is, it's better to push the iso up, overexpose it. It will look noiser at first, but then you can darken it a bit in post and that hides some of the noise, the Denoise and grade to further hide it.
If even that looks too bad, you could try shooting it in B&W. At 3200 ISO on my GH1, the FPN is horrible, but in Smooth B&W film setting, the bulk of the FPN is gone and the remaining noise is very easy to remove in post.
Here's a tutorial of some things you can do to try and fix footage.
-
I like the "Dark and moody"!! Nice YouTube tutorial. I love Neat NR and used it in mine right at the end of the FX chain (maybe too much) but I notice where you use RGB, I used the preview in Y Cr Cb as you can then look at each window as you adjust the slider that corresponds to it (just find that easier as it only affects one window at a time). But I would be interested to know: I've used two instances of Neat, one after the other. For some reason I think it looks better to do two subtle corrections than one big one. This might be just me imagining it. Is this something you've tried? From your videos, you obviously know your way around these things a lot more than I do, so I was interested in your take on using two instances of noise reduction.
I like your suggestion of grain, and I think that might really have helped. If you look carefully at my corrected footage you will see odd blocks (sort of Jpeggy) around the flowers at mid-top left of frame, and a bit of grain might have disguised those, as well as generally taken away that "plastic" look. Flare: really cool idea - will try that next time.
-
Ooh - tried it. A bit of noise and flare (and I also tweaked the Neat NR after looking at the frequency windows). The flare is really subtle but adds some interesting colours in the shadows just to my right. The noise definitely hides the artefacts around the flowers - and I think it convinces you that there is detail hidden in there. I like it!
-
@Mark_the_Harp Thanks, but that's not my vid. I like that guys channel and he posts some good tutorials for the GH1/2s so I remembered he did something reguarding rescuing bad footage.
I definitely think a lot of people are too quick to throw away bad footage. Even just messing with brightness and contrast you can do a lot to give it a nicer look. I don't have neat video cause I'm cheap, but I found a free noise reduction plug-in for Vegas that works well for the cost:P
http://www.mikecrash.com/index.php?name=Content&pa=showpage&pid=6
It's called Dynamic Noise Reduction and it works with current Vegas and even Vegas Home Studio version.
-
@CRFilms - thanks for that - sorry to jump to the conclusion that it was you! However, thank you - that little tutorial was a great "find". I had a go at the mikecrash NR plugin some time ago and if I didn't have Neat, I'd use it.
-
@Mark_the_Harp, have you tried 5DtoRGB? I think it will help in this case.

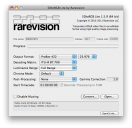
 Screen shot 2012-04-20 at 8.39.48 PM.png609 x 590 - 108K
 -
Hi - I do have this but I'm this case I exported a section from the MTS in Vegas timeline using quicktime / DNxHD 10-bit (just a small section exported from a timeline as the origina MTS was a 4GB file and it would have been huge once transcoded).
-
@stonebat Just realised maybe I'm being dense: by exporting from a Sony Vegas timeline in DNxHD am I still causing problems which would be solved by converting direct to 5DtoRGB without going near my NLE (Vegas)? I might do some tests...
-
I'd transcode first by using 5DtoRGB. Then import the transcoded file into an editor.
Howdy, Stranger!
It looks like you're new here. If you want to get involved, click one of these buttons!
Categories
- Topics List23,993
- Blog5,725
- General and News1,354
- Hacks and Patches1,153
- ↳ Top Settings33
- ↳ Beginners256
- ↳ Archives402
- ↳ Hacks News and Development56
- Cameras2,368
- ↳ Panasonic995
- ↳ Canon118
- ↳ Sony156
- ↳ Nikon96
- ↳ Pentax and Samsung70
- ↳ Olympus and Fujifilm102
- ↳ Compacts and Camcorders300
- ↳ Smartphones for video97
- ↳ Pro Video Cameras191
- ↳ BlackMagic and other raw cameras116
- Skill1,960
- ↳ Business and distribution66
- ↳ Preparation, scripts and legal38
- ↳ Art149
- ↳ Import, Convert, Exporting291
- ↳ Editors191
- ↳ Effects and stunts115
- ↳ Color grading197
- ↳ Sound and Music280
- ↳ Lighting96
- ↳ Software and storage tips266
- Gear5,420
- ↳ Filters, Adapters, Matte boxes344
- ↳ Lenses1,582
- ↳ Follow focus and gears93
- ↳ Sound499
- ↳ Lighting gear314
- ↳ Camera movement230
- ↳ Gimbals and copters302
- ↳ Rigs and related stuff273
- ↳ Power solutions83
- ↳ Monitors and viewfinders340
- ↳ Tripods and fluid heads139
- ↳ Storage286
- ↳ Computers and studio gear560
- ↳ VR and 3D248
- Showcase1,859
- Marketplace2,834
- Offtopic1,320


