It allows to keep PV going, with more focus towards AI, but keeping be one of the few truly independent places.
-
@shian you're right the card wasn't angled correctly. It was shot using 'smooth'. Both camera and card were handheld so the spot meter tends to jump around quite a bit.
I'm going into a six day outdoor/forested area shoot in september and one thing I'm particularly interested in is techniques in dealing with sky highlights in the background. ie. using double net scrims to knock down that light.
I know we have the highlights warning in the GH2, and it would be great to have a waveform monitor on set because in the example above it clearly shows whats happening with the sky peaking through the trees, but we wont have that luxury. Is there a technique using a handheld lightmeter to help measure those hotspots in the sky?
-
@Imaginate it really depends on whether or not you have a 1 degree spot capability on your meter. BUT I'm shooting a new tutorial next week that might answer your question.
For those toying with the Ansel Adams Zone system, I'll give you these to help you. I'll be using this color chart a lot in the zone system tutorials, and a little bit in the 2nd part of the Intensity and falloff tutorial.
ColorChart shot in daylight at 200ISO Smooth (-2 all) with perfect exposure (2/3 over on gray card)

IRE cheat sheet for where in the WFM these colors fall when properly exposed. (I added contrast to make it more look more like the chart looks to the eye)
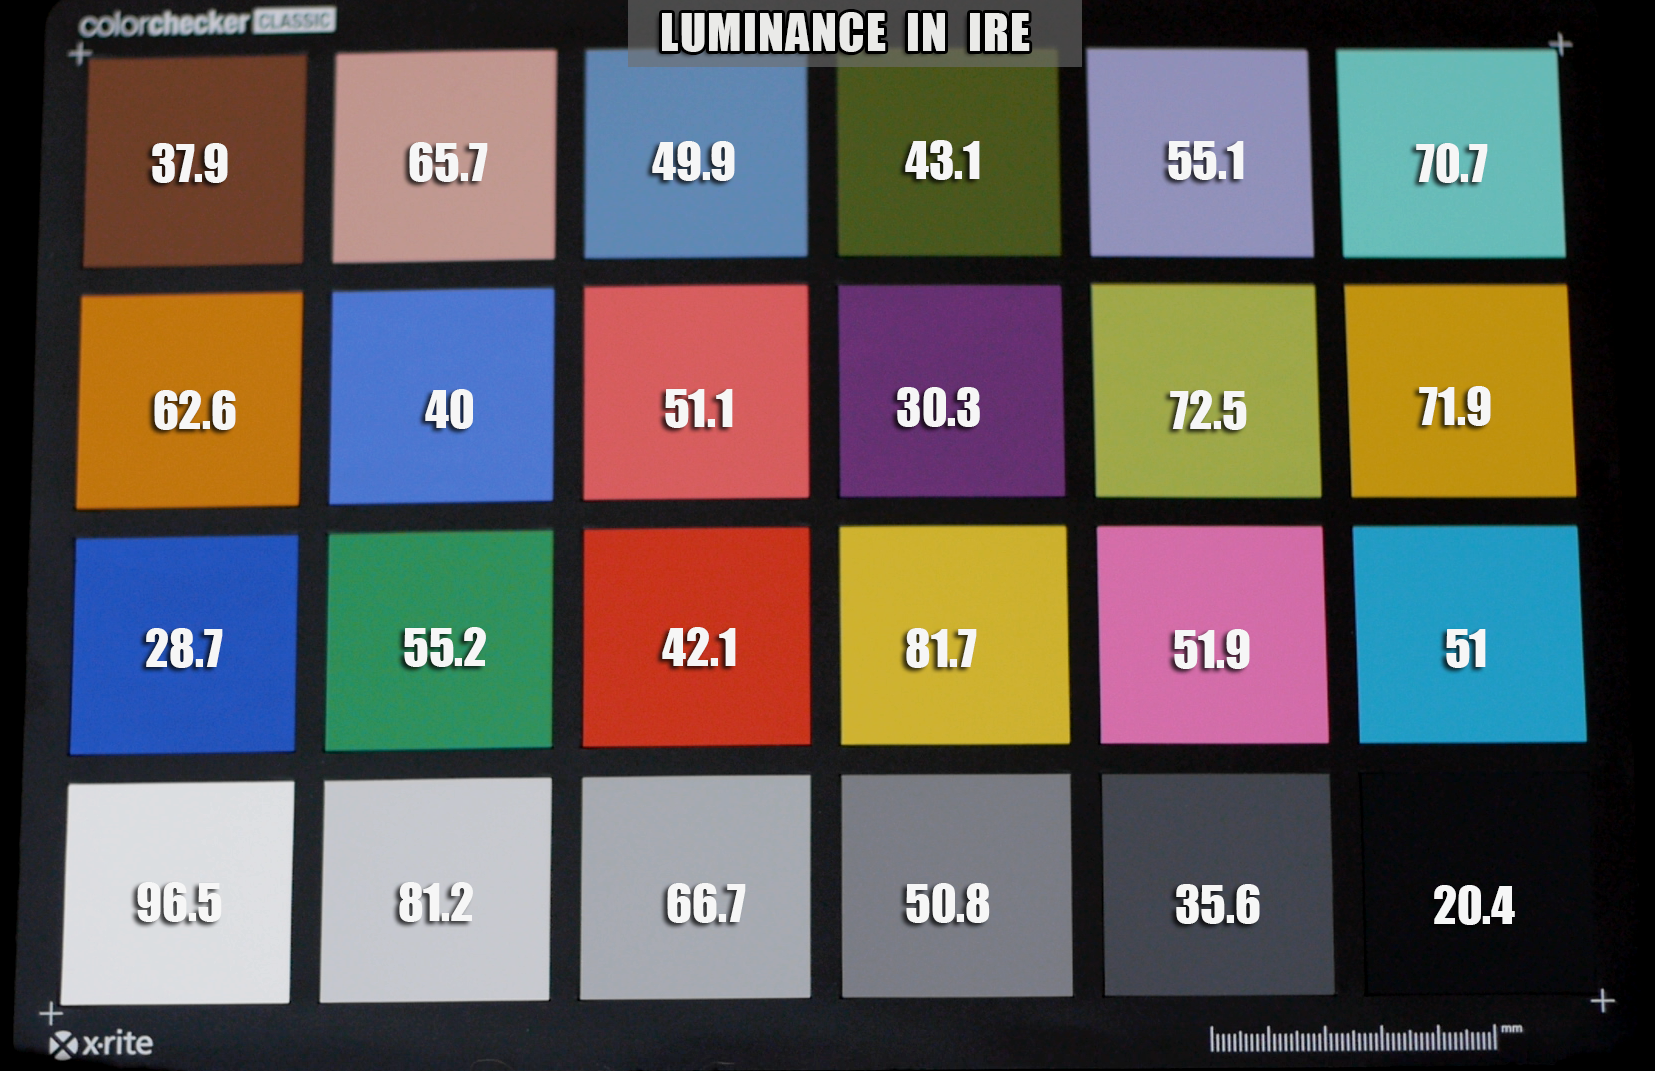
Full Chart
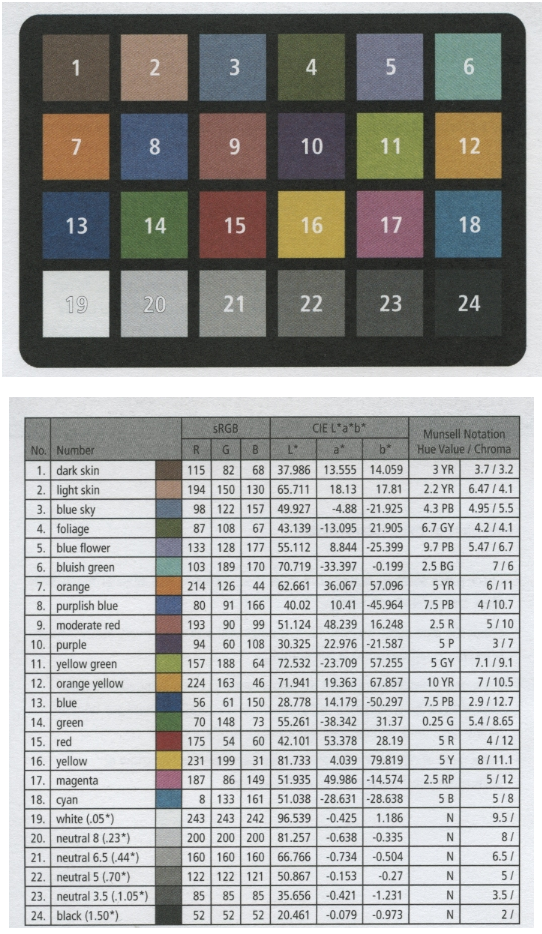
 chart.png1655 x 1071 - 2M
 ColorChart IRE.png1655 x 1071 - 2M
 colorchecker luma.png542 x 934 - 779K
 -
@shian can't wait for that tutorial you described in your second to last post! The one about showing how to light for a 5 stop range and different grading options!
-
I found this interesting. The familiar f-stops can be mapped into light loss in distance scale. f/2, 2.8, 4, 5.6, 8 are mapped into 2 meters, 2.8 meters, and so on.
e.g. Two light sources emitting same amount of light. One source is 4 meters away from a subject. To make one stop difference in incident light meter readings, place the other light source 2.8 meters (a stop gain) or 5.6 meters (a stop loss) away.
I wonder if that's how analog camera flash technique worked.
-
@stonebat I have no idea. You'll have to ask someone more knowledgeable than me. My understanding is that the f/stop is a ratio. The ratio is between the diameter of the aperture in the lens and the focal length of the lens.
This is where T-stops differ, as T-stops are measured through the lens, and are a bit more accurate. T stops measure the amount of light transmitted through that particular lens.
-
@stonebat its a nice coincidence.
F-stops relate to the diameter of the aperture. To get the amount of light that passes through, you have to square them to get the area of the "hole" (1.4->2, 2->4, 2.8->8, 4->16,...). Thats where you get the "every stop doubles/halfes the amount of light" comes from.
If placing a (point) lightsource in 3D-space (and its hard not to do so;-) you get the inverse square law of light fall off.
Two physically totally different things, but both can be discribed with a square law and so the same "shortcuts" can be applied.
-
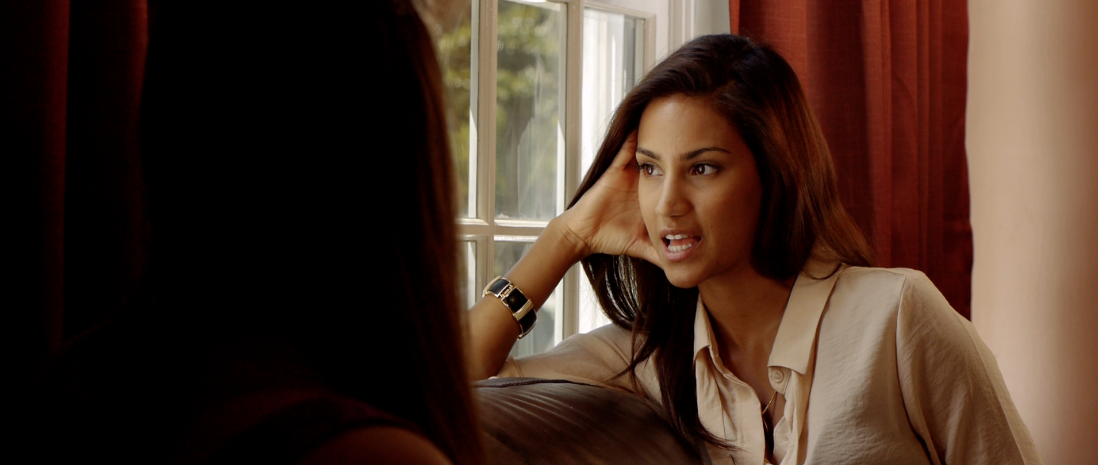
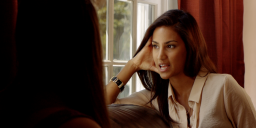
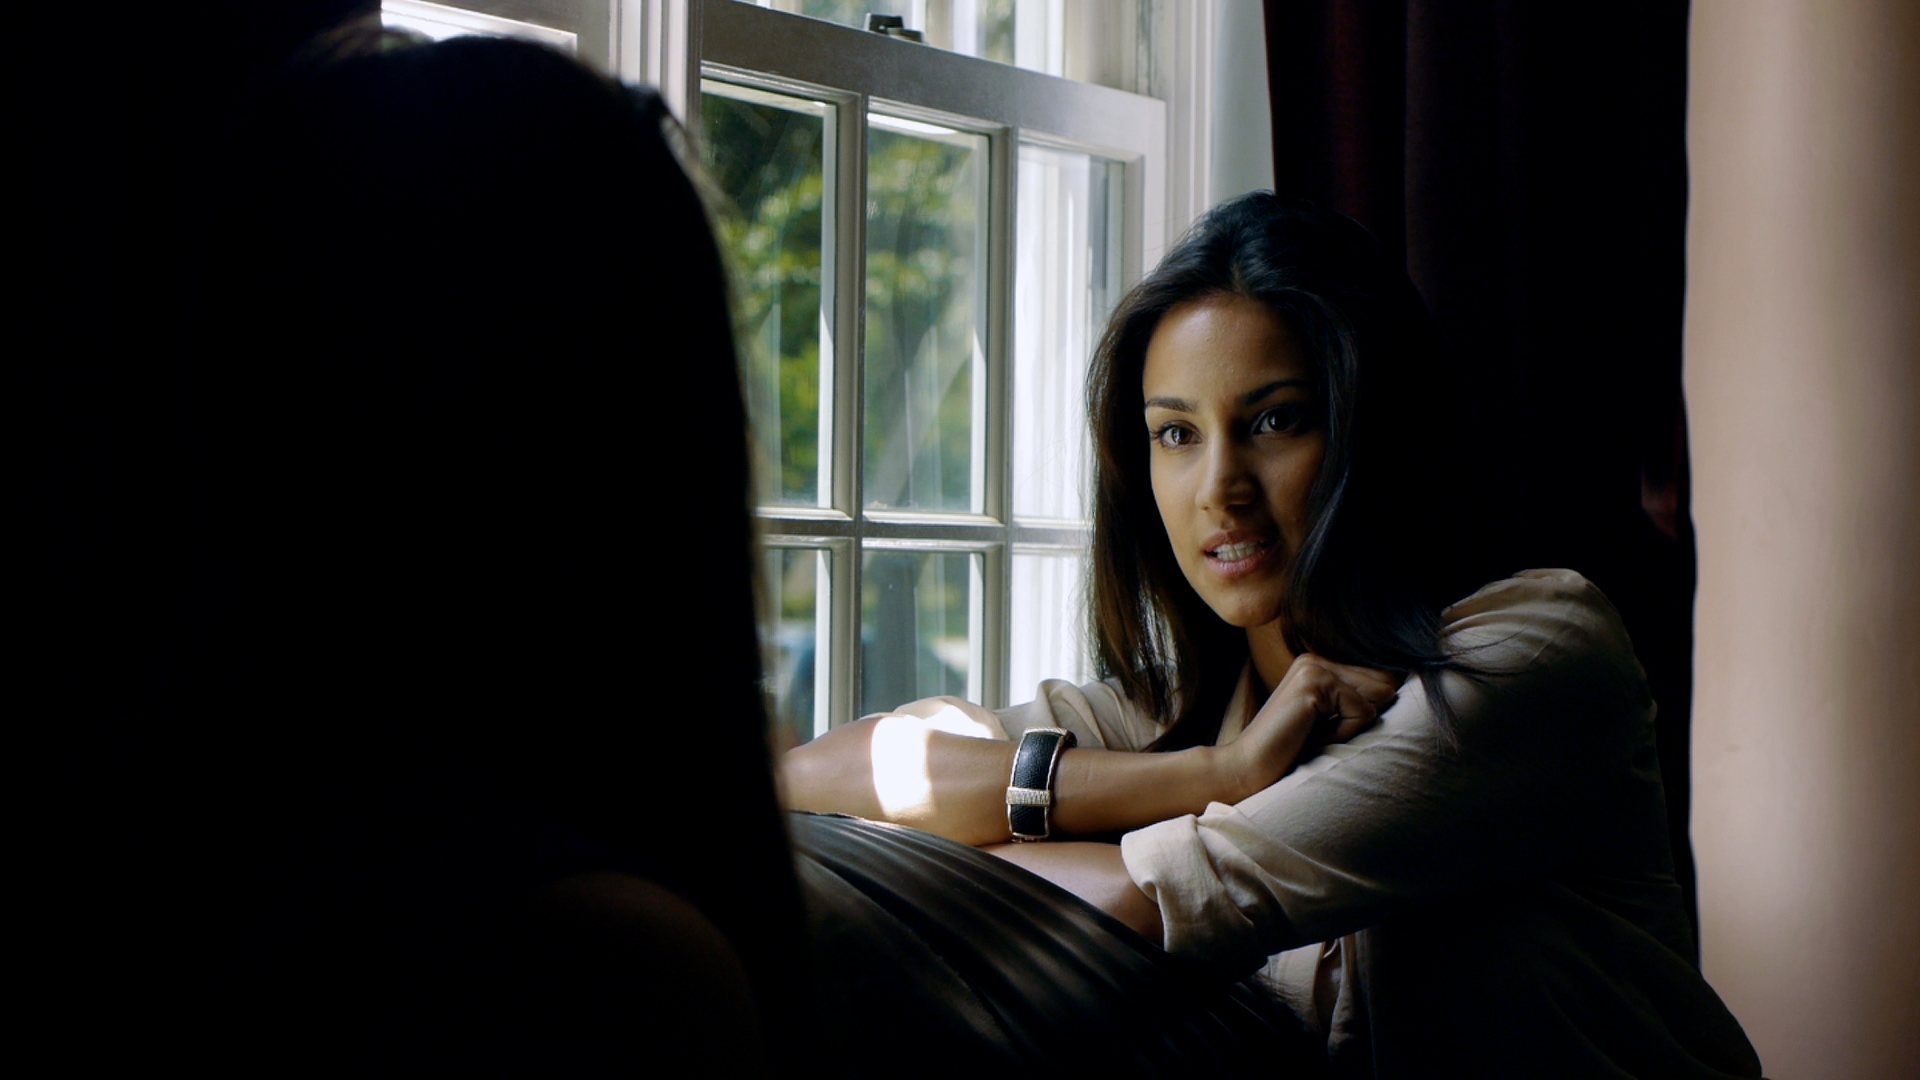
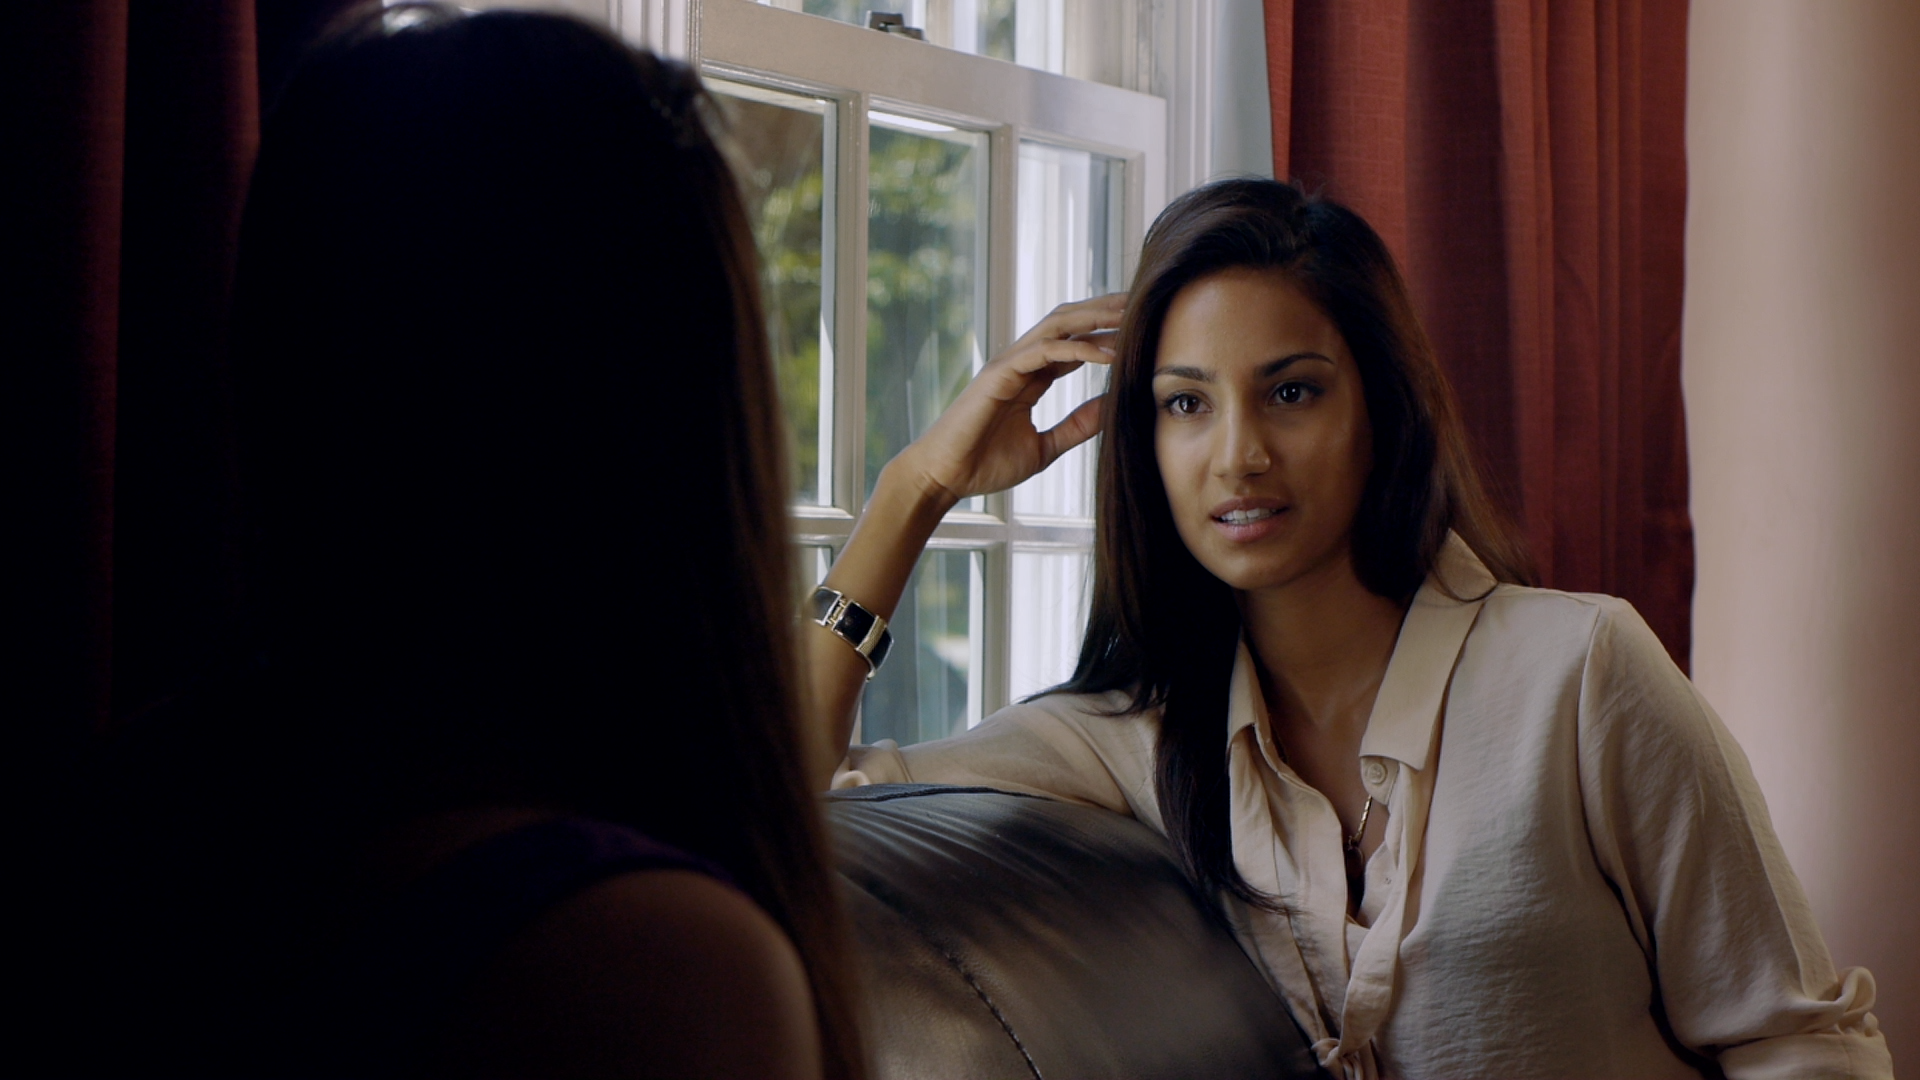
A still from today's shoot for the 5 stop zone tutorial - straight out of the cam using Apocalypse Now 444 release candidate.
CHEERS @driftwood and @cbrandin this patch is insane! I just hope the tutorial I shot with it can live up to the images.
 Screen Shot 2012-08-10 at 7.26.45 PM.png1098 x 465 - 609K
 -
Nice! You wouldn't happen to have a drawing (or could make one) of your lighting setup? Would be nice to see what you used.
-
@shian Wow. That looks really really good. Is that with Smooth -2?
-
-
Stunning! Can't wait to see this :-)
-
Thanks for all the info, i myself am also heading into the depths of perfect exposures, and feel and moods.
My minolta and my eyes are my best pall, and the histogram.
My biggest issue with lighting scenes, is creating noire-ish shots, with max 1 or 2 sources, for example night interiors, using 1 keylight and shape this to a perfect source, as a rim and fillkey, and also keep enough headroom for a little grade and not overcrushing the blacks.
I am also struggeling with creating crisp rims around a subject, any ideas for that?
-
@sicovdplas Noir is my specialty. Use a two light rim scheme.
-
You have any examples?
-
Not handy. But do a search for techniques that employ using a kicker with a rim light.
-
Ok no problem, problem is there is not much about advanched lighting things on the nets, atleast i did never found it.
Also a thing i would like to discuss, a good gaffer, with perfect lighting and prefilterage and minimum grading in post, or equal exposures with some kicks here and there more headroom in post for grading?
- Your opinion? keep in mind DP has a style to maintain and a Editor is mearly a puppet which can ruin your footage, or make it more perfect, also depends on the Colorist/Editor in my opinion, which flow you preffer?
-
It sort of depends on the camera. When shooting film, you of course want as much in camera. For digital, I always try to get as much as possible in camera, to an extent. It all depends on the limitations. Keeping everything within the zones is good, as it preserves information and with our digital cameras we don't get that nice rolloff, so want to keep as much as possible. But I keep the idea of the look on set, oftentime I might actually add a "LUT" in the monitor by adjusting to how I will grade it. See it sort of as film back in the old days (when it was very slow), where it was important to get a properly exposed negative for it to look well. Same thing with white balance: Set it correctly unless you 100% sure there won't be any changes made in post, as tinting it away from white is "easy" but tinting it to white is hard. But for me, I aim to get a picture that is within the zones on set to be easy to work with, but to still have the idea of how it will look. As I say, I try to get 75% on set, while color grading will be much more about setting contrast, tinting and getting nice saturation.
-
@sicovdplas I'm hoping to remedy that with CGFS. We're still in the beginner stages, but eventually the master class will cover far more complex techniques.
-
FYI here's a good example of lighting setup diagram. Yes it's for photo, but it would be great to see diagrams for video setup. Thanks.
http://www.flickr.com/photos/polvero/sets/72157615873440953/
-
@Gabel I hear you, most of my issues is how far will i stretch the image, since my style is most of the times that i would like to light less, doing it in the zone is important and working hard on that since my last shortfilm, where everything was "flooded" for equal soft exposures in 1 scene, the problem i find with exposuing in the zone is that it tends to get flat as in 2D space, trying to get it more like 3D space i find myself crushing the blacks or things that i don't find relevant for the picture, camera wise it's always a dilemma ofcourse, but lighting is imho the most important thing of Cinematography, and learning it, and mastering it takes a while a guess.
For example i find daylight interiors much harder to light then night scenes (interiors) The problem i find is that there is simply too much light, and always having in mind that it has to be realistic is something i find myself questioning, does it need to look realistic, there are windows camera left, so do i place my rimlight camera left? or can i simply 3 point light it with a nice rim and maybe some atmosphere by a smoke machine, these things are questions i ask myself all the time, and most of the times you hear DP's or directors complaining that it aint realistic or put a Fill Camera left because there are windows there.
Any thoughts about the 2nd line?
I have to mention that the windows in the above conversation are not visible on camera.
-
Still working on the edit. I should have the full tutorial up this week. I haven't even started on the grading, but here is a comparison. The footage has been white balanced, and the black levels brought to 0, but that's the only correction.
Shot with no lights: ND .9 on windows, and silver reflector bounce outside window for key.
Exactly the same only with diffused 202 (Half CTB) hair light and fill.
 LR TARA natural1.png1920 x 1080 - 2M
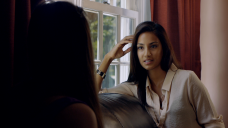 LR TARA zone.png1920 x 1080 - 2M
 -
@sicovdplas: Well keep in mind that the zone is still fairly large. You don't want everything to be the same in level, you would probably want the subject to be a stop above the background, while a window or similar should be one or possibly two stops over to create space. The zone isn't about getting everything on the same value, but within a good well, zone. And rimlight could come from another direction, perhaps representing another window in the room.
-
@gabel you thats what i try to do, really apreciate the feedback!
The problem with budgets, and complex scenes is shadow handeling for me. And ofcourse lighting the main targets, which most of the time are moving, how do you guys fix light setups for moving talents?
-
@sicovdplas: Moving talent I fix the only way it can be fixed properly whenever possible: Big lights. Then you will need something like a 2K (or up preferably) and bring my 2 2Ks, which works OK when bounced for adding more fill. Sometimes I might boom lights for movement too, for extra fill, if it's nice and soft.
-
@sicovdplas I encourage you to keep experimenting, and eventually work to get an internship, or anything that will get you onto a real film set. The first day I spent on a major film set was a game changer. I would also suggest that; if after that experience, things don't immediately make sense... to maybe rethink things. I used to spend hours trying to figure out the same things you are asking. And the moment I saw an experienced DP setup a scene, a light went on (excuse the pun) and everything instantly snapped into place, and I understood how to light. I don't mean that I just understood that particular setup, it was more like an understanding of how to control light. The rest of it is developing your artistic skill.
To qualify that: I didn't walk into that experience as a complete noob - I had a driving hunger to understand Cinematography from way back. I began lighting in 3Dmax back in 2000 when a home computer really couldn't compute Global Illumination in a realistic time frame, so every shadow and bounce had to be animated by hand using objects that would ultimately remain invisible. As a result I got very good at analyzing light in the real world, and re-creating it in the computer. But I was clueless as to how to reproduce this on set where the flags, lights, and light stands were visible. So I moved on to miniatures, and began building snoots, and diffusers, and flags and such out of cardboard, and I would light action figures and such, and started with static scenes, and moved on to figuring out how to light a moving scene. After that, I was primed with a basic understanding, so that when I stepped onto that set, and saw how everything I had learned correlated to actual film production, everything just clicked. But you never stop learning, There are still times when I see someone else employ a technique that had never occurred to me, and I just marvel at it, take a quick mental note, and file it away.
To see what I'm talking about with action figures, peep this. I didn't have fully articulated figures like these (Oh, what fun I would have had) but the concepts are the same.
But if all this seems beyond you, don't get discouraged - as embarrassing as this is to admit, I used to really suck at this, and to prove it, here is an old crappy reel of mine from 2007 when EVERYTHING had to have a vignette on it, (face palm). I DPed everything in this except "The End" (2000 wrote and directed, and starred - it was a Marilyn Manson phase...let it go. - I did DP the candle/laptop stuff, cuz the DP said it was stupid and would never work and walked off set.. needless to say, it worked.) and Training Wheels [2002 I was editor, Post Sup, ADR, and 2nd unit director/DP - so I shot the girl riding in the passenger seat, the plane taking off, the sunset, and the bike on the bridge out the door of the van, and I mixed the audio for the dialog scenes, all of it looped.] And 99% of this is all shot on a Sony PD150. (Blame "Rotten" on my Art School friends and mushrooms.)


Howdy, Stranger!
It looks like you're new here. If you want to get involved, click one of these buttons!
Categories
- Topics List23,911
- Blog5,718
- General and News1,330
- Hacks and Patches1,148
- ↳ Top Settings33
- ↳ Beginners254
- ↳ Archives402
- ↳ Hacks News and Development56
- Cameras2,342
- ↳ Panasonic984
- ↳ Canon118
- ↳ Sony154
- ↳ Nikon95
- ↳ Pentax and Samsung70
- ↳ Olympus and Fujifilm98
- ↳ Compacts and Camcorders295
- ↳ Smartphones for video96
- ↳ Pro Video Cameras191
- ↳ BlackMagic and other raw cameras116
- Skill1,959
- ↳ Business and distribution66
- ↳ Preparation, scripts and legal38
- ↳ Art149
- ↳ Import, Convert, Exporting291
- ↳ Editors190
- ↳ Effects and stunts115
- ↳ Color grading197
- ↳ Sound and Music280
- ↳ Lighting96
- ↳ Software and storage tips266
- Gear5,407
- ↳ Filters, Adapters, Matte boxes344
- ↳ Lenses1,577
- ↳ Follow focus and gears93
- ↳ Sound496
- ↳ Lighting gear313
- ↳ Camera movement230
- ↳ Gimbals and copters302
- ↳ Rigs and related stuff271
- ↳ Power solutions83
- ↳ Monitors and viewfinders339
- ↳ Tripods and fluid heads139
- ↳ Storage286
- ↳ Computers and studio gear559
- ↳ VR and 3D248
- Showcase1,859
- Marketplace2,834
- Offtopic1,314


